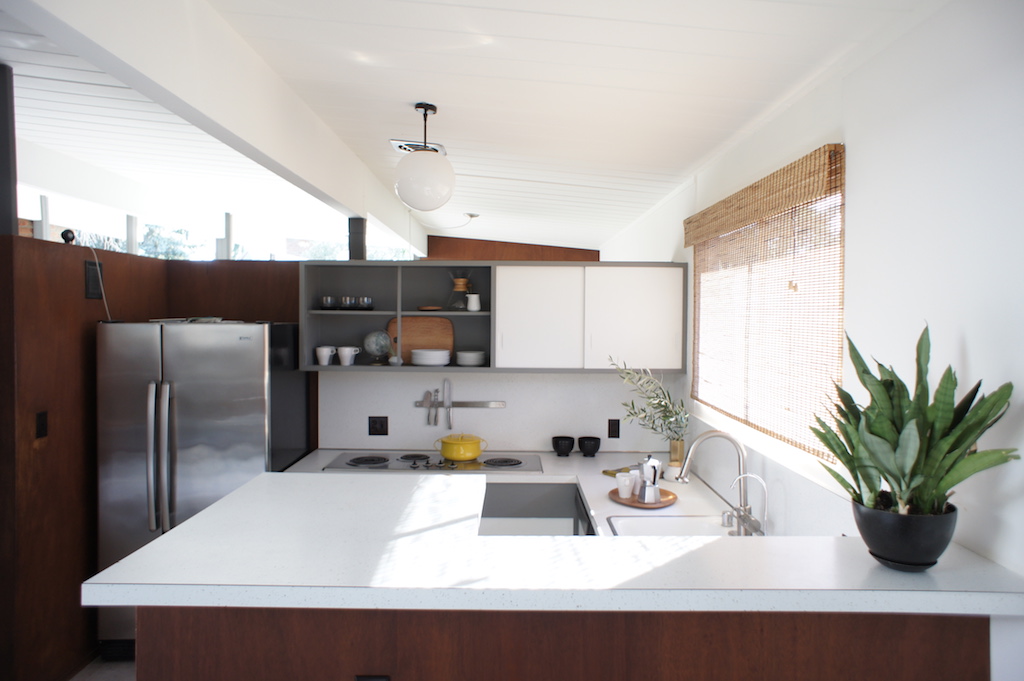
We’re back to work after the break, and I’m back to a bit of blogging. 2016 was a busy year, and started with this refresh of our Eichler kitchen.

It’s been a bit quiet around here, since we’ve had a tough couple of weeks, sad and frustrating at the same time. I’ve been coping by working on the house, tuning things up here and there, aggressively painting at times, and purging junk. And after a nice weekend visiting with friends, my mind and heart are feeling much more settled now as compared to last week.
So: closet doors! (The unofficial, never-ending theme of this blog.)
As part of having our house painted, all of our original closet doors got a fresh coat of paint … along with their original slider hardware (oops). The painted sliders were sticking in their wooden tracks, making the doors nearly impossible to slide. The wooden track-and-slider combo is an original Eichler feature and, sadly, one that is not terribly durable. After a few weeks of frustration, we decided to make things right.
Here’s how it went down, in case you’d like to re-do your doors, while keeping them as intact and original as possible:
Step 1: Take down doors and rip out the old wooden tracks. It’s cathartic. Even if you only make it past this step, you will feel a lot better about your house and yourself. However, you will have no closet doors at this point, so you’ll have to soldier on.
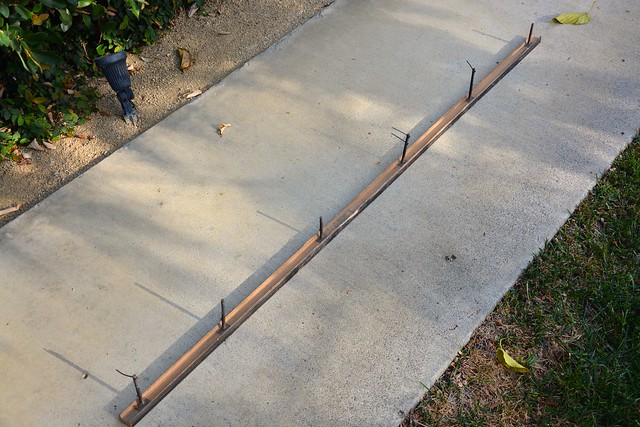
Let’s take a moment to appreciate the scary wooden tracks. Held in place with a combination of screws with nails driven through them (?!?), they wore out very unevenly over their 50+ years of service. We had the doors jumping out of their tracks on a regular basis. Not-so-fun times.
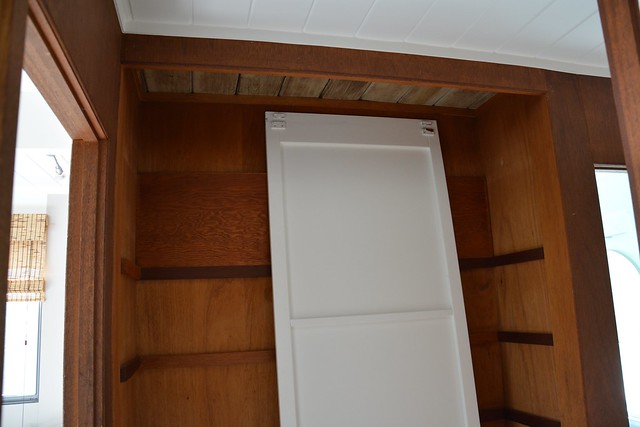
Step 2: Build out the area from which to hang the new track with extra lumber.
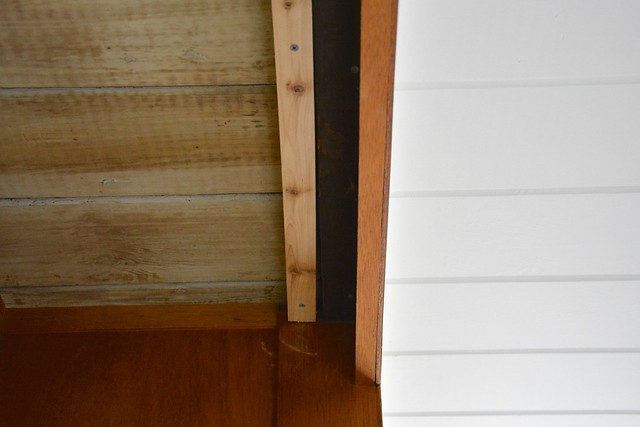
We put an additional 1 1/2″ x 1 3/4″ (or so) board up alongside the existing black frame from which the tracks were suspended. With the new lumber (the light stuff) we had about 3″ in depth, enough to install the metal track and have it set back from the fascia of the closet. Set-back from the fascia really helps when hanging the doors later on since you have to put them in on an angle.
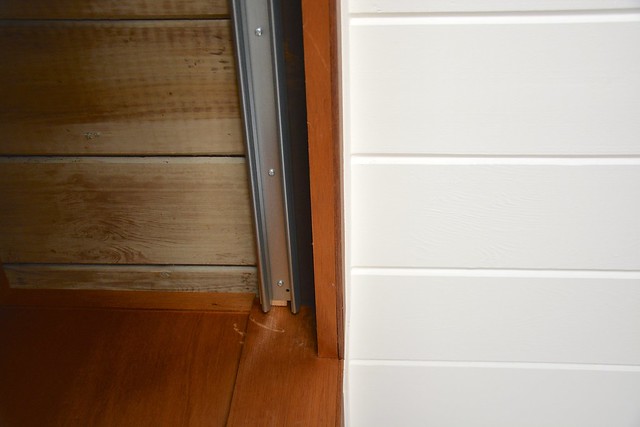
Step 3: Install the metal track. Pilot holes and screws.
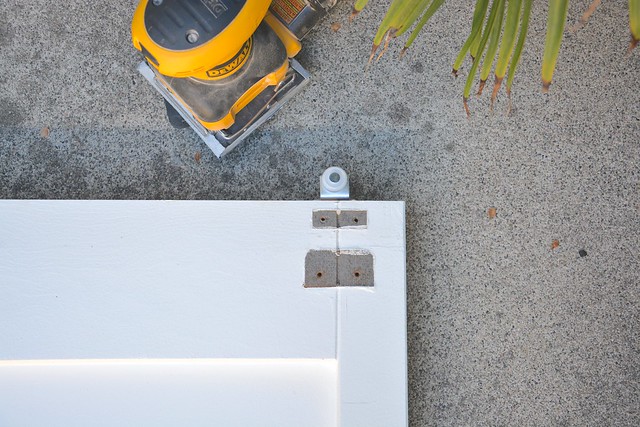
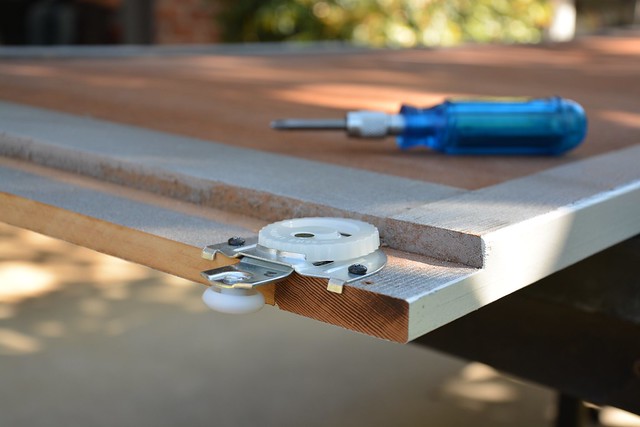
Step 4: Pop off the old sliding hardware and bumpers from the doors. Sand, patch, sand, paint. We did this both for aesthetic and functional reasons, to prevent the bumpers from scraping against the doors after hanging (as we discovered later).

Step 4: Measure the doors and opening AT LEAST 10 TIMES. We took about 3/4″ off each door: 3/16″ at the top, and 5/8″ at the bottom. I know that doesn’t add up, but when things get precise like this, I revert back to my native metric, so: we actually took 0.5 cm off the top, 1.5 cm off the bottom.
Step 5: Trim the doors. We used a circular saw. I recommend this video for tips on how to get nice precise cuts. We specifically made sure not to take off too much from the top, so our new roller hardware could fit into the original groove at the top of each door.
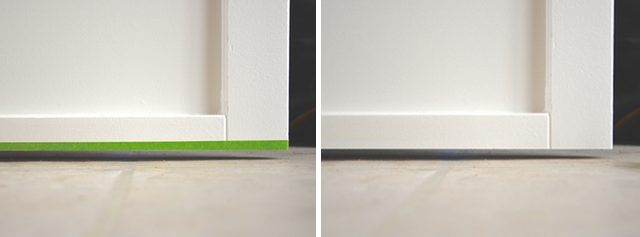
By the way, the best advice from that video: use painter’s tape when cutting surfaces that are already painted. We did this and it really kept the cuts smooth and clean:
Steps 6-7: Attach the rollers to the doors, and hang.
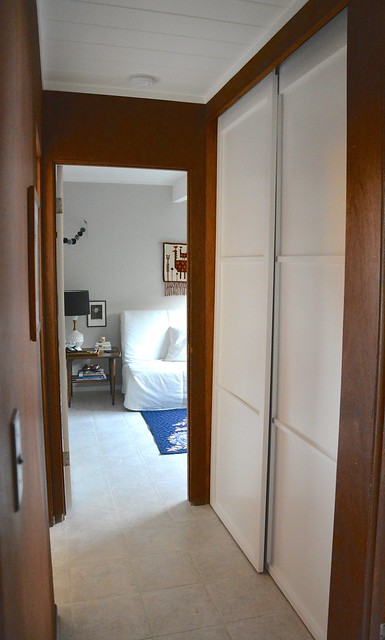
After all this time, having closet doors that actually move is a small miracle in our house. It’s so amazing to have them just glide with minimum effort.
Anyway, hope this was useful to some of you! I’ll be back with prettier things soon.
This is a long post, friends. Please grab yourself a comfy seat and a cup of tea. We’ve got a furniture restoration project on our hands!
Just last week, my husband and I made our almost yearly trek up to visit family in Canada. This includes a stay in the wilderness known as cottage country in northern Ontario. I’ll post more about the cottage soon, but what you need to know is that one of my favourite non-nature-y activities while at the cottage is visiting antique stores and junk shops. Some of which are quite literally junk shops. Hello, Seguin Township dump store!
On one of these outings, my mother-in-law Sharon drove us to a favourite shop in Parry Sound, which includes a proper furniture store in addition to barns filled with all manner of antiques, knick-knacks, and old household wares. It’s probably the stuff of nightmares for a fire marshal.
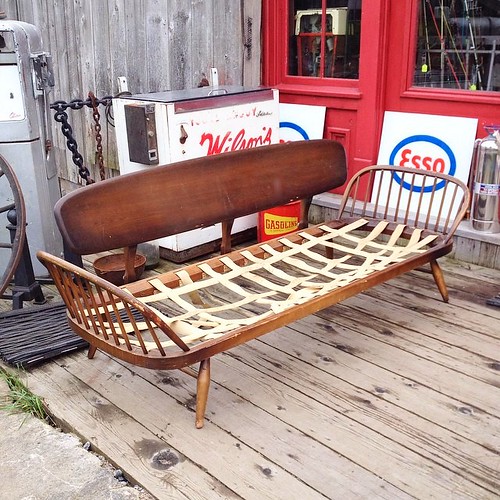
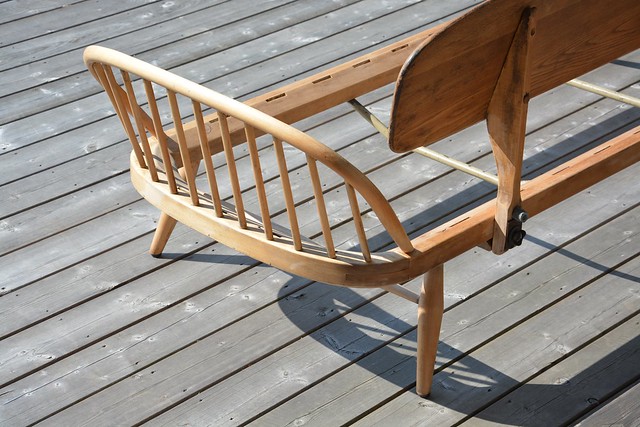
In one of the barns, I spotted what I thought was a possibly mid-century style bed frame:

We asked the shop owner for a price ($100 CDN) and where it came from (England). Then we hauled it out, checked that it was sufficiently sturdy, and decided that it was a project we could not resist. It would be perfect as a daybed under one of the big picture windows overlooking the lake at my inlaws’ cottage. Lucky them!
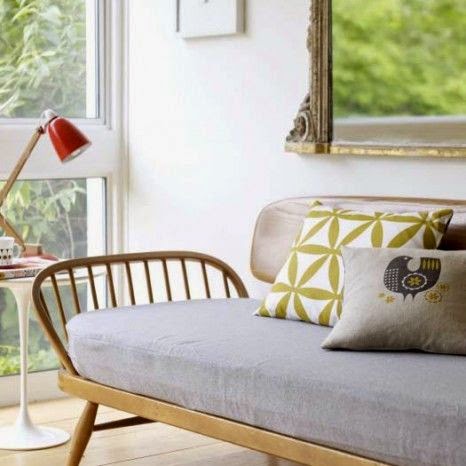
Thanks to the wisdom of my Instagram friends, we learned that this is an Ercol sofa and indeed made in England. Specifically, it’s the Ercol Studio couch which was designed in the 1950s by the company’s founder, Lucian Ercolani.
Look how cute:
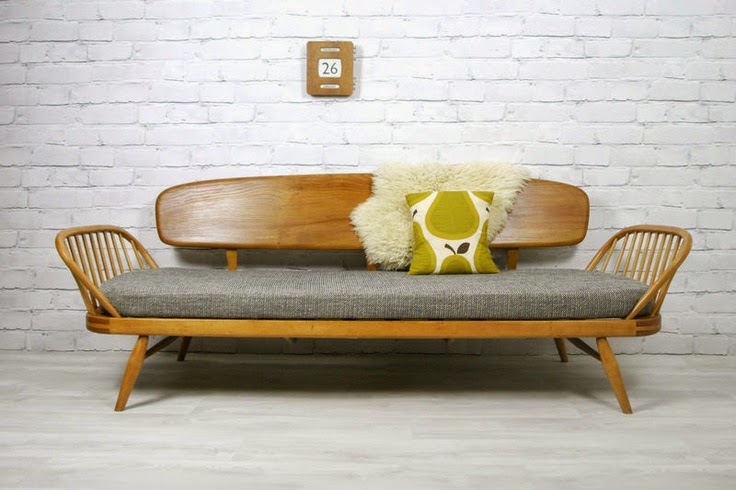
They’re still being produced and are rather pricey. I’m quite pleased that my eye for quality mid-century junk is in good working order!
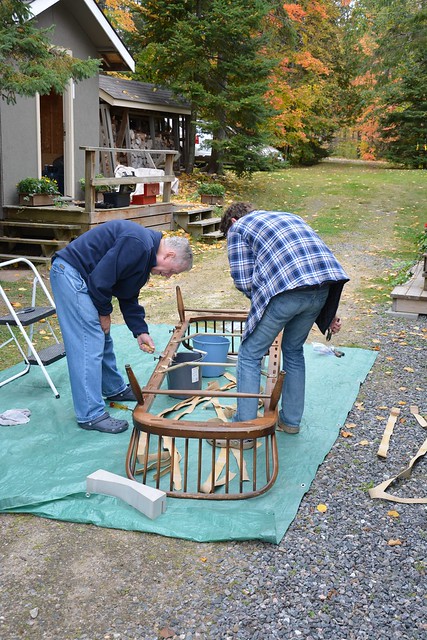
So, back to our sofa:

We took the sofa back to the cottage with us where I gave it a rub-down with mild soap to see what sort of condition the finish was in.
The original stain is really neat. The darkened areas accent the back and the spindles of the arm rests. Sadly, it was badly damaged in a number of areas along the arms and back, so we decided to strip and refinish it completely. The plan is to achieve that nice and bright honey-toned look like the sofas above.
As an aside: I think I’m really bad at vacations.
After the cleaning, we removed the original webbing, which we learned is a very high-quality rubberized webbing made by Pirelli. (Sound familiar? They make tires.) Each strap was originally held in place with wooden dowels on either end.
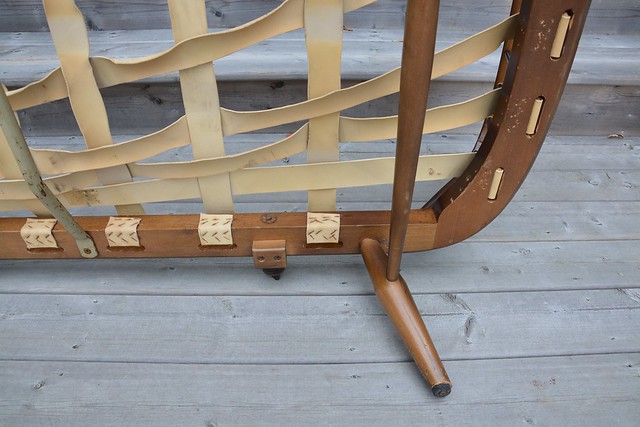
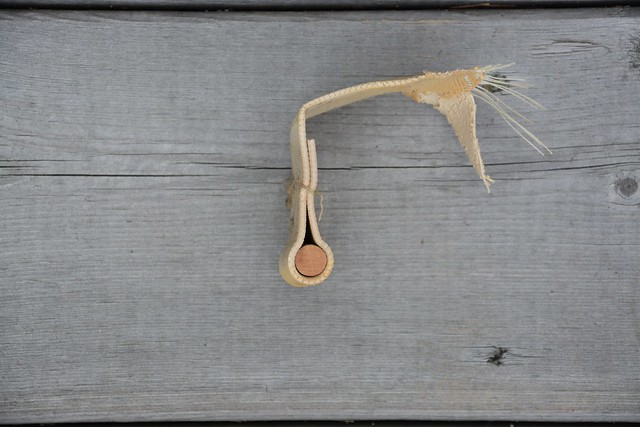
In its previous life, someone had tightened up the webbing by cutting it shorter and stapling it on one side. We’ll try to get a whole new set of webs and dowels so it can be restored to its proper state.
Our main accomplishment was stripping off the finish. Pro tip: instead of using steel wool to remove the paint stripper, we used those green scrubber pads used for washing dishes. Their main attribute is that they’re super cheap, yet effective and gentle enough to not damage wood. The best part is that you can buy an armload and just toss them out as they fill up with gunk.
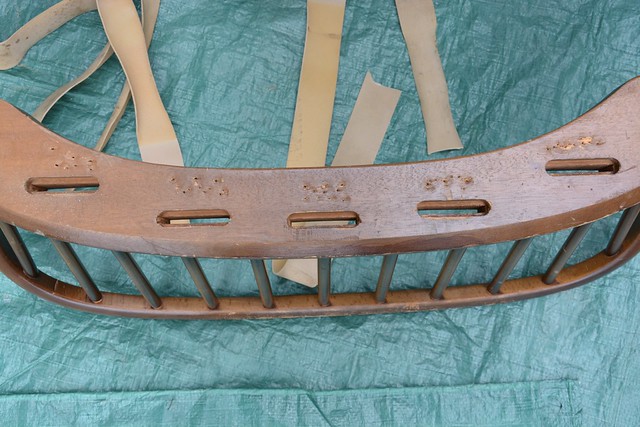
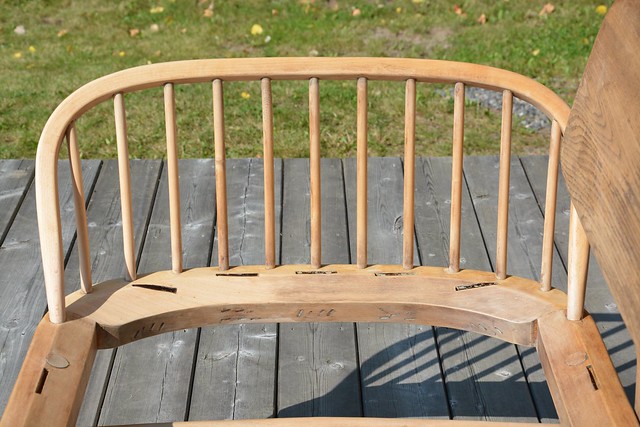
The stripper only went so far in the areas where the original finish was very dark, leaving some really dark stains. So I started to sand: 100-grit, followed by some ‘medium’ grit sponge, and finally 220-grit. I love the grain and the surf-board shape of the back rest, but it still needs a LOT of work.
Here are a few close-ups of where I sanded. You can see the contrast between the residual stain and the bare wood.
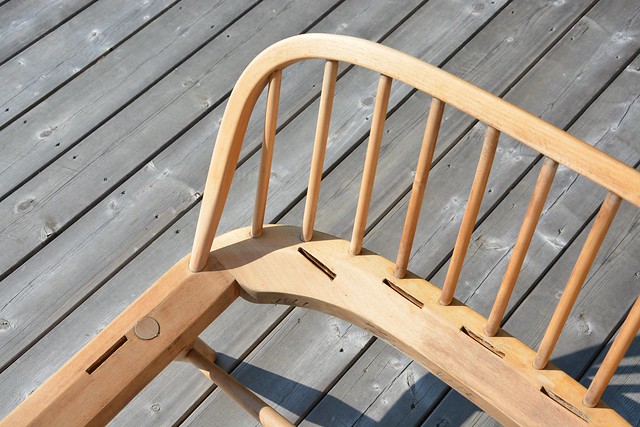
I sanded the first three spindles and half of the bottom frame (on the left) and the corresponding top of the arm rest. The wood is so nice and bright. The frame is solid beech and the back is a single board of elm.
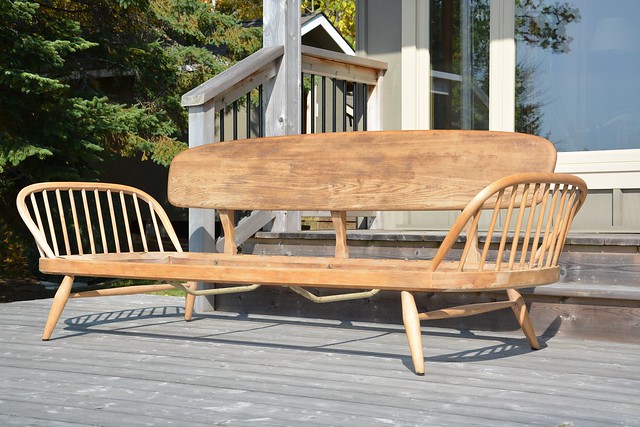
And that’s as far as we got. I would have loved to have a few more weeks, even days, to work on it.
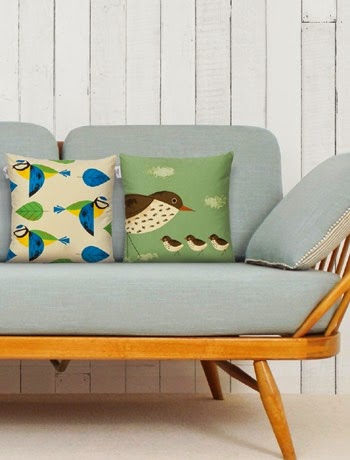
In the meantime, we’ll have to make do with looking at other Ercol sofas online, restored and styled in cute ways. Sharon and I are figuring out the webbing situation and what the seat cushion will look like, leaning toward something simple and in the neutral gray-to-greige spectrum. I can’t wait for this project to be finished.
Styled sofa photos via 1 | 2 | 3
All other photos by Karolina Buchner
dear house,
it’s been a while since we’ve done something for you, hasn’t it?
and so i have built you closet doors, out of purest love.
xo
karolina
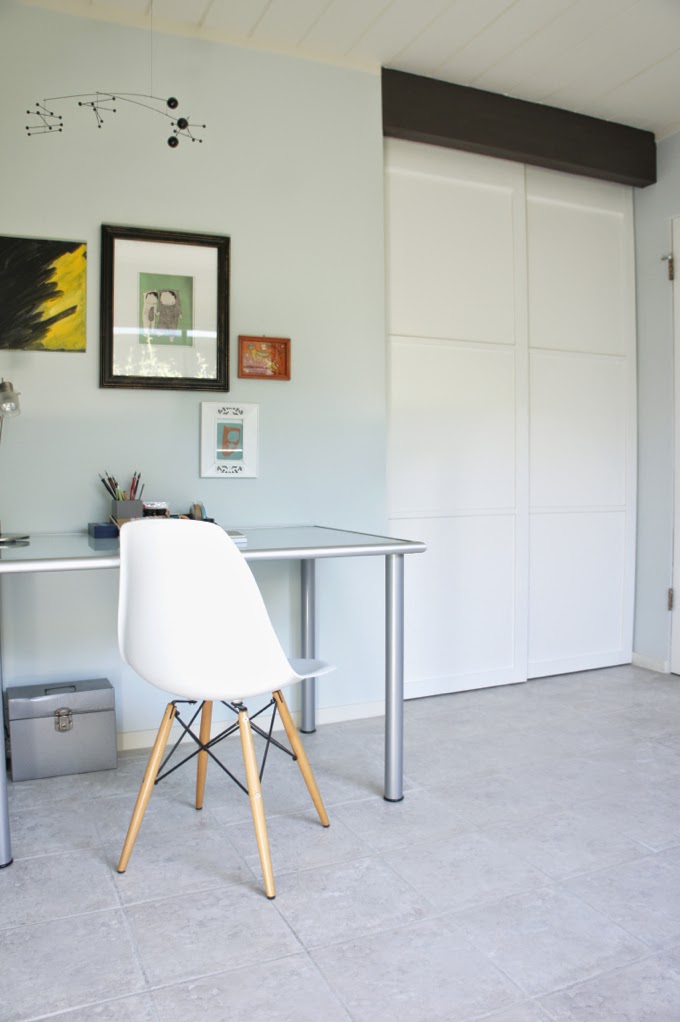
There’s one room I haven’t featured here on the blog, mostly due to shame: our office. It was formerly a nursery and now serves as an office/ironing room/general catch-all/room of shame, albeit with some pretty great wallpaper to deceive the unsuspecting. Part of its shame came from the sad closet door. Well, when say ‘door’ I mean a sad, random piece of red material strung up on an IKEA curtain wire. Which eventually failed, leaving the crammed closet innards for all to see.

After the IKEA curtain solution gave out (taking some drywall with it, UGH), we were left with a choice: install some ready-made closet doors, or try to match the doors to the original Eichler doors in the house. Due to certain compulsions of mine, I opted for the latter. I thought of getting salvaged doors from a renovation, but that would have involved waiting around until the perfectly sized set of doors became available (probably never).
So: we decided to build some. From scratch. With our own non-expert hands. #YOLO
This lead to the inevitable acquisition of more wood-working tools, but since the living wall project, I’ve decided to just jump into this sort of thing head first. I don’t particularly care how long it will take to complete a project. After some high-level planning and convincing ourselves this is indeed feasible, we were a go.
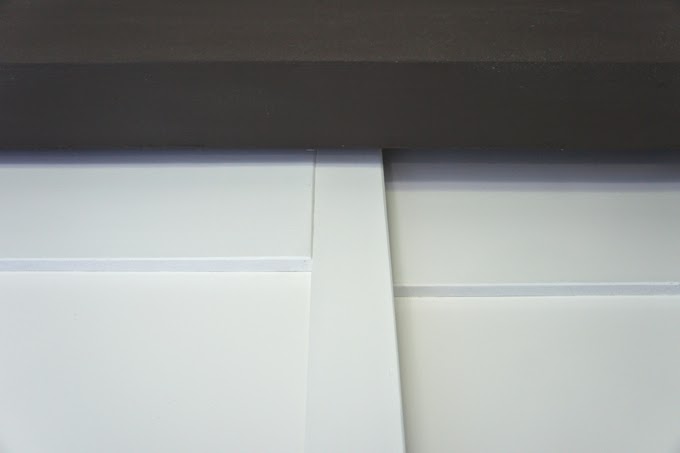
This is what the original Eichler closet doors look like in other parts of our house:
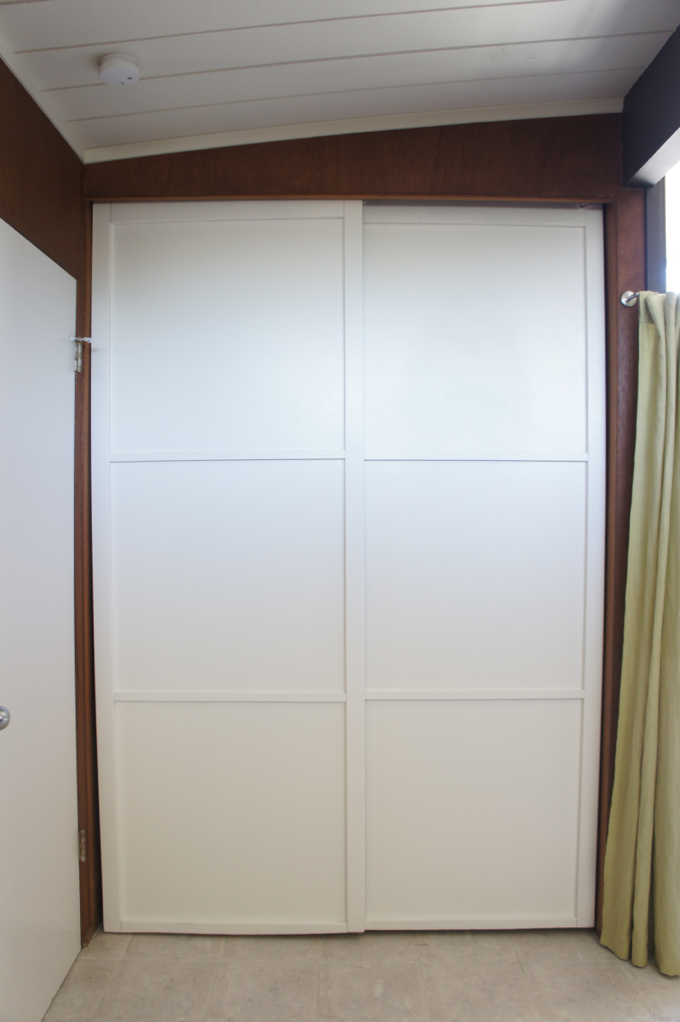
The new doors are not a completely faithful reproduction. We didn’t use the same type of wood and we most definitely are not using the original hardware. The original tracks of Eichler closet doors are made of wood, which at least in my house, are a total pain.
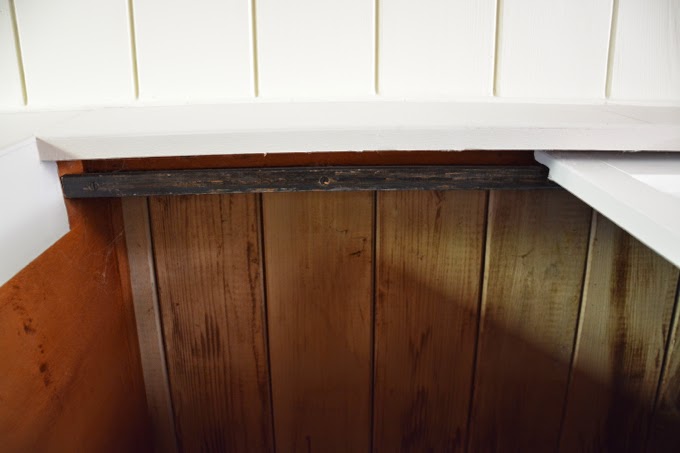
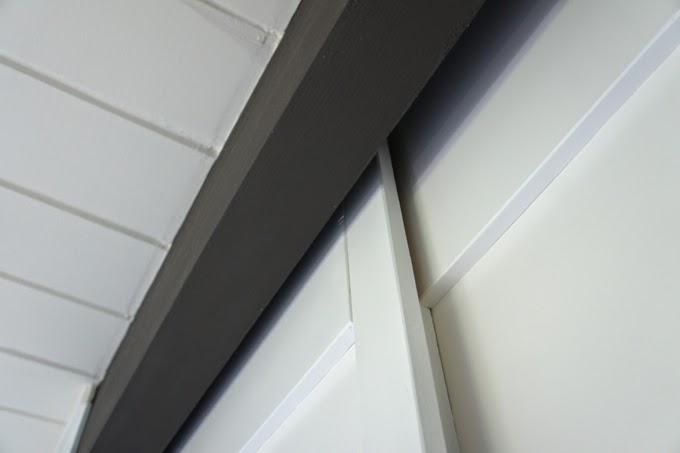
You can see the wooden track here (the black piece), looking up at the ceiling inside the closet:
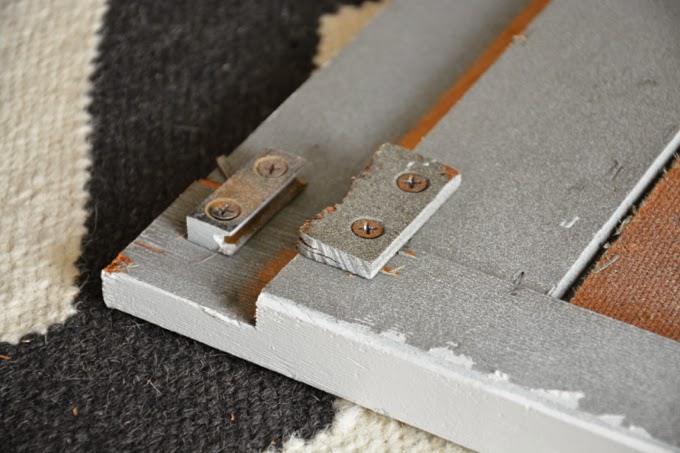
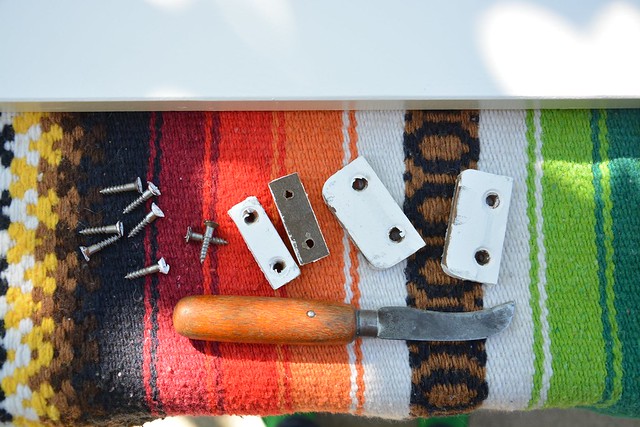
And that’s the “hardware” on one of the doors: a metal slider at the top of the frame, and a cardboard bumper which looks terribly chewed up. Our doors are often jumping off their tracks and getting stuck. For this project, we used standard roller and metal track hardware.
To start, I took down some of our existing doors to figure out the design. The original doors are built with 1 ¾” thick wood frames, and the panels are masonite boards. We measured one of them carefully and determined what our dimensions should be.
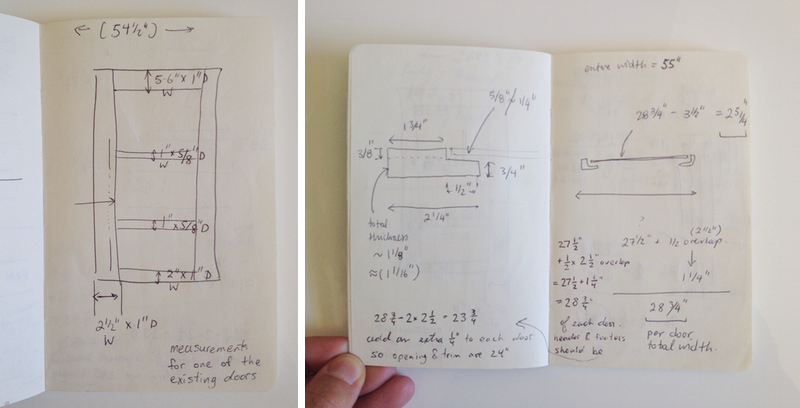
The main challenge was to use materials similar to the original doors, but also to keep the weight as low as possible, given our use of modern track hardware. The original doors use a rabbet cut along the inner edges of the frame, to create an inset for the panels to sit. You can see that in the above pics and in my sketch on the right. This also keeps things from being too thick and chunky, so the doors can more easily slide past each other.
To make the rabbet, we got a dado blade to use with our table saw. There are various ways to do it (for example, using a router) but we wanted to minimize the amount of additional equipment in our garage. The dado blade produced perfectly good results and was super fast to use. (It is awesome, I tell you. If you’ve never seen one, come over. It’s a basically a huge stack of saw blades! So…. evil. I love it.)
In order to mimic the original door details, I also chamfered the edges of the frames and trim. Yes, I totally had to look that up. I did this using a block plane (and a jig) when cutting along the wood grain, and sanding across the grain at the ends.
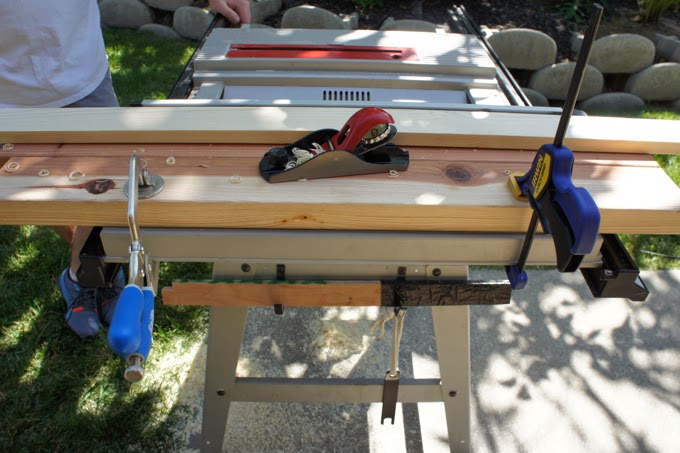 |
| My chamfering jig! Basically two 2x4s clamped to our table saw fence, which helped me run the block plane along the door frame edges at the same angle each time. |
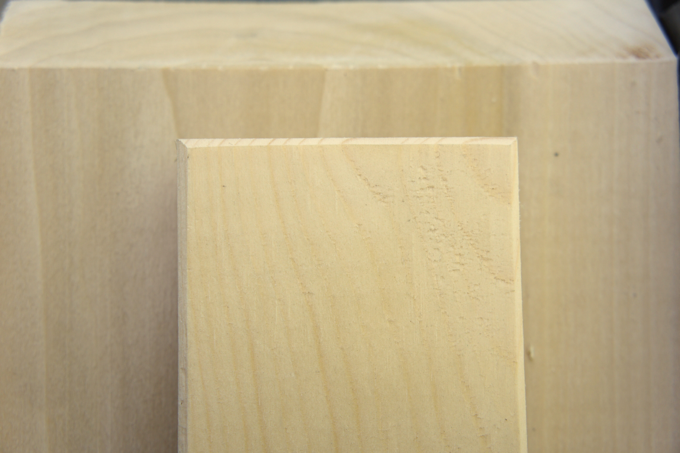
 |
| Profile of one of the door frame pieces: chamfered edges, rabbet on the bottom right. |
 |
| Chamfers lining up at the corners (almost). |
To build the frames, we used a pocket-hole join (created using a Kreg jig) to attach the top and bottom to the sides, like so:

 |
| Pocket joins at the top and bottom of the frame. |
Here’s a long shot of the frames, so you can see how things work:
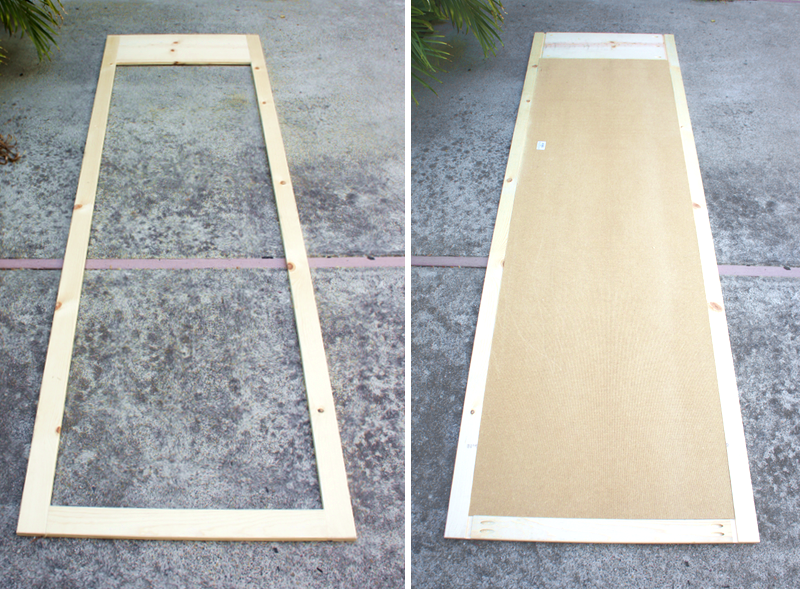 |
| Left: closet door frame (front side up), right: closet door frame back with masonite backing |
After fitting everything together and making some adjustments, we painted the frames, masonite boards, and trim separately. To assemble, we used heavy-duty staples to attach the masonite to the frame and the front trim to the masonite.
A few learnings along the way:
After painting the doors and putting everything together, we are really satisfied with the results. The details I worked my butt off to replicate are almost identical to the original doors. And the office looks a lot better now. Hooray!
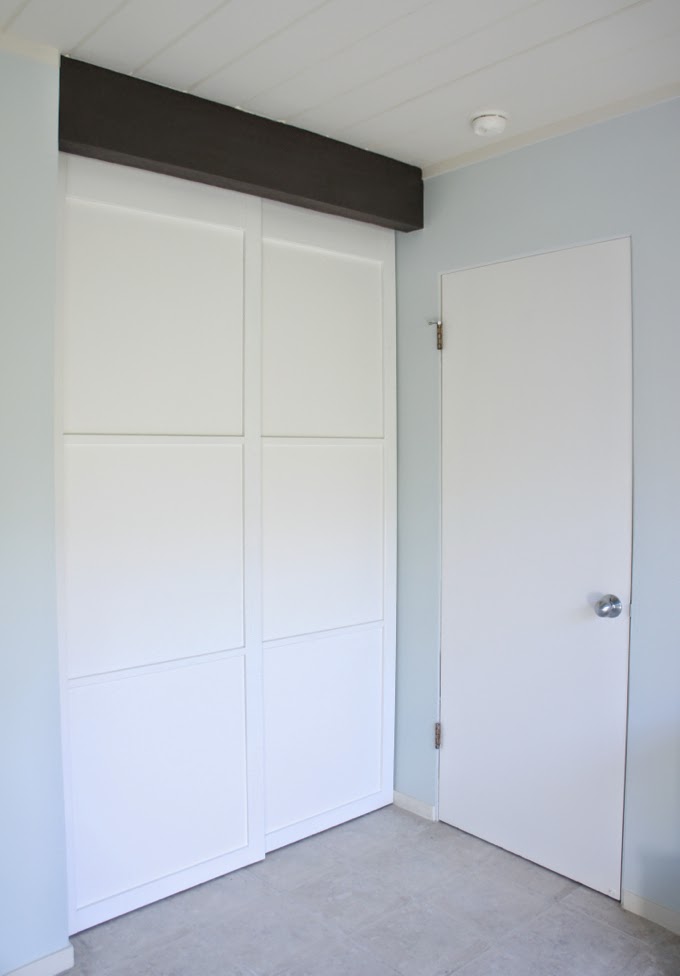
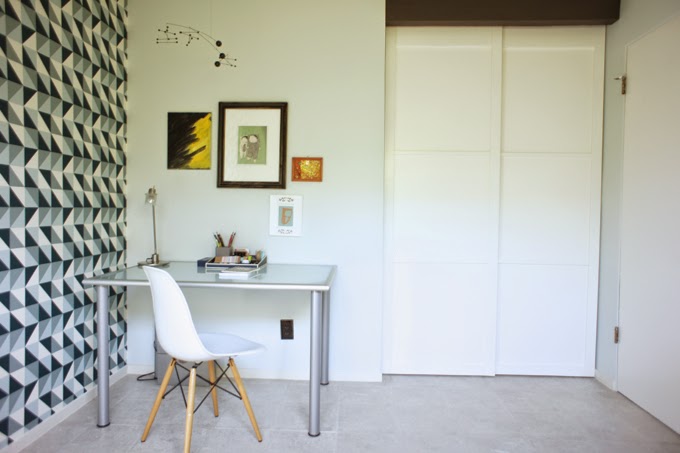
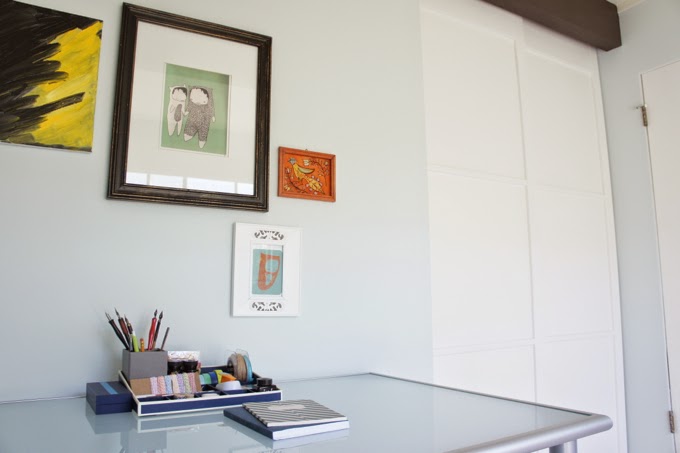

Ahhh.. a much nicer spot to work!
The closet doors are not perfect (I’m not a master with the block plane just yet, it turns out), but we love them. And I’m happy knowing that I will leave a little bit of my own handiwork with this house for its next people.
Would we do it again? Probably not, but it was a LOT of fun. The whole project took us just over a week of work, due to the fact that we had to learn how to do just about everything as we went along. The materials, to recap:
Total cost is about $150 (without the equipment I bought). Not exactly pocket change, but I’m guessing a lot cheaper than having them custom-made by a carpenter.
Has anyone out there built something similar? I’d love to hear about your experiences and any recommendations for improving the process – let me know in the comments or drop me a line!
(This is in no way a sponsored post.)
All photos by Karolina Buchner

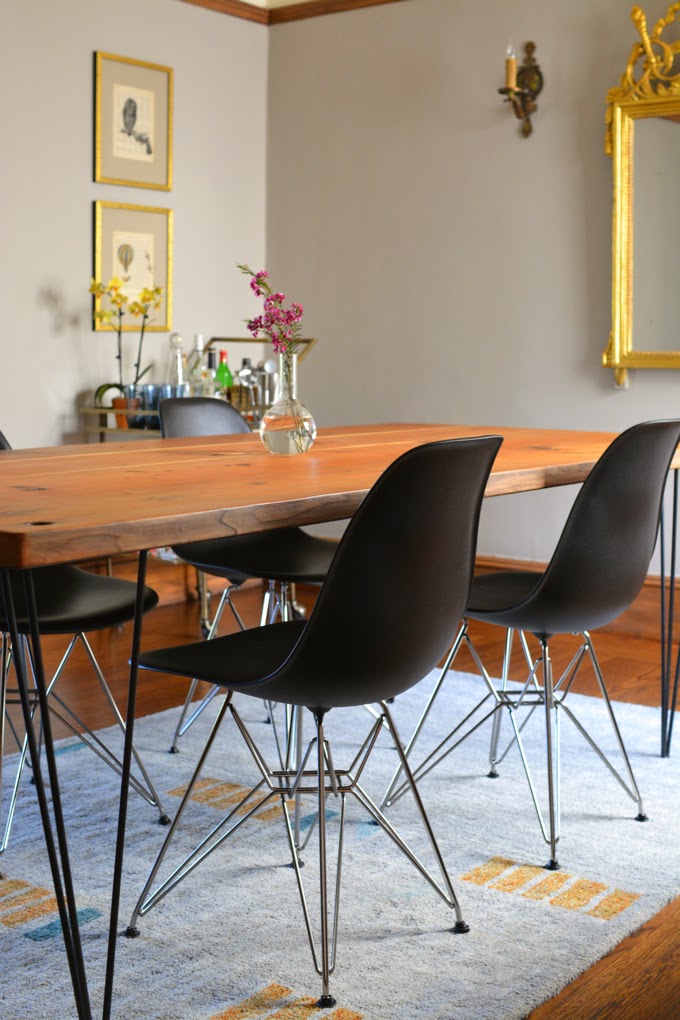
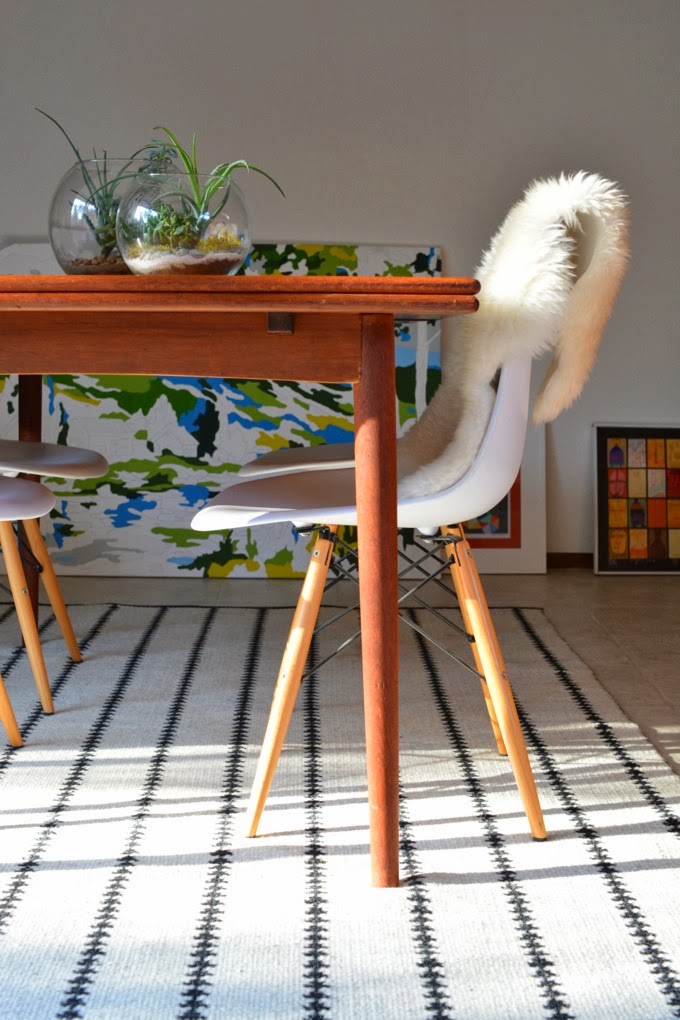
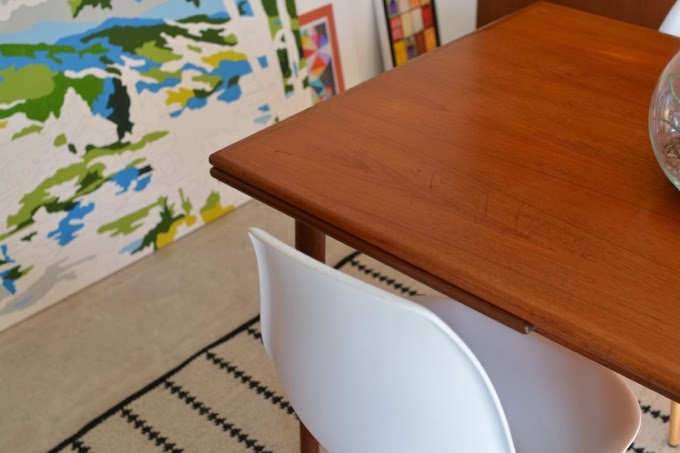
I’m very excited to share another peek at my client project with you! We’ve just finished the dining room of their lovely 1920s home, located in the Mission district of San Francisco.
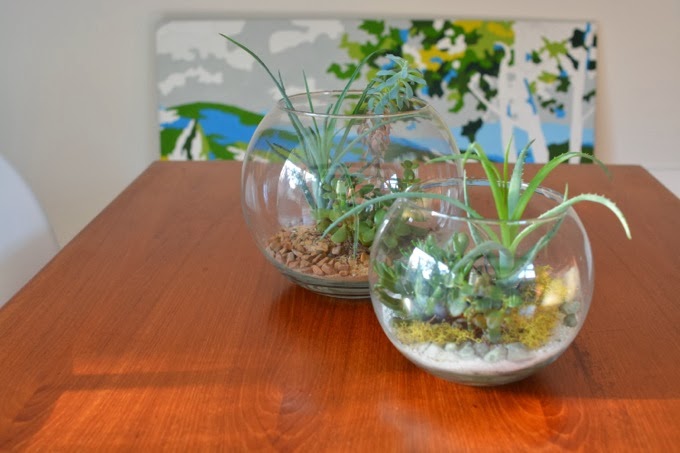
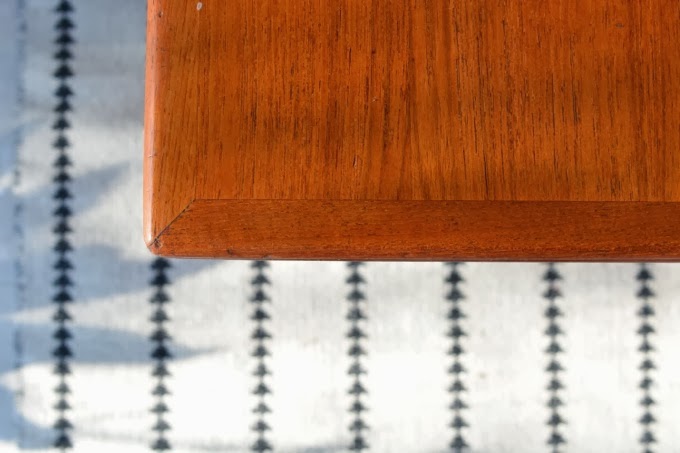
This dining room had some great pieces to start with, but needed some polish. I’ve omitted the before shot this time, but the Eames chairs, the art, the rug, and the amazing raw wood table are all theirs. These folks have a great sense of style, which is one of the many reasons I love working with them. And getting to explore their gorgeous neighbourhood is definitely a bonus.
When we started this part of the project, they had some pretty specific requirements for me to go after, which included finding the perfect antique mirror for the space. I’m thrilled with the mirror: it’s authentic (circa 1900), totally them, and a real conversation piece to boot.

Glorious, isn’t it? This mirror may be my favourite purchase for this project so far. I love how it works with the modern table and chairs.
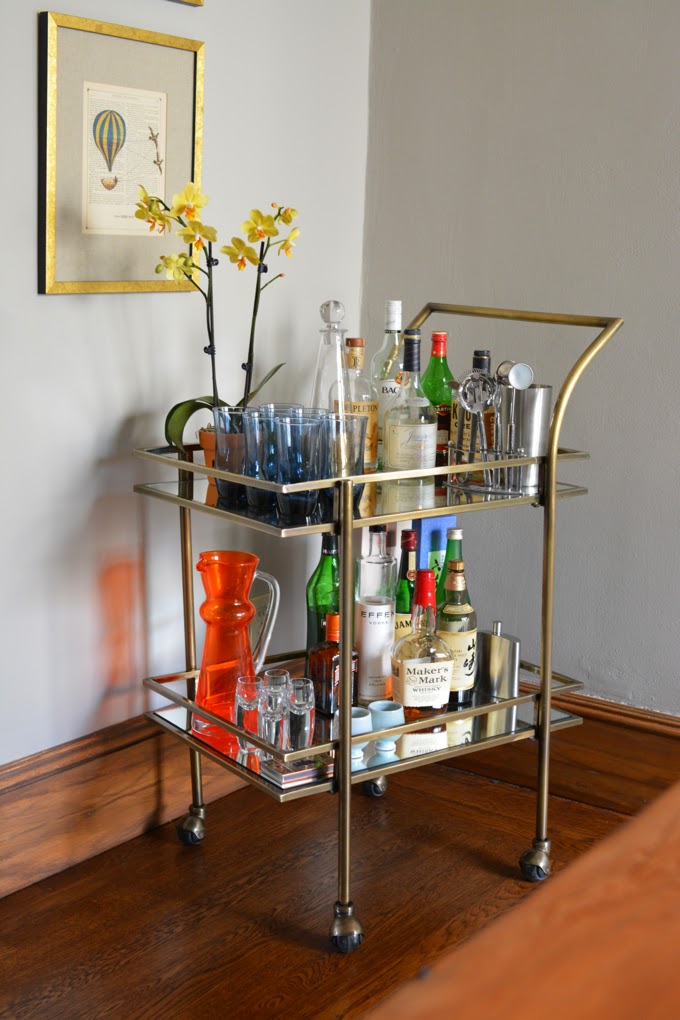
On the same wall as the mirror, a hefty black bar cabinet was replaced by this very sweet bar cart. The mirrored shelves and delicate lines give this cart a refined look. We originally missed out on this same cart in a true gold finish, but I feel like the subdued brass keeps things from looking too over-the-top. (And stay tuned – I’ll be sharing all of my other bar cart picks in an upcoming post, for they are plentiful. My secret pinboards are brimming with them.)

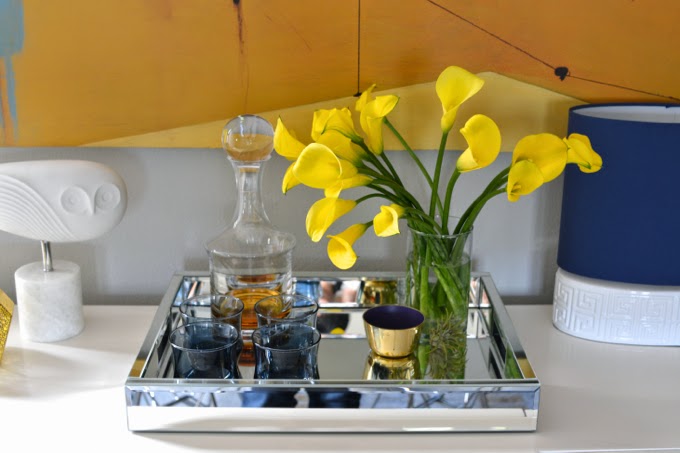
A new buffet is now below the large abstract art piece, styled up with a mirrored tray which echoes the bar cart’s shelves. Repetition is a great tool for unifying your space. As is restricting your colour palette (one of my great learnings from AB Chao). I tried to be very intentional about these elements in this space, while incorporating my clients’ pieces, like the bright orange pitcher on the bar cart, and still having a bit of fun.

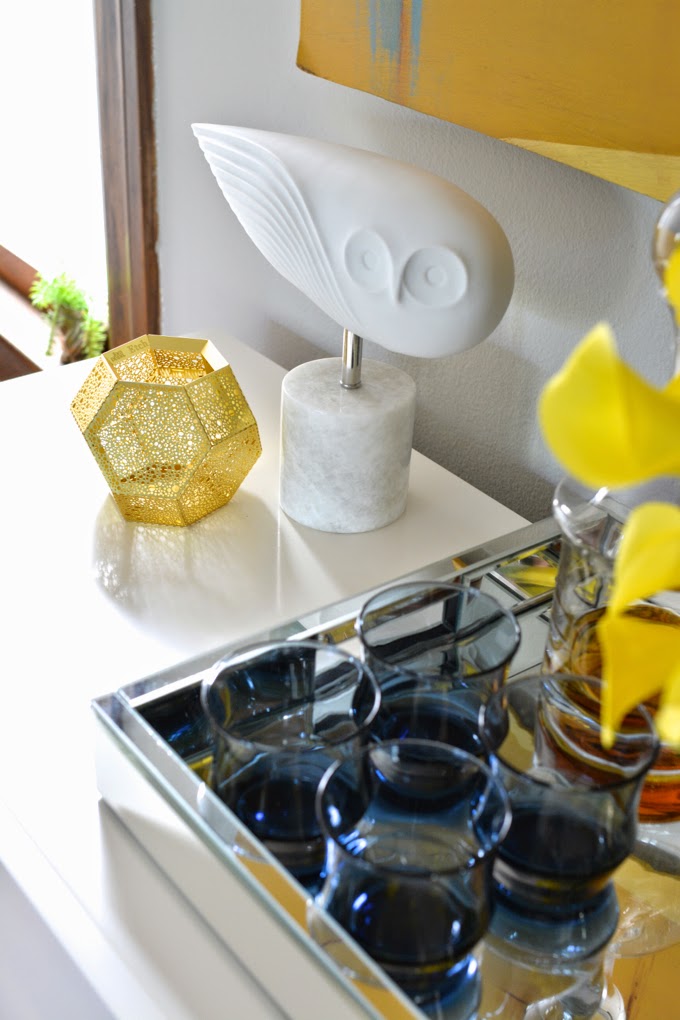
To style the buffet, I ended up using just one lamp instead of a pair. I am pretty sure this is breaking some sort of sacred design rule. But what fun are rules if you can’t bend them a bit? The lamp is balanced by the owl sculpture, so it works quite well to my eye. The mirrored tray keeps things corralled and organized. Trays are a great styling tool if you have a collection of objects to display.
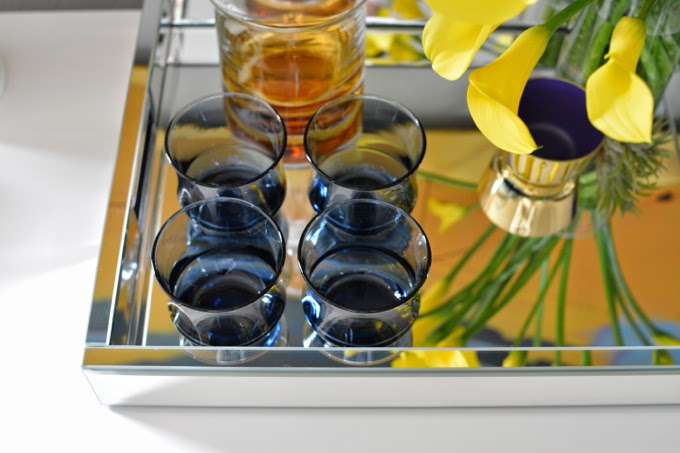
And there are those blue midcentury tumblers again. Repetition, yo. It works.
And that’s all for now. We still have a few more rooms to tackle in this project, which I’m looking forward to. I hope you’re enjoying this as much as I am, because there’s more to come!
All photos by Karolina Buchner
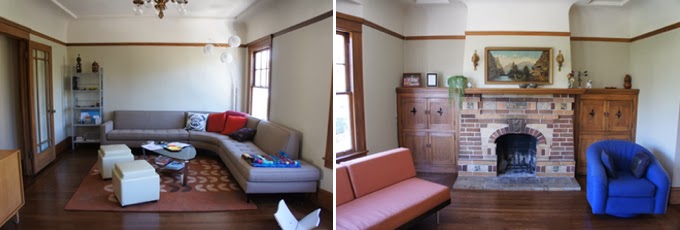
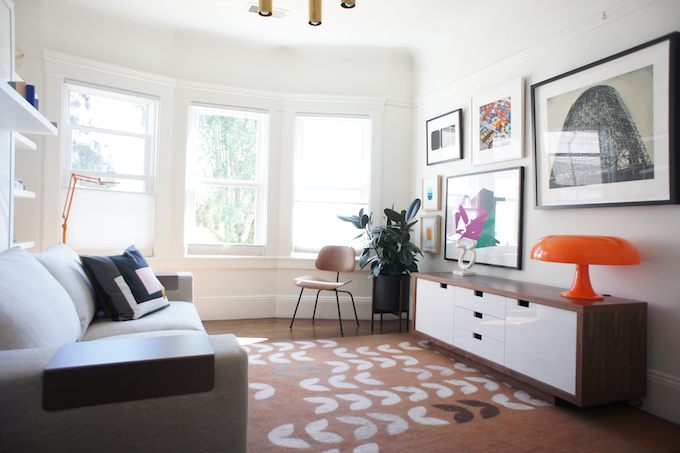
The space needed to be pulled together and livened up. We went with a fresh colour palette that worked well with the existing neutrals in their space and added some pop.
The rug really changed the look of this area. The grey is much quieter and plays well with the cooler tones of the pillows and art. Plus, it’s felted wool, so it’s both cozy AND indestructible.
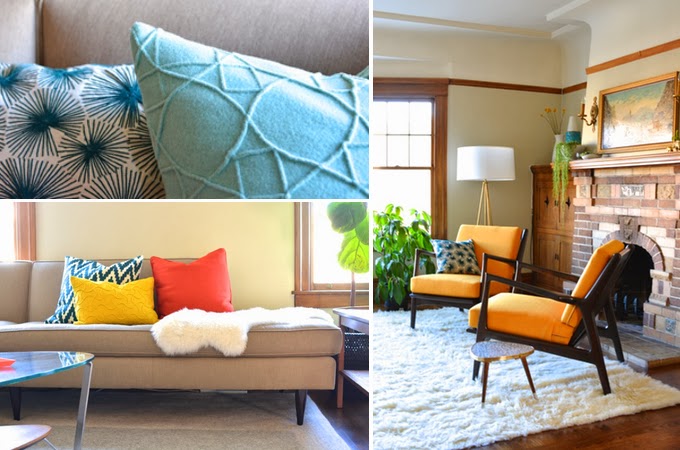

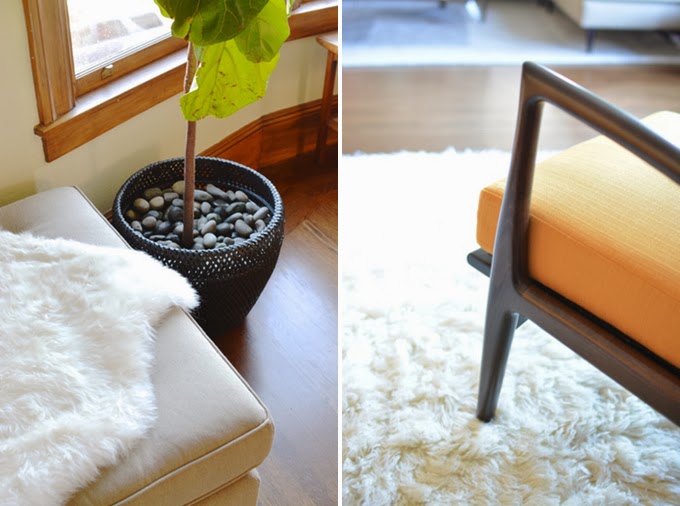
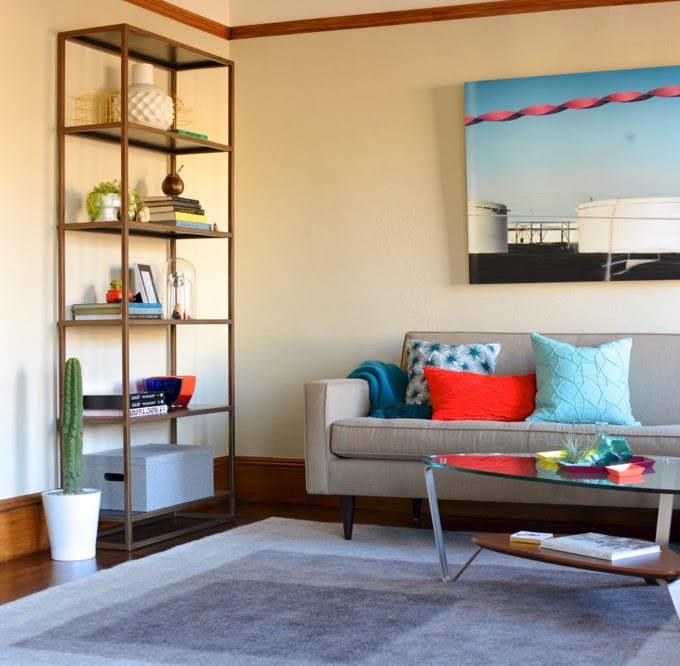
Sources: Remi bookshelf from Crate and Barrel; Littlebox grey wool rug from Peace Industry; art by Heidimatic; teal throw and cushions from CB2 and West Elm; Thrive Eisenhower chairs in Klein Citrus fabric; adorable teeny mid-century tripod table from Lunartics on Etsy; sheepskin and woven planter from IKEA; Jonathan Adler Ohai floor lamp; coffee table is the clients’ own; sectional from Room&Board
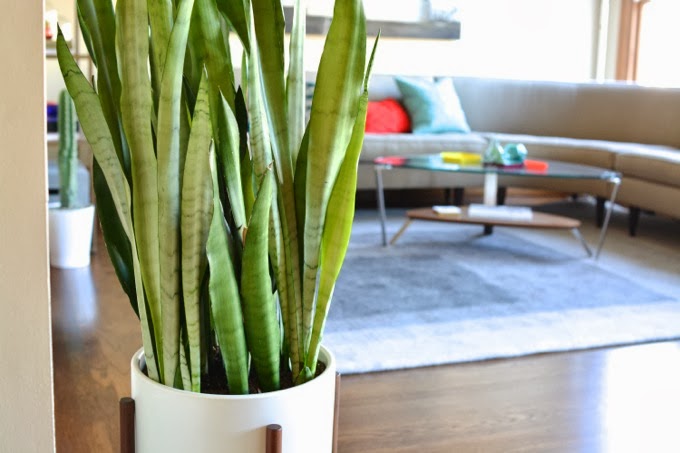
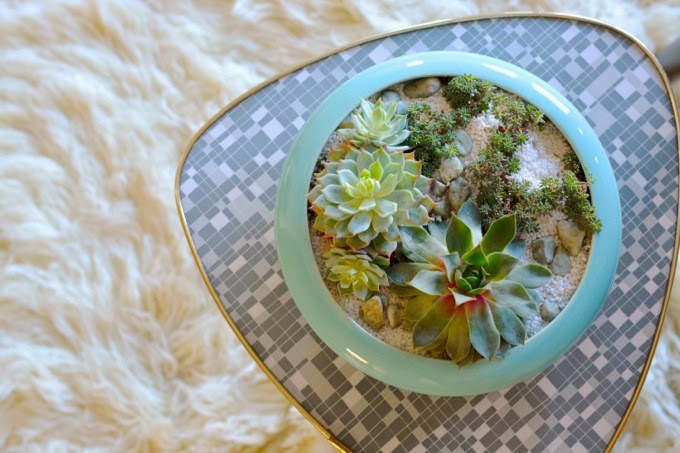
Sources: snake plant and fiddle leaf fig from Green Design (I love this place – South Bay friends, check them out!); mid-century ceramic planter from Modernica; teal California pottery planter (pictured here on top of the tripod table) from a local antique mall
Of course, things would not be right without an air plant in here somewhere. I found this huge one at a garden shop in Berkeley, and love this vista from the coffee table to the fireplace:

Sources: aqua vases from IKEA and CB2; Kaleido trays at DWR
I’ll have to leave you with that for now. More things are still to be added, including a very exciting order we’re waiting on from Knoll. I’ll be updating after our next phase. I can’t wait to share!
We finally painted the dining room + kitchen this weekend! You may recall my big plans to paint things a dark, deep blue. After trying out a patchwork of colours on top of the recent dark green, things took a dramatic turn … for the brighter.
Yep, it’s WHITE.


I decided to go for white after some very, very deep reflection, a.k.a., browsing my pins. I have to admit I’ve been having some bright white envy after seeing the homes of Emily Henderson and fellow Eichler owner Traci Yau of 45wall design. And I rather enjoy treating my home as a sort of lab for design experiments! I’m starting to scheme about painting out all of our dark brown beams and brightening the ceilings, which are currently really off-white.
Anyway, back to the space itself: To keep things light, I flipped the Nate Berkus rug to its reverse side. The credenza is now off to the side, just to mix things up a bit, and the art is obviously a bit scattered for now. I’m pretty keen on getting a huge art piece for the white wall. I’m in love with the work of Samantha French – her large-scale underwater portraits are stunning, but I might let my eye wander a bit first. Suggestions for big, abstract-ish art are welcomed!
I’ll update on the kitchen and breakfast nook once I’ve had some time to style them a bit more. In the meantime, I’d love to hear what you all think.
Where have I been?
Limping towards the finish line, friends. As I feel the year’s adrenaline draining from my body, I am so ready for the holidays to start. One more day of work, and I’m DONE.
How are you? Ready for the onslaught of eating, gifting, catching up with family, and perhaps more eating?
I’m taking some deep breaths before it all starts, and enjoying our growing Christmas light collection. One of the joys of having an atrium model Eichler is that I get to see this…

… from my living room sofa, and my kitchen, and the hobby room. That’s our bench in the atrium.
Anyway, I thought I’d say hello and wish you all the best for the holidays. I’ll do my best to catch up a bit, as I have quite a backlog of posts and photos to share. Until then!
p.s. Yes, we did make the JOY sign ourselves. I made a little how-to on my tumblr last year. It involved blowtorches and solder and dubious safety measures. The best kind of project, right? Enjoy!
