Browsing Category

diy

diy furniture

ercol studio couch

February 7, 2018

A few years back we happened upon a beat-up Ercol Studio Couch in the wilds of Canada … specifically, in an antique-and-junk filled barn in northern Ontario.  When I say we, I mean my mother-in-law Sharon and me.  The frame of the couch was in rough shape, with its original finish coming off in our hands, so we ended up stripping it down for a more nordic look to suit the family lake cottage where it would live.  I’m happy to report the couch is complete.   And I finally have photos to show it off a bit.

Continue Reading

diy eichler projects

eichler closet doors + modern hardware

November 6, 2014
DSC09897

It’s been a bit quiet around here, since we’ve had a tough couple of weeks, sad and frustrating at the same time. I’ve been coping by working on the house, tuning things up here and there, aggressively painting at times, and purging junk.  And after a nice weekend visiting with friends, my mind and heart are feeling much more settled now as compared to last week.

So:  closet doors!  (The unofficial, never-ending theme of this blog.)

As part of having our house painted, all of our original closet doors got a fresh coat of paint … along with their original slider hardware (oops).  The painted sliders were sticking in their wooden tracks, making the doors nearly impossible to slide.  The wooden track-and-slider combo is an original Eichler feature and, sadly, one that is not terribly durable.  After a few weeks of frustration, we decided to make things right.

Here’s how it went down, in case you’d like to re-do your doors, while keeping them as intact and original as possible:

Step 1:  Take down doors and rip out the old wooden tracks.  It’s cathartic.  Even if you only make it past this step, you will feel a lot better about your house and yourself.  However, you will have no closet doors at this point, so you’ll have to soldier on.

DSC_0002
DSC_0029


Let’s take a moment to appreciate the scary wooden tracks.  Held in place with a combination of screws with nails driven through them (?!?), they wore out very unevenly over their 50+ years of service.  We had the doors jumping out of their tracks on a regular basis.  Not-so-fun times.

Step 2:  Build out the area from which to hang the new track with extra lumber.

We put an additional 1 1/2″ x 1 3/4″ (or so) board up alongside the existing black frame from which the tracks were suspended.  With the new lumber (the light stuff) we had about 3″ in depth, enough to install the metal track and have it set back from the fascia of the closet.  Set-back from the fascia really helps when hanging the doors later on since you have to put them in on an angle.

DSC_0008


Step 3:  Install the metal track.  Pilot holes and screws.


Step 4:  Pop off the old sliding hardware and bumpers from the doors.  Sand, patch, sand, paint.  We did this both for aesthetic and functional reasons, to prevent the bumpers from scraping against the doors after hanging (as we discovered later).


Step 4:  Measure the doors and opening AT LEAST 10 TIMES.  We took about 3/4″ off each door:  3/16″ at the top, and 5/8″ at the bottom.  I know that doesn’t add up, but when things get precise like this, I revert back to my native metric, so:  we actually took 0.5 cm off the top, 1.5 cm off the bottom.

Step 5:  Trim the doors.  We used a circular saw.  I recommend this video for tips on how to get nice precise cuts.  We specifically made sure not to take off too much from the top, so our new roller hardware could fit into the original groove at the top of each door.

DSC_0061


By the way, the best advice from that video:  use painter’s tape when cutting surfaces that are already painted.  We did this and it really kept the cuts smooth and clean:


Steps 6-7: Attach the rollers to the doors, and hang.

DSC_0013


After all this time, having closet doors that actually move is a small miracle in our house.  It’s so amazing to have them just glide with minimum effort.

Anyway, hope this was useful to some of you!  I’ll be back with prettier things soon.

diy furniture projects

ercol sofa

October 10, 2014
ercol sofa

This is a long post, friends.  Please grab yourself a comfy seat and a cup of tea.  We’ve got a furniture restoration project on our hands!

Just last week, my husband and I made our almost yearly trek up to visit family in Canada.  This includes a stay in the wilderness known as cottage country in northern Ontario.  I’ll post more about the cottage soon, but what you need to know is that one of my favourite non-nature-y activities while at the cottage is visiting antique stores and junk shops.  Some of which are quite literally junk shops.  Hello, Seguin Township dump store!

On one of these outings, my mother-in-law Sharon drove us to a favourite shop in Parry Sound, which includes a proper furniture store in addition to barns filled with all manner of antiques, knick-knacks, and old household wares.  It’s probably the stuff of nightmares for a fire marshal.

In one of the barns, I spotted what I thought was a possibly mid-century style bed frame:

ercol sofa refinishing project

We asked the shop owner for a price ($100 CDN) and where it came from (England).  Then we hauled it out, checked that it was sufficiently sturdy, and decided that it was a project we could not resist.  It would be perfect as a daybed under one of the big picture windows overlooking the lake at my inlaws’ cottage.  Lucky them!

Thanks to the wisdom of my Instagram friends, we learned that this is an Ercol sofa and indeed made in England.  Specifically, it’s the Ercol Studio couch which was designed in the 1950s by the company’s founder, Lucian Ercolani.

Look how cute:

ercol sofa
ercol sofa
ercol sofa

They’re still being produced and are rather pricey.  I’m quite pleased that my eye for quality mid-century junk is in good working order!

So, back to our sofa:

ercol sofa refinishing project

We took the sofa back to the cottage with us where I gave it a rub-down with mild soap to see what sort of condition the finish was in.

The original stain is really neat.  The darkened areas accent the back and the spindles of the arm rests.  Sadly, it was badly damaged in a number of areas along the arms and back, so we decided to strip and refinish it completely.  The plan is to achieve that nice and bright honey-toned look like the sofas above.

As an aside:  I think I’m really bad at vacations.

After the cleaning, we removed the original webbing, which we learned is a very high-quality rubberized webbing made by Pirelli.  (Sound familiar?  They make tires.)  Each strap was originally held in place with wooden dowels on either end.

ercol sofa refinishing project

In its previous life, someone had tightened up the webbing by cutting it shorter and stapling it on one side.  We’ll try to get a whole new set of webs and dowels so it can be restored to its proper state.

Our main accomplishment was stripping off the finish.  Pro tip:  instead of using steel wool to remove the paint stripper, we used those green scrubber pads used for washing dishes.  Their main attribute is that they’re super cheap, yet effective and gentle enough to not damage wood.  The best part is that you can buy an armload and just toss them out as they fill up with gunk.

ercol sofa refinishing project

The stripper only went so far in the areas where the original finish was very dark, leaving some really dark stains.  So I started to sand:  100-grit, followed by some ‘medium’ grit sponge, and finally 220-grit.  I love the grain and the surf-board shape of the back rest, but it still needs a LOT of work.

Here are a few close-ups of where I sanded.  You can see the contrast between the residual stain and the bare wood.

ercol sofa refinishing project


I sanded the first three spindles and half of the bottom frame (on the left) and the corresponding top of the arm rest.  The wood is so nice and bright.  The frame is solid beech and the back is a single board of elm.

ercol sofa refinishing project


And that’s as far as we got.  I would have loved to have a few more weeks, even days, to work on it.

In the meantime, we’ll have to make do with looking at other Ercol sofas online, restored and styled in cute ways.  Sharon and I are figuring out the webbing situation and what the seat cushion will look like, leaning toward something simple and in the neutral gray-to-greige spectrum.  I can’t wait for this project to be finished.

Styled sofa photos via 1 | 2 | 3
All other photos by Karolina Buchner

diy eichler projects

diy reproduction eichler closet doors

June 18, 2014

dear house,
it’s been a while since we’ve done something for you, hasn’t it?
and so i have built you closet doors, out of purest love.
xo
karolina

There’s one room I haven’t featured here on the blog, mostly due to shame:  our office.  It was formerly a nursery and now serves as an office/ironing room/general catch-all/room of shame, albeit with some pretty great wallpaper to deceive the unsuspecting.  Part of its shame came from the sad closet door.  Well, when say ‘door’ I mean a sad, random piece of red material strung up on an IKEA curtain wire.  Which eventually failed, leaving the crammed closet innards for all to see.

 
After the IKEA curtain solution gave out (taking some drywall with it, UGH), we were left with a choice: install some ready-made closet doors, or try to match the doors to the original Eichler doors in the house. Due to certain compulsions of mine, I opted for the latter.  I thought of getting salvaged doors from a renovation, but that would have involved waiting around until the perfectly sized set of doors became available (probably never).

So: we decided to build some.  From scratch.  With our own non-expert hands.  #YOLO

This lead to the inevitable acquisition of more wood-working tools, but since the living wall project, I’ve decided to just jump into this sort of thing head first. I don’t particularly care how long it will take to complete a project.  After some high-level planning and convincing ourselves this is indeed feasible, we were a go.

This is what the original Eichler closet doors look like in other parts of our house:

 The new doors are not a completely faithful reproduction. We didn’t use the same type of wood and we most definitely are not using the original hardware.  The original tracks of Eichler closet doors are made of wood, which at least in my house, are a total pain.

You can see the wooden track here (the black piece), looking up at the ceiling inside the closet:

And that’s the “hardware” on one of the doors:  a metal slider at the top of the frame, and a cardboard bumper which looks terribly chewed up.  Our doors are often jumping off their tracks and getting stuck. For this project, we used standard roller and metal track hardware.

To start, I took down some of our existing doors to figure out the design. The original doors are built with 1 ¾” thick wood frames, and the panels are masonite boards.  We measured one of them carefully and determined what our dimensions should be.

The main challenge was to use materials similar to the original doors, but also to keep the weight as low as possible, given our use of modern track hardware.  The original doors use a rabbet cut along the inner edges of the frame, to create an inset for the panels to sit. You can see that in the above pics and in my sketch on the right.  This also keeps things from being too thick and chunky, so the doors can more easily slide past each other.

To make the rabbet, we got a dado blade to use with our table saw. There are various ways to do it  (for example, using a router) but we wanted to minimize the amount of additional equipment in our garage.  The dado blade produced perfectly good results and was super fast to use.  (It is awesome, I tell you.  If you’ve never seen one, come over.  It’s a basically a huge stack of saw blades!  So…. evil.  I love it.)

In order to mimic the original door details, I also chamfered the edges of the frames and trim.  Yes, I totally had to look that up.  I did this using a block plane (and a jig) when cutting along the wood grain, and sanding across the grain at the ends.

My chamfering jig!  Basically two 2x4s clamped to our table saw fence, which helped me run
the block plane along the door frame edges at the same angle each time.
Profile of one of the door frame pieces:  chamfered edges, rabbet on the bottom right.
Chamfers lining up at the corners (almost).

 To build the frames, we used a pocket-hole join (created using a Kreg jig) to attach the top and bottom to the sides, like so:

Pocket joins at the top and bottom of the frame.

Here’s a long shot of the frames, so you can see how things work:

Left:  closet door frame (front side up), right: closet door frame back with masonite backing

After fitting everything together and making some adjustments, we painted the frames, masonite boards, and trim separately.  To assemble, we used heavy-duty staples to attach the masonite to the frame and the front trim to the masonite.

A few learnings along the way:

  • Lumber from big box retailers is only OK-ish for projects like this.  After getting some really crummy trim that my block plane chewed up, we discovered Southern Lumber, here in San Jose.  Their stock is fantastic both in quality and selection.  (And they will totally rip and dado and band-saw things for you!  For a small fee.  Heaven.)
  • If you can, get masonite cut to size when you buy it.  Oh my goodness.  Dealing with these giant, floppy boards was horrible.  We decided it should be fine to cut them at home.  Uh huh.  We managed to do shorter cuts with a hand saw (an experience akin to digging your way out of Alcatraz with a spoon) and longer cuts with our table saw (which was pretty much a scene taken from the “how to cut plywood with a table saw and wheelbarrow” video, except with patio chairs and an ironing board standing in for the wheelbarrow).
  • Woodworking means you will be building jigs.  Like this one, which we mimicked.  I was attempting to chamfer wood freehand (bad idea), until I discovered this.  If you want consistent results, you build a jig to eliminate as much variability in how you apply a tool to a piece of wood as possible.  This is a new concept to me:  building something to help me build something else.

After painting the doors and putting everything together, we are really satisfied with the results.  The details I worked my butt off to replicate are almost identical to the original doors.  And the office looks a lot better now.  Hooray!

Ahhh.. a much nicer spot to work!

The closet doors are not perfect (I’m not a master with the block plane just yet, it turns out), but we love them.  And I’m happy knowing that I will leave a little bit of my own handiwork with this house for its next people.

Would we do it again?  Probably not, but it was a LOT of fun.  The whole project took us just over a week of work, due to the fact that we had to learn how to do just about everything as we went along.  The materials, to recap:

  • 2 sheets of masonite ($10 a piece)
  • 5 pieces of 6ft 3×1″ pine boards ($6 each maybe?)
  • 2 pieces of 2ft 12×1″ pine board ($14)
  • 4 pieces of 2ft 1×1/2″ clear pine trim ($8)
  • closet door hardware ($14)
  • Zinsser BIN shellac-based primer ($14, it covers knotty pine like a dream, but might kill you with its vapours — I actually wore a respirator mask when working with it)
  • semi-gloss latex paint ($30)

Total cost is about $150 (without the equipment I bought).  Not exactly pocket change, but I’m guessing a lot cheaper than having them custom-made by a carpenter.

Has anyone out there built something similar?  I’d love to hear about your experiences and any recommendations for improving the process – let me know in the comments or drop me a line!

(This is in no way a sponsored post.)

All photos by Karolina Buchner

diy landscaping projects weekend

weekend project: living wall

August 22, 2013

Hi friends!  Finally the reveal you’ve been waiting for:  our living wall!  I’m so happy that it’s done, looking so lush with lots of pretty plants, and, did I mention that it’s done?  Yeah!

What do you think?  I think I am in love with it.

Let me back up a bit to give you the details of how we built this, in case you’re interested in constructing your own.  To start, I wanted to create a wall that would not damage our rather precious and not terribly robust Eichler siding.  This meant not having plants, soil, and moisture right up against the siding.

After some research, I chose to go with the Woolly Pockets since they have an impermeable membrane built into the pocket so moisture is contained.  The pockets are designed to mount directly to a wall, using wall anchors or screws.  However, I didn’t want to put a million holes in our siding and have the weight of the pockets supported by the siding and wall anchors only.  I needed something more sturdy that mounted to the wall studs.  My solution was to design a backing board that would mount to the studs, onto which we would then attach rows of Wally Threes.

Here’s how it came together:

TADA!  When I think back, it was almost that simple.  Before things got serious, I used painter’s tape to convince myself of where exactly I wanted the wall to go:

Basic materials included plywood (we used 5-ply, 3/4″ thick), 2×4 redwood lumber (nice dry stuff), and a whole lotta wood screws.  The wall was to be 68″ wide by 78″ tall, to accommodate six Wally Three pockets.

Given the size of plywood at the store, this meant we had two half-panels which we assembled to make the full backing board.  The back was framed using the 2x4s, to give ample space between our siding and the board, and to accommodate a French cleat which was instrumental in getting the board up and attached to the wall studs.

That cleat was magical, I tell you.  And I may be in love with my table saw (Ryobi BT3000, which I bought second-hand!) as a result. The alternative to using the cleat would have been for one person (myself or my husband) to be holding up a giant piece of plywood whilst the other scrambled to drive screws through to hang it.  Painful and totally not fun, I’m sure.

With the cleat, we just attached half of the cleat (pointy edge up) to the wall, driving 3″ screws through into our studs.  We cut the other half of the cleat (pointy edge down) in half, and the two halves went along the tops of the plywood panels.  Lift, hang, and behold!

To make things extra-secure, we did attach a 2×4 in the middle of the space behind the wall, and drove 2″ screws through the plywood along the cleat and the 2×4.  That thing is not going anywhere.

After mounting the backing board, attaching pockets, and running irrigation, we planted.  And planted and planted and planted.  I believe I visited no fewer than four nurseries in the past week, because I really wanted a wall that I loved.  And when I said that I wanted ALL of the plants, I was not joking!

And so, I ended up using the following to fill the wall, mostly from Flora Grubb and my local Summerwinds:

  • Bromeliads (Vriesea Gigantea Nova and Tessellata)
  • Ferns (foxtail and Sprengeri)
  • Stonecrop (‘Bronze Carpet’)
  • Foxtail agave (Agave attentuata)
  • Euphorbia (‘Dean’s Hybrid’)
  • Echeveria (Hens and chicks)
  • Senecio mandratiscae
  • Japanese forest grass (Hakonechloa M. ‘All Gold’)
  • Yucca rostrata
  • Tiny mistletoe cactus (Rhipsalis ewaldiana)
I realize these will not all co-exist happily until the end of time, and the wall will evolve.  We’ll see if the bromeliads are OK with this location or not, as I’ve never dealt with them before.  It turns out that to water them you need to fill up their cups, so we may rig a tiny sprinkler above them in addition to the drip irrigation.  And anything that’s not completely happy can be relocated to other parts of our yard.

Now, I just need some sort of seating from which I can enjoy the wall.  Hanging chair or Acapulco?

(This is not in any way a sponsored post.  And you can find my earlier post about planning this project right here.)

All photos by Karolina Buchner

diy projects weekend

weekend project: beam repair part 2 (we did it!)

July 23, 2013

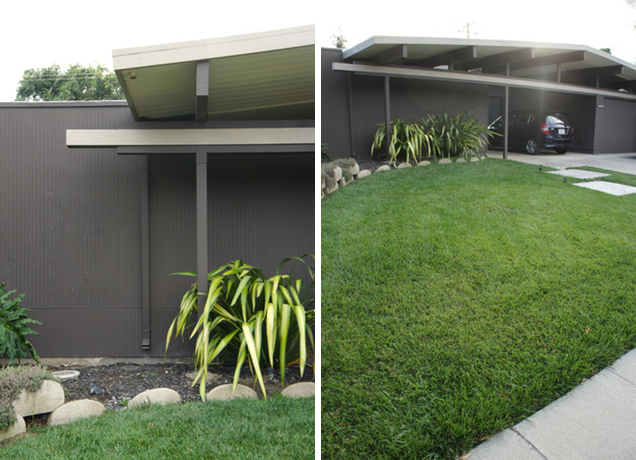
As I write this, Winston is laying beside me, (I think) exhausted from the weekend’s work.  He worked very hard supervising everything, as pictured here in our front yard.  We’ve been busy!

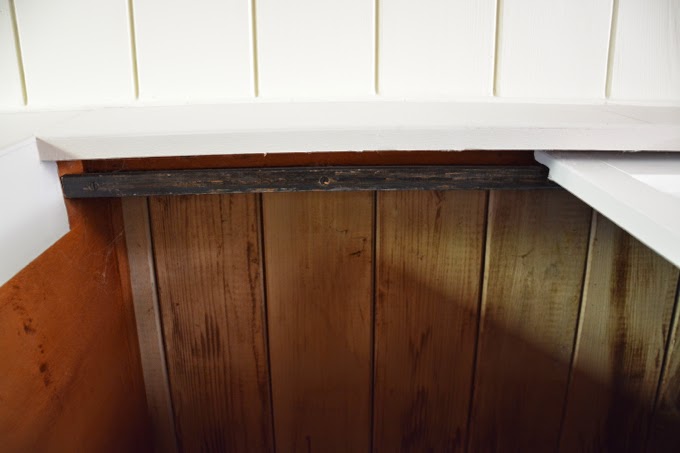
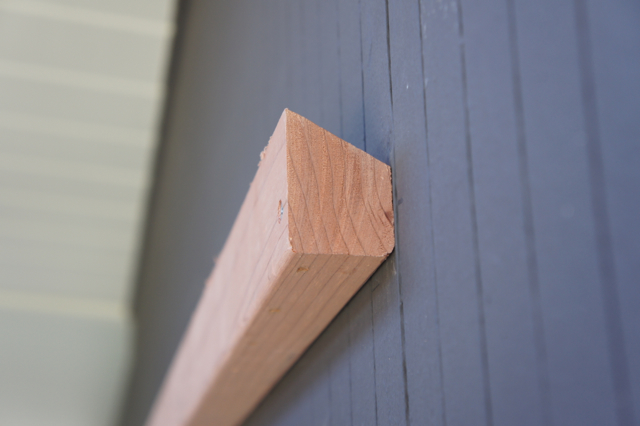
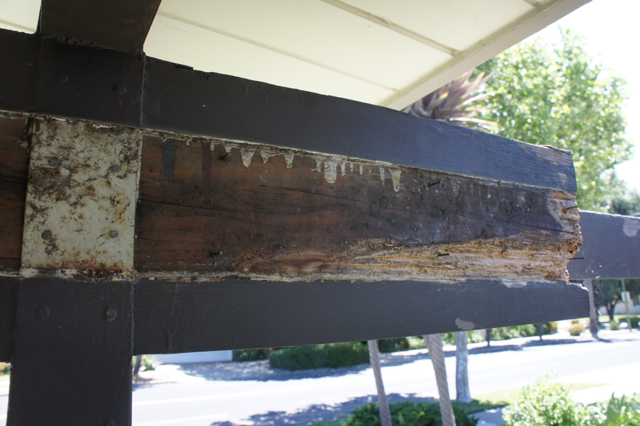
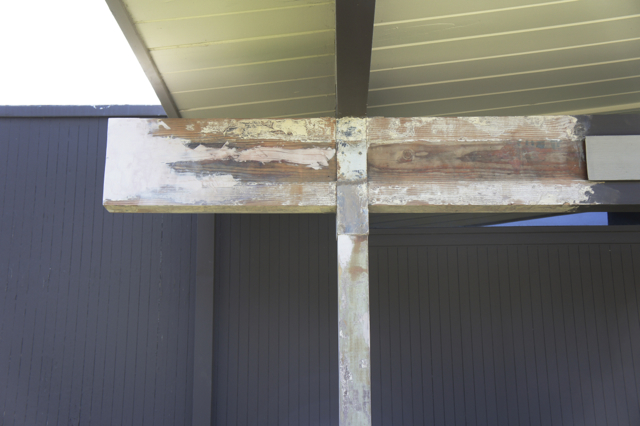
If you recall about a month ago, I posted about the horror of dry rot which we discovered had destroyed part of a beam on the front of our house.  As a refresher, here’s what it looked like:

It still gives me the heebie geebies.

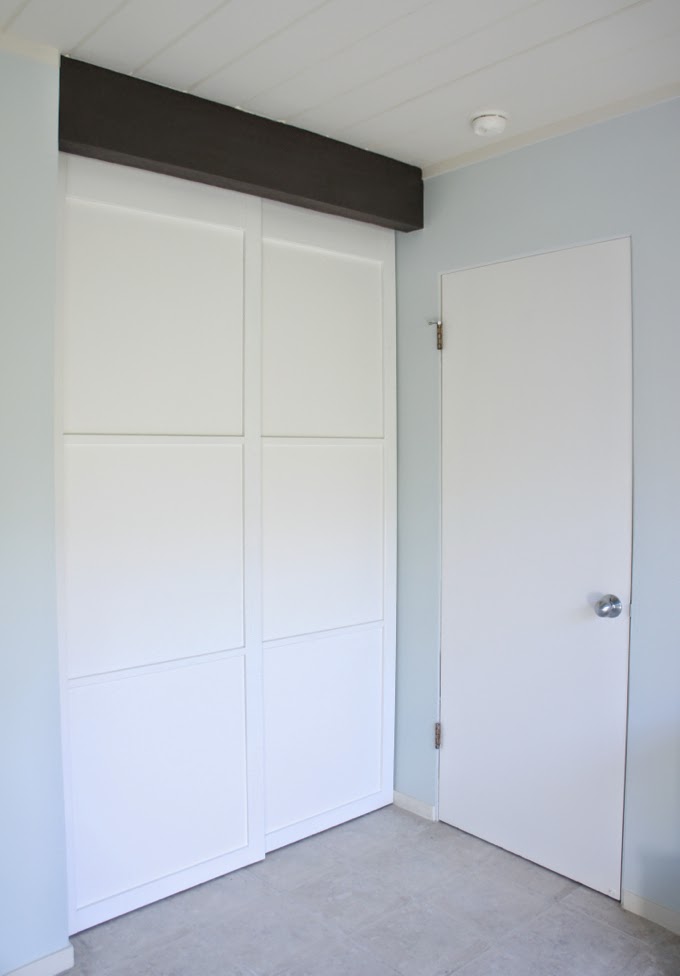
I’m happy to report that this weekend, we finally restored everything back to its original state.  Hopefully, much better than its original state.

Let me walk you through the rest of the process here, which took us actually three weekends to complete.  It’s a long one, so grab yourself a seat.  And maybe a drink.  An iced tea would be appropriate.

Weekend 1:  Epoxy, sand, more epoxy!

As I mentioned in my earlier post, the product we used to fill in the rotten areas was a 2-part epoxy filler.  There are various products available, the most common being Bondo, which we used.  You can find this at big-box home improvement stores and auto repair shops.  Guess where it retails for less.

It’s pretty weird stuff to work with.  You have to work in batches by mixing a small amount of hardener (which comes as part of the kit) with the epoxy material, and then apply it before it sets up.  We found it lasted almost exactly 3 minutes before turning to rubber and becoming unusable.  Also:  it smells pretty toxic.  We wore gloves when working with it and were outdoors in the fresh air.

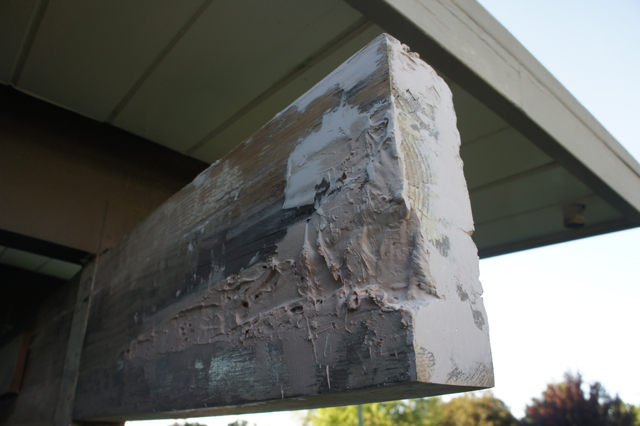
We worked building it up layer by layer:

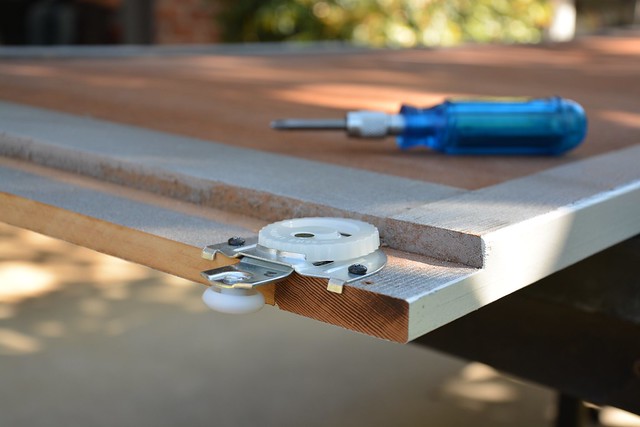
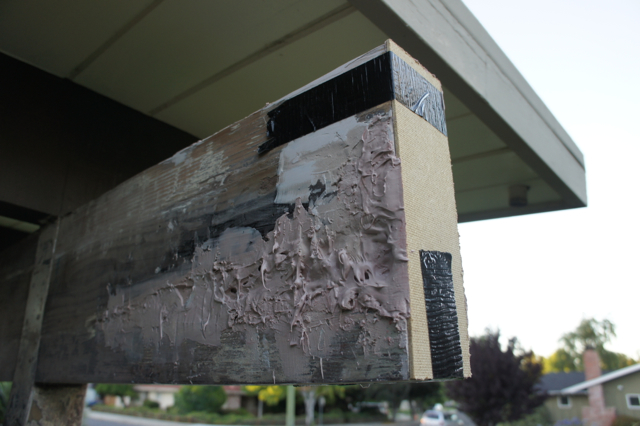
It was necessary to sand down the bumps every layer or so, in order to more easily apply the next layer and to make sure there were no air bubbles or crannies left.   We taped a piece of hardboard to the end of the beam to help us form better edges.

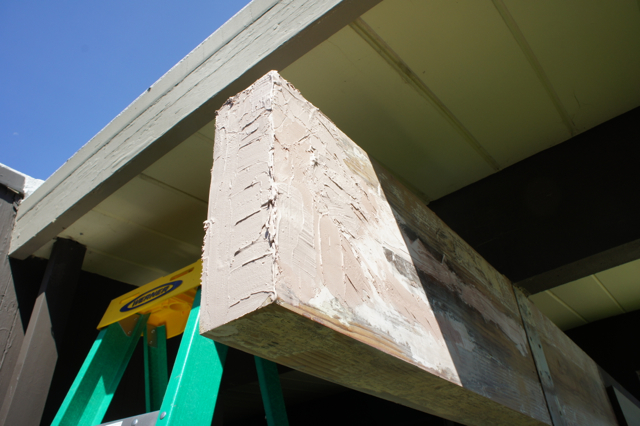
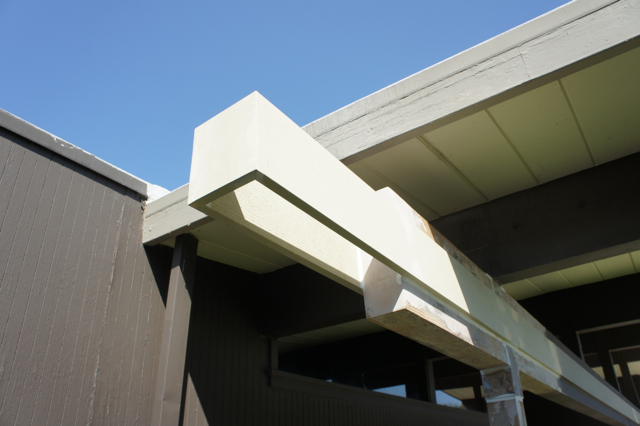
Finally, after using about a container and a half of epoxy, we applied the last layer.  I tried my best cake-icing technique here:

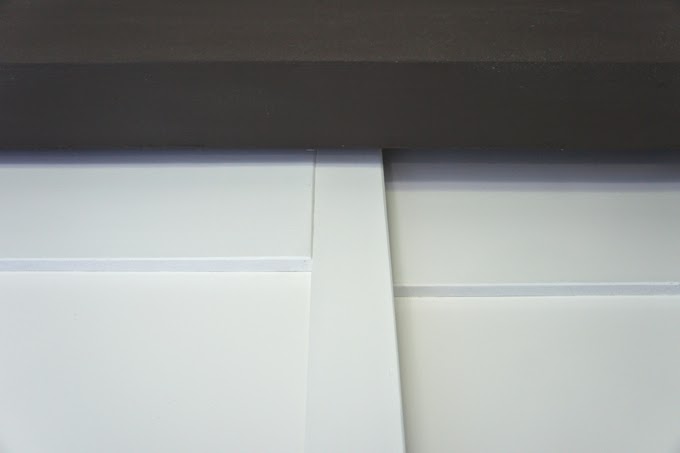
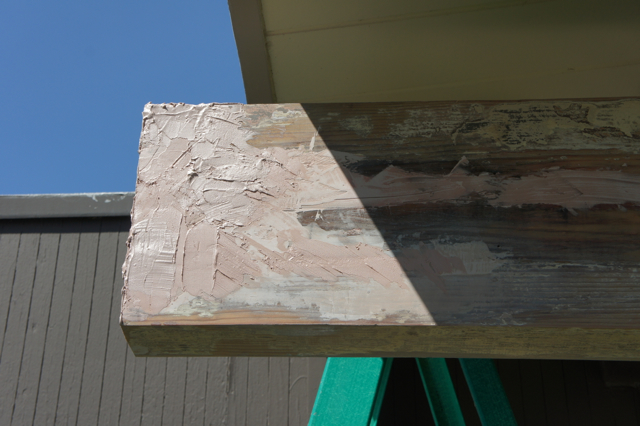
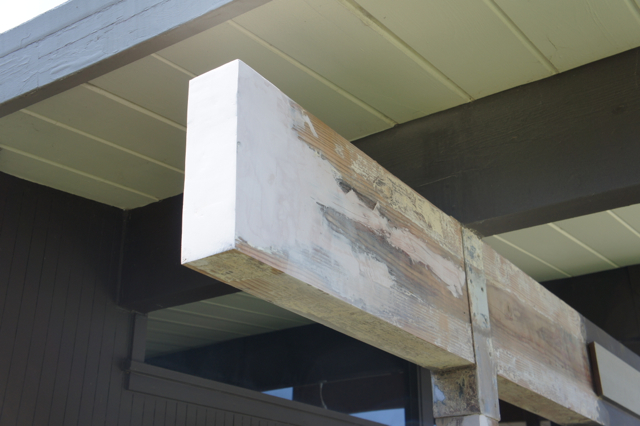
Then, we took a sander to it, and BAM.  It looks like a beam again!

The Bondo was really quite easy to work with once we got the hang of it, and it sanded to nice, sharp edges.  One strange thing is that it has a sticky skin even after it’s fully dry, which freaked us out initially, thinking it hadn’t cured.  But, after sanding, it was fine.  I would definitely use it again for jobs like this one.

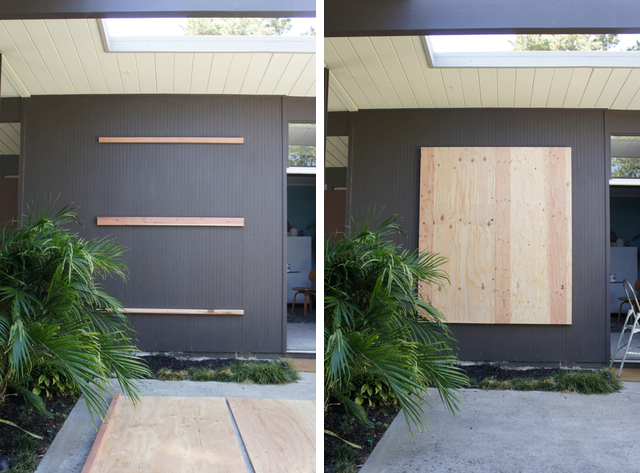
Weekend 2:  Cut new trim, nail it up, and fret about things not being square!

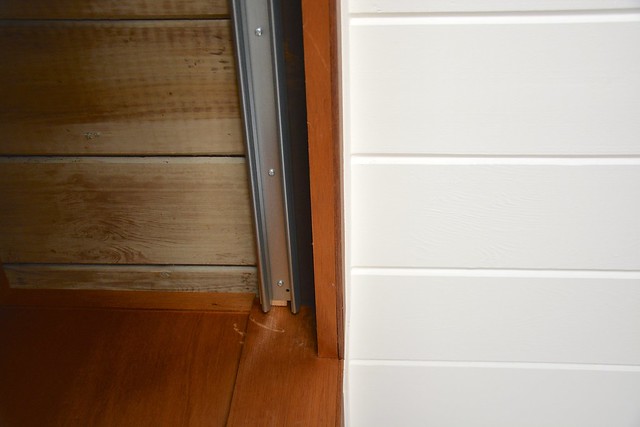
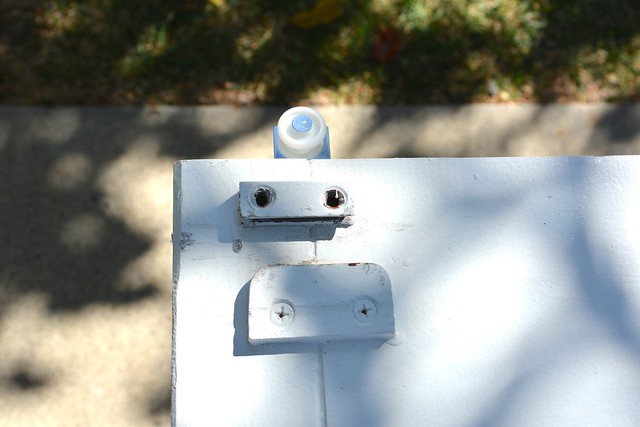
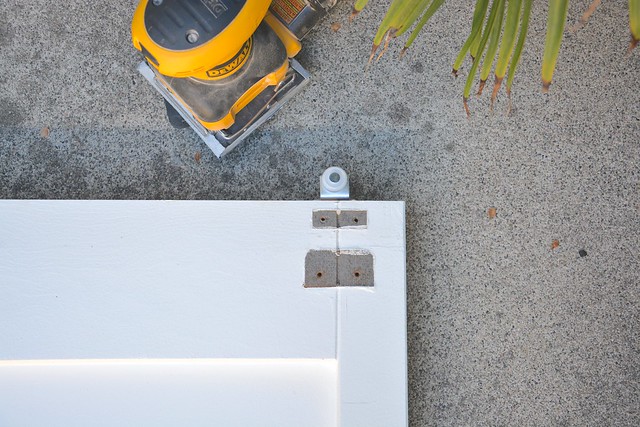
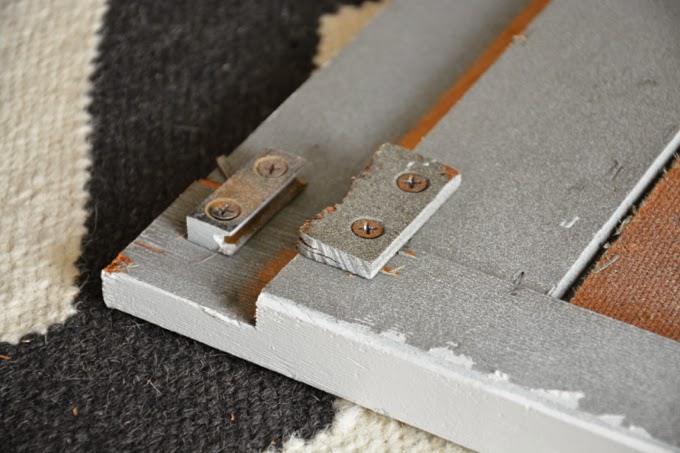
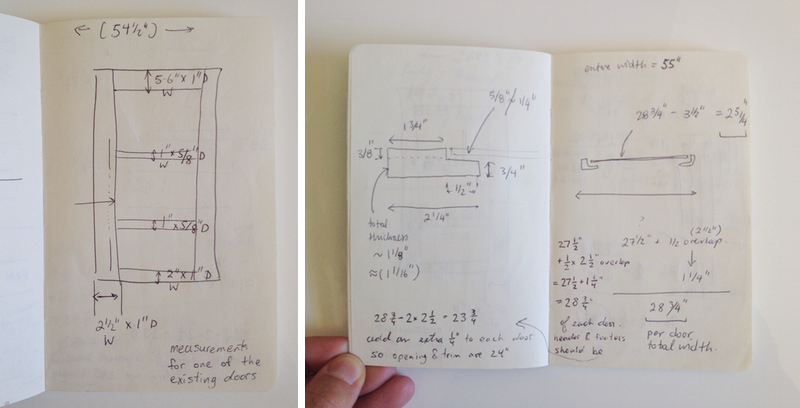
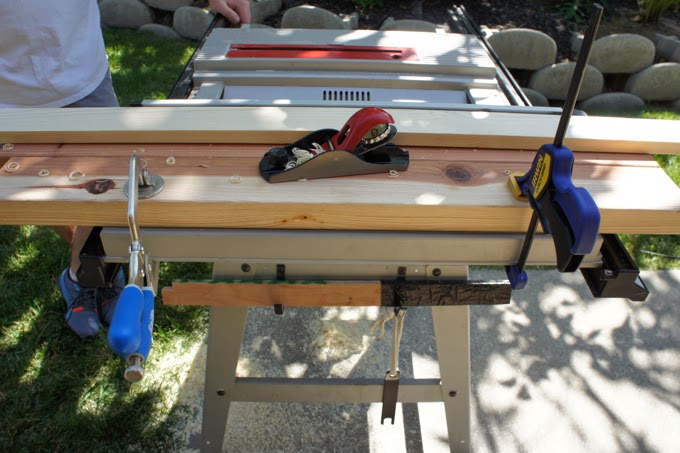
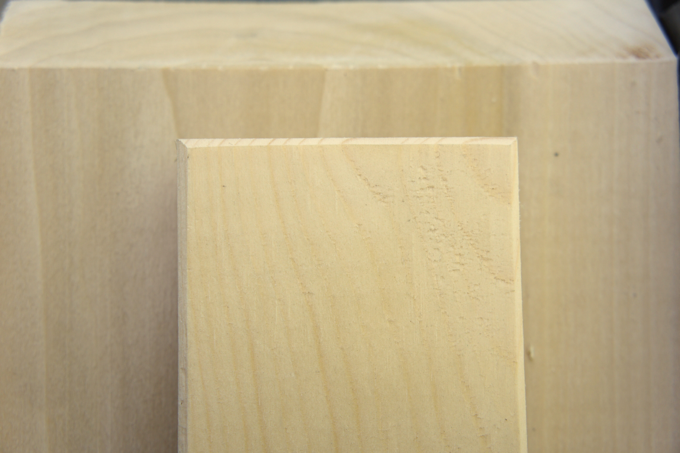
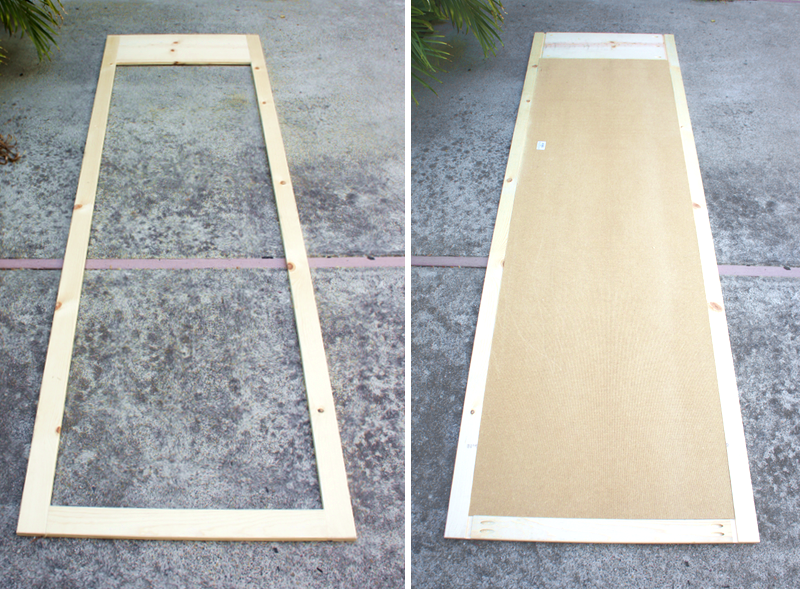
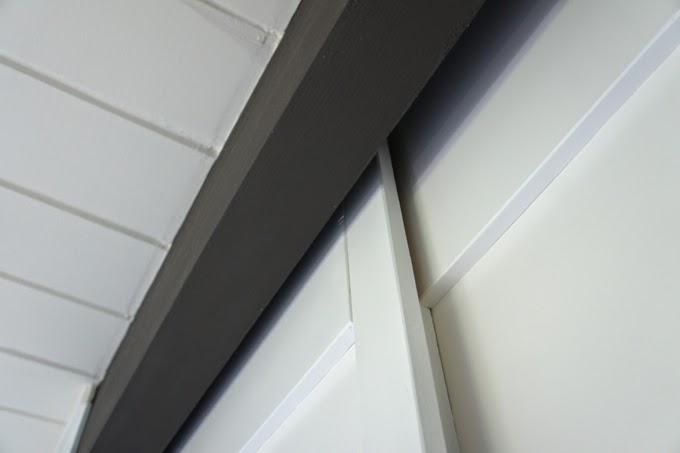
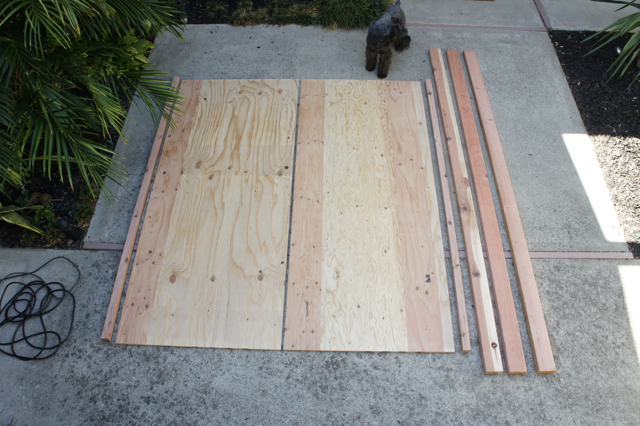
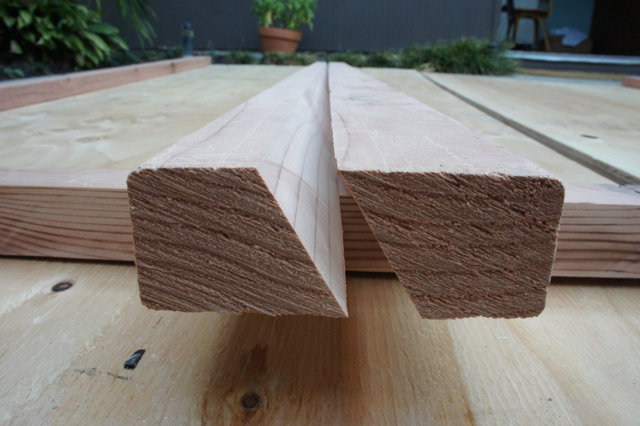
We considered re-using the original trim (made of redwood!) but sadly it was in rough shape and rotting in a few places too.  So, we ended up purchasing new trim at the hardware store.  We took exact measurements of the old trim and cut new pieces.  This involved chiseling out part of the back of each trim piece to accommodate the metal brace you can see on the pillar above.  Here’s to developing new wood-working skills!

We felt pretty good about making the new trim until we put it up and realized we couldn’t make the end piece line up with the trim.  AT ALL.  It turns out that nailing trim up is the most inexact method of attaching it to your house and we puzzled over this for a long time.  Also, I imagine our beam and trim weren’t perfectly straight either.  Sadly, I don’t have pictures, we were that absorbed by this conundrum.

It wasn’t until after our vacation that we solved it.

Weekend 3:  Pull trim off, re-attach, seal, prime and paint!

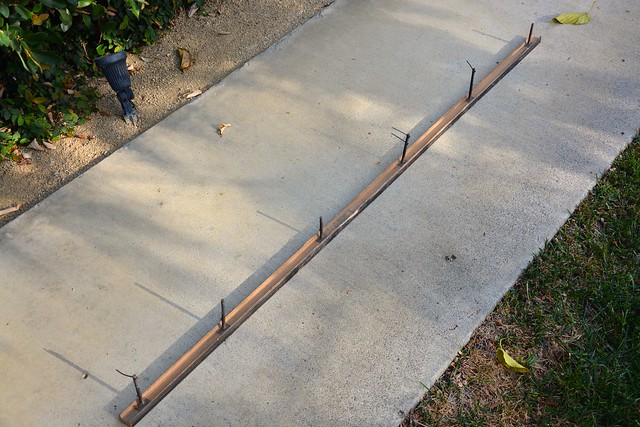
There was a lot of brainstorming this weekend.  On Saturday, we actually (carefully) ripped off the trim on the back of the beam.  Then we nailed the end cap to the front trim, by first partially driving nails through it, then having multiple hands hold it while hammering.

Once that was in place, we attached the back trim with a screw.  Lined it up with the end cap, and fixed it in place with a second screw.  We then nailed it and the end cap in place completely and removed the screws, applied wood putty over all the nail holes and called it a day!

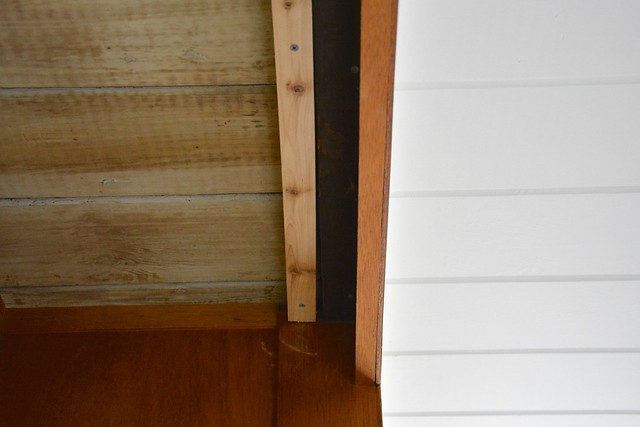
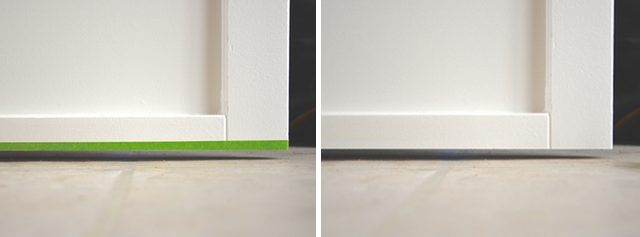
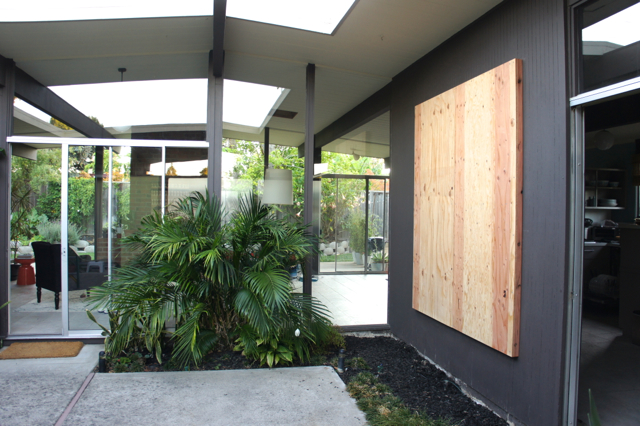
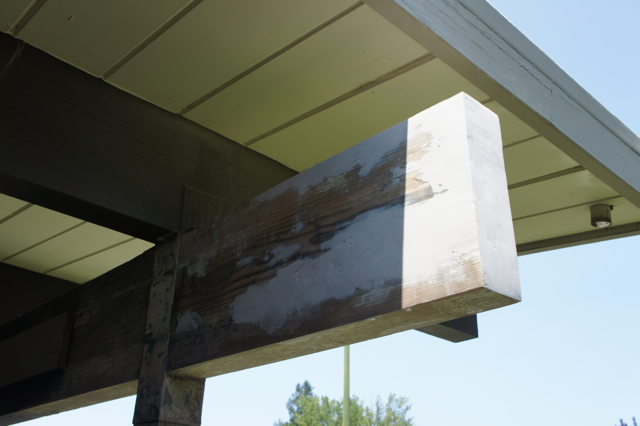
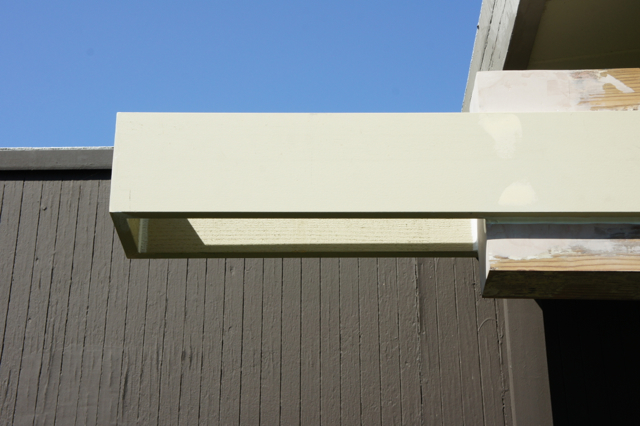
On Sunday morning, we caulked all around where the beam and the trim met.  I sanded down the wood putty and then primed the whole thing:

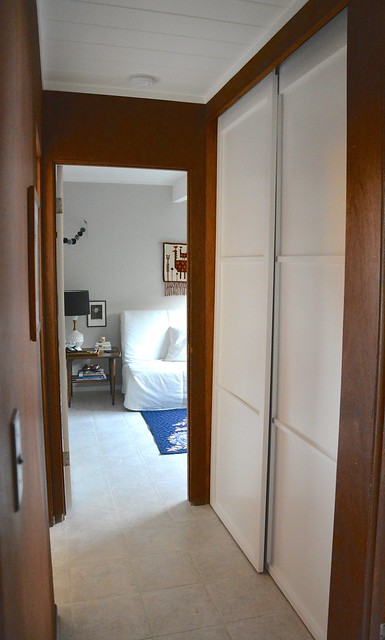
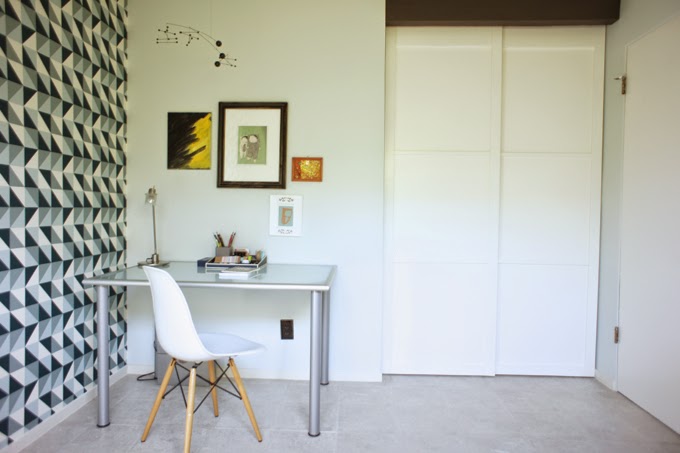
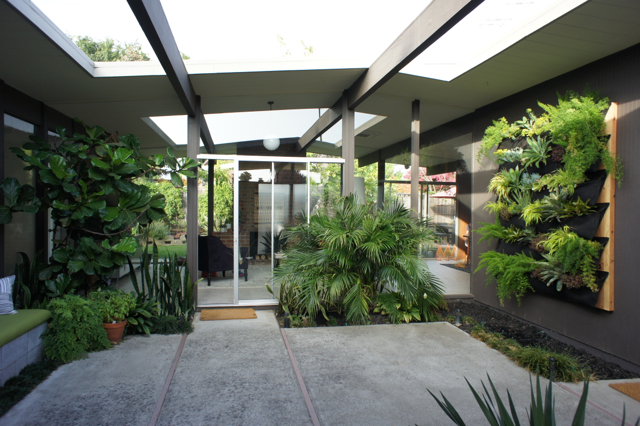
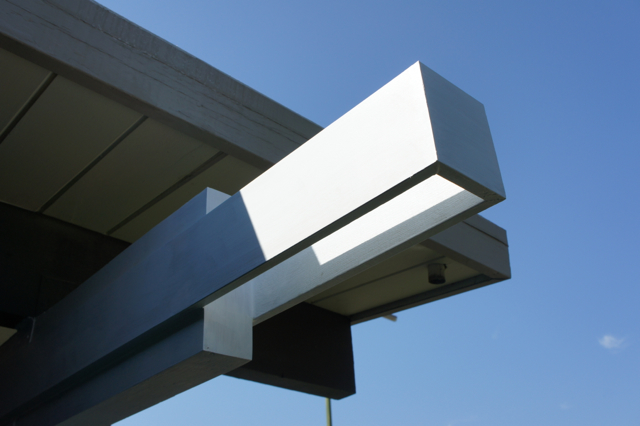
Then painted.  This was the most exciting part:  our house was BACK!

Yeah!

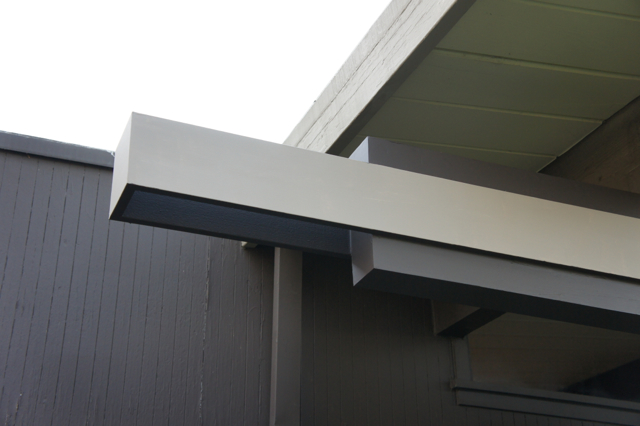
Everything is back in place and looking great.  Though I think it just inspired us to pick at all the other beams, patch them with epoxy, and replace the siding.  Wouldn’t it be great if everything were as crisp and freshly-painted as this beam and trim?

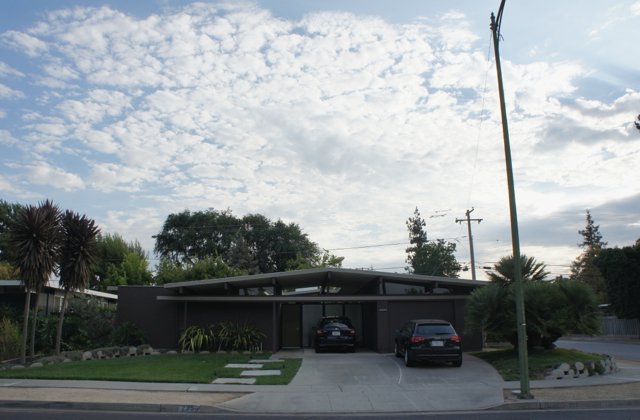
But just for now, perhaps it’s time to pause and enjoy some fluffy, happy clouds and pat ourselves on the back.

I need to catch my breath a little, before the next project.

To see where we started, check out my post:  beam repair, part 1.

diy projects

living wall project planning

July 15, 2013

Hi friends!  I’m back from the tropical paradise that is Maui, Hawaii and sadly, I’m rather under the weather (allergies, I think).  I was hoping to finish our beam repair project this weekend, but alas, I’ve been on decongestants and antihistamines and, mainly, my face for most of the day.

But, what’s better than lying around sick and bemoaning unfinished projects?  Lying around sick and planning new projects, of course!

On Saturday, before I took a turn, David and I ventured up to San Francisco.  Among other things, I stopped in at Paxton Gate to confirm that yes, their living wall is still awesome, and yes, I am still pining for one.  Then we found our way to Flora Grubb Gardens.

Living walls at Paxton Gate (left) and Flora Grubb (right)

I love plants and Flora Grubb has a selection beyond what my local nurseries carry.  And, I spotted their version of the living wall made with Woolly Pockets attached to a sheet of plywood.  DIY ideas instantly came to mind.

Here’s the plan:

  1. Frame the back of a, let’s say, 4×6′ sheet of plywood with some 1-2″ lumber.
  2. Cut a piece of the same lumber to make a wood cleat for hanging.  Attach half of the cleat to the back of plywood.   (See woodworking master Ron Hazelton for how to hang pictures with wooden cleats if you’re interested.  His videos are so helpful.)
  3. Hang the plywood frame in the atrium, by attaching the other cleat to our siding.  On the wall where our useless bougainvillea used to be.
  4. Attach rows of Woolly Pockets across the entire surface of the plywood, run drip irrigation through, and then plant like crazy!

I like this project because a) I’ll get to do something fun in our atrium, b) I get to buy plants! so many plants!, and c) it justifies the purchase of a table saw.  Trifecta.

Other appealing aspects:   This will be much more affordable than the Paxton Gate installation even with the purchase of a saw.  And I know that our siding will be protected from moisture, thanks to the material used to make Woolly Pockets and the added distance the plywood frame will provide.

Now, let’s see what else I can plan up tonight!  Have a great week everyone!

All photos by Karolina Buchner

diy projects weekend

weekend project: staghorn fern mount

April 8, 2013

Hello all [four readers]!  You’re probably wondering what I was up to this weekend.  Dying to know!  I get it!

Before I get to the pretty below, it must be noted that the major time-suck this weekend was due to my abrupt realization that we absolutely need to power-wash our concrete patio slabs.  Which we did.  For a number of hours on Saturday.  To not entirely satisfying effect.

Our concrete is the original and it’s looking rough these days.  After a winter under a layer of algae, the concrete in the atrium is now pock-marked with black spots that refuse to be removed.  Now that I have grossed you out, let’s move on!

So:

closeup of fern fronds

Yeah!

I FINALLY got around to mounting my staghorn fern.  It’s been growing like crazy, but sadly still in its original green plastic pot from the nursery.  This meant I needed to built a mount for it.  Fun times!

A week or so ago I picked up a scrap of plywood from the hardware store and decided to sacrifice one of our tomato stakes for this project.  After some sawing and drilling, I had a simple mounting board assembled.  Last weekend I picked up a fancy package of sphagnum moss at Paxton Gate (we happened to be in the city, and everything at Paxton Gate is so delightfully weird that I couldn’t resist.)  I later found that a very similar sphagnum moss is available at our local Ace (which I love!) for about half the price.

To mount the fern onto the board, I followed Apartment Therapy’s how-to but was not entirely convinced about having fishing line and a few nails supporting the fern.  After packing the moss and wrapping it with fishing line, I grabbed a square of burlap and stapled a skirt on this guy, to add more support.  It even has a little fringe.  Hey, maybe this fern likes skirts.  And fringes.  Don’t judge.

burlap cloth over fern roots

It’s looking much more dignified than it was in its plastic pot, sitting on my bathroom floor, occasionally being kicked over, and spilling its dirt.  Oh!  
I’m happy with how it turned out, even with the extra burlap.  And the fern looks happy too.  Awww.
diy hobby room lighting projects weekend

weekend project: sconces in the hobby room

March 27, 2013
wood paneled room

I’ve been trying to figure out what to do with this room for just about 2 years now.  It is starting to come together and I’m pretty excited.  You can check out the previous incarnations of my plans for it here and here, … oh and here!

I love the mahogany walls.  But they make this, hands down, the gloomiest room in the house.  Those walls = love + gloom.  SIGH.

To try and bring the 2+ years of over-thinking to a close, I did seek professional help whilst attending AB Chao’s Dewit Design Camp last year.  AB very helpfully suggested sconces on either side of the sofa.  And since this is going to be a man-cave no matter what, we decided it had at least be a very well-lit man-cave.  I’ve been hunting and scheming ever since.

My first attempt back in January involved George Nelson Bubble lamps since I wanted maximum un-gloominess.  They were pricey and very, very pretty but they were just… not…. right.  Not enough light and weirdly too large for the room.

I think I knew all along.  What I really wanted to try were silver-tipped bulbs in super-simple sconces.  Like these from The Brick House.  Or perhaps a bit more sleek and modern, like the Artemide Teti in black, which turns out to be really hard to find.

I was worried that the sconces might just light up part of the walls, which absorb all light like giant, mahogany sponges.  However, with DWR refund now in hand, I figured I could do this for much less than the Bubbles, and make them custom.  Custom = so much more fun!

light fixture on wall

Cute, right?

They may be wee, but they are bright.  And I am quite happy with how they turned out.  They fit in really well with the aesthetic of the room.

light fixture off and on

Here are the goods required:

supplies to make the lamp
(Clockwise: cloth-covered cord, silver-tip bulb, offset plug, on-cord switch, back
 plate, ceramic lightholder. Maybe $50 total. I think the bulb was the priciest thing here, at $8.)

The offset plugs are great for plugging in behind the sofa, allowing us to push the sofa up against the wall without worrying about cords getting mashed, as they do.

offset plug detail

Of course, we triple-tested everything we wired using the multi-meter that Dave got for Christmas.  Because we are NERDS.

metal plate attached to wall

I drilled through the lip of the metal back plate (the hole is visible at the bottom).  With a regular drill, which required some patience/foolhardiness.  I kept it as just a hole rather than a notch in the edge of the plate, for reasons I can’t quite explain.  A notch would have made assembly SO much easier (no threading of cord through the hole).

Also, gloss spray paint on ceramic looks surprisingly OK:

ceramic socket attached to metal plate

Basic how-to:
  1. Paint.  I used spray primer and then with gloss black spray paint.
  2. Drill holes in the metal back plates to accommodate cord.
  3. Mount back plates to wall.  We used a laser level to make sure they lined up.
  4. Wire and assemble!*

I found most of my materials at the local hardware store and ordered some cloth-covered cord from Grand Brass.  The silver-tipped bulbs are from 1000 Bulbs.

*Disclaimer: I am not an electrician so assemble at your own risk. The ceramic lightholders are meant to be mounted on top of electrical boxes. I can report no electrical fires so far.

As a fun bonus, in the process of putting up the lights, I mocked up my whole vision for the wall using masking tape.  You really don’t need to see a picture of that since it was quite hastily done and very lopsided.  Trust me.  Upshot:  Now I know that I want a 4×5’ piece of art.  That should be both affordable and really easy to find, right?

While I ponder that, please enjoy this gratuitous shot of Winston appreciating the room, post-lamp-installation:

small dog on sofa

All photos by Karolina Buchner