All Posts By

Karolina

diy projects

living wall project planning

July 15, 2013

Hi friends!  I’m back from the tropical paradise that is Maui, Hawaii and sadly, I’m rather under the weather (allergies, I think).  I was hoping to finish our beam repair project this weekend, but alas, I’ve been on decongestants and antihistamines and, mainly, my face for most of the day.

But, what’s better than lying around sick and bemoaning unfinished projects?  Lying around sick and planning new projects, of course!

On Saturday, before I took a turn, David and I ventured up to San Francisco.  Among other things, I stopped in at Paxton Gate to confirm that yes, their living wall is still awesome, and yes, I am still pining for one.  Then we found our way to Flora Grubb Gardens.

Living walls at Paxton Gate (left) and Flora Grubb (right)

I love plants and Flora Grubb has a selection beyond what my local nurseries carry.  And, I spotted their version of the living wall made with Woolly Pockets attached to a sheet of plywood.  DIY ideas instantly came to mind.

Here’s the plan:

  1. Frame the back of a, let’s say, 4×6′ sheet of plywood with some 1-2″ lumber.
  2. Cut a piece of the same lumber to make a wood cleat for hanging.  Attach half of the cleat to the back of plywood.   (See woodworking master Ron Hazelton for how to hang pictures with wooden cleats if you’re interested.  His videos are so helpful.)
  3. Hang the plywood frame in the atrium, by attaching the other cleat to our siding.  On the wall where our useless bougainvillea used to be.
  4. Attach rows of Woolly Pockets across the entire surface of the plywood, run drip irrigation through, and then plant like crazy!

I like this project because a) I’ll get to do something fun in our atrium, b) I get to buy plants! so many plants!, and c) it justifies the purchase of a table saw.  Trifecta.

Other appealing aspects:   This will be much more affordable than the Paxton Gate installation even with the purchase of a saw.  And I know that our siding will be protected from moisture, thanks to the material used to make Woolly Pockets and the added distance the plywood frame will provide.

Now, let’s see what else I can plan up tonight!  Have a great week everyone!

All photos by Karolina Buchner

furniture love

love: miyazaki chair factory

July 10, 2013
Aloha, friends!  As you might tell from my posts on Instagram, I’m on a vacation tag-along trip in Maui right now, and so thought it might be fitting to share this as we’re half-way to Japan, right?  I’ll be back next week, in the meantime – hope you’re having a great one!

A few months back, I posted about a certain settee and how it looked like an anime monster.  I only recently noticed that I was getting hits to my blog from searches for terms like “miyazaki furniture” and was a bit puzzled as to why.

After digging around, I was pleased to discover that Miyazaki Chair Factory is a furniture maker in Japan.  And even more pleased to discover that their stuff is A-MAZING.  For the chair-obsessed, like me, these images may be a little too exciting.  Miyazaki’s chairs look handmade and gorgeous and I want to touch ALL of them.

From top:  Hata, Kuku / Kuku Muku, and Pepe

I am in awe of the craftsmanship that goes into these.  You’ve got to love a company that talks about its team of craftsworkers, who use machines as their “extended hands” and are continually honing their skills.  It’s definitely reflected in a product that shows how carefully and beautifully it was made.

While the adorable cantilevered Kuku (in the second and third pictures above) comes in at a close second, the DC09 might be my favourite of all:

A number of the recent chairs at Miyazaki, like the DC09, are by design firm Inoda+Sveje, a Japanese and Danish design duo.  I love this blend of design sensibilities which seems to be best embodied by the DC09.  It’s so reminiscent of Danish v-leg chairs but with a more refined, sculptural quality.  Denmark meets Japan.

Inoda+Sveje’s work also includes the IS sofa.  I am trying to imagine it in person, and it’s making my brain tingle.

 
Yes.  This thing exists and is a real sofa.  For real.

I think of all of these pieces as works of art.  Indeed they are quite pricey.  But then, maybe you’re in the market for an investment chair or two?  If so, let’s get together and discuss over lunch, please!

Regardless, if you’d like to see more of these beauties, check out Miyazaki Chair Factory, whose site includes a very charming description of each chair and the story behind it plus a peek into their manufacturing process.

(Not a sponsored post.)

All photos via Miyazaki Chair Factory and Inoda+Sveje

food and drink

time for a drink: my favourite tea, iced

July 2, 2013
http://dearhouseiloveyou.com/wp-content/uploads/2013/07/1c353182e1fd11e28d8c22000a1f9ad6_7-300x300.jpg

After nearly melting these past few days, I thought I’d share the best beverage I had this weekend:  homemade iced tea!

I realize it’s a bit tame, as far as drinks go.

You see, we spent most of our weekend toiling outdoors in the SWELTERING heat, covered in dust and sweat, working on our beam repair project (which is looking good!) and alternating between hydrating with water and OJ, ad nauseum.  When we finally finished up on Sunday evening, after dinner outside on our patio, I needed something different.  And while I tried, I only managed to consume maybe half a beer all weekend.  It just didn’t seem like the right thing.  I needed to recover from being in the sun and feel less sleepy, not more.  Full credit goes to David for this beverage idea!

What’s special about this iced tea is the tea itself.  I’m not much of a fan of iced tea (Dave is), but this tea makes it.  Our pantry typically contains at least six different kinds of tea, and when Dave asked me which to brew up, I thought we should try the very best one (heck, we worked hard and deserved something awesome!):  Summer Tea from H.R. Higgins (Coffee-man) Ltd.
The tea has a story, which needs to be told.

I first bought this tea on a high school trip to England, what seems like about 100 years ago now.  One of my in-the-know friends insisted that we visit the H. R. Higgins shop on one of our free days.  I don’t recall if it was tea or coffee she was after, but after inhaling the aromas of the teas in the shop, I knew that some tea had to come home with me.  Summer Tea both looked and smelled amazing, so I bought a little tin of it and packed it securely in my suitcase.

Fast forward a few years to university, when I met my husband David.  One of our dating rituals was having tea together in the evenings, up in our dorm rooms, as poor students in a land of non-existent public transportation might do for fun on a weeknight.  We probably got this little tin down to the dregs during those years.  When we finally got married, we gave our guests tiny round tins of tea as wedding favours.  And that is how I came to own a whole kilogram of the stuff, thanks to the olden day wonders of online shopping, shipped direct from the UK!
It’s still in its original box in our pantry and, miraculously, still smells and tastes great.  It looks a bit similar to potpourri in an almost unsettling way, but fear not.  The black tea that is its base is quality stuff.  And there are tiny flowers and petals throughout:  corn flower, marigold, and a few others.  So pretty to look at.  The floral flavours in the tea really make it so summery and deserving of its name, and, perfect for iced tea!

And so, for the curious, the exact making of that iced tea goes something like this:
  1. Place three heaping teaspoons of loose tea into an infuser, and place it in your tea pot.  I like to use a ball-shaped infuser.
  2. Boil freshly-drawn water, then pour over the tea.
  3. Let the tea brew with the top off, so it cools.
  4. Add five teaspoons of sugar to your pitcher.  Pour tea into pitcher and top with lots of ice.
  5. Sit on your porch or patio, preferably under some string lights, serve in cute mid-century glasses, and enjoy!

So simple, and sooooo good.  Fresh flowers from the garden are optional, but highly recommended.

Cheers!

All photos by Karolina Buchner
guest room house tour interiors

house tour: guest room

June 27, 2013


As a respite from that ugly beam (sorry guys), I thought I’d continue with our house tour and share my favourite room with you:  our guest room.  I love that it’s cozy and kind of its own little world.  It’s on the small side, just about 10′ square.

Here’s what the my rough plan for the room looked like, back in the day:

guest room

The Danish wall hanging was the jumping-off point for the neutral and warm palette and accessories.  It was featured on the Etsy blog as a pick by Morgan Satterfield of The Brick House, and given how much I love Morgan’s style I probably deliberated for about thirty seconds before buying it.

When we don’t have overnight guests, which is most of the time, this room is my little hide-out. 

I really love the light that comes in here, even if it’s only a few short hours a day, especially when it’s all dappled through the matchstick shade.  It’s very satisfying to sit in on a sunny weekend morning with a cup of tea and my magazines (ok, they are mostly catalogs).  I get to take in the light without feeling too guilty about not being outside bright and early.

While the basics of the room came together pretty early on, I’ve been tweaking it here and there.  The above sunny shots were taken early on in the process, and I couldn’t help but to include them.  They’re so bright and happy!  Having recently added my staghorn fern mount and a few accessories, there’s more dimension to the room now and I’m liking the feel of it.

Resources: Bassett side table from Midcentury Mobler; stump side table from West Elm; rattan tray from Crate & Barrel; sheepskins from IKEA; Danish wall hanging from Project Sarafan; midcentury ceramic lamp from Loverly Vintage; kilim pillow cover from Sukan; onyx-marble polyhedron from Sky Parlor; cacti screenprint from Banquet Atelier; bud vase from Heath Ceramics

I realize there is some inconsistency across these shots but I keep messing with things and then re-shooting.  And it’s a teeny room to try to shoot!  I basically have to smoosh myself in any void possible to get head-on shots of furniture.  Anyway, enough sobbing.  I love my teeny room nonetheless.

Of the things I’m not quite satisfied with, one is the rug.  The IKEA Beddinge sofa I guess I’ll live with (it is comfy for sleeping), but the rug I can change.  I enjoy that crewel-work rug tremendously and got a super deal on it at Anthro a few years ago, but it doesn’t really fit with its gigantic paisley pattern.  And, after seeing some great patterns around, notably on Design*Sponge, I am considering some options.

You know what that means . . .

Rugs clockwise from top left via Old Brand New / Overstock / Overstock / Imogene & Willy

The Navajo patterns are so good.  All those triangles and great colour combinations.  I will let you in on a secret though:  the kilim rugs on Overstock are surprisingly great.  The one in our dining room previously came from there, so I’m quite tempted to take another gamble and try.  Vintage rugs are so lovely, and definitely have a different feel to them, like the beat-up one captured by Dabito above.  Still, the third rug in that set looks pretty fantastic.

Perhaps I could achieve the worn-in look by letting Winston spend some time with my new rug?  Sounds like a plan to me.

Photos (except rugs) by Karolina Buchner

projects weekend

weekend project: beam repair part 1

June 19, 2013

dear house,
i love your beams.
i really, really do.
xo
karolina

 
This weekend, Dave and I embarked on the first serious repair work we’ve ever attempted on the house:  fixing a beam affected by dry rot.

Sure those exposed beams are pretty, but they take a beating thanks to the hot California sun in the summer and torrential rain in the winter.  This beam in particular is on the more exposed side of the house without a roof overhang to protect it and it’s in a sorry state.

After noticing some chipping paint a few weeks back, Dave took a toothbrush to it and found that he was able to brush away a lot of the wood out of the beam as it disintegrated into dust.  Leaving gaping holes.

Brace yourselves.

Pretty horrific.

BUT since the beam rot doesn’t affect anything structural (it stops about a foot shy of that post, which, yes, is holding up our roof) we’ve decided to have a try at repairing this ourselves.

Here’s our plan of attack:
  1. Remove the decorative outer trim (the beige stripe) surrounding the beam.
  2. Strip the paint from the beam (and heck, why not strip the post supporting the beam while we’re at it!)
  3. Chip out as much of the dry rot as possible from the beam, until only stable wood remains.
  4. Treat the wood with wood hardener or ‘consolidant’ as the pros call it.  (We’re using Minwax Wood Hardener.)
  5. Patch the beam with epoxy filler.  (We’re using Bondo, which you can get at car repair shops and some hardware stores.)
  6. Sand the beam back to its usual profile.
  7. Re-apply the trim, caulk, prime, and paint!
Should be easy, right?

Before starting the work, we had a chat with a local contractor to make sure our plan wasn’t completely crazy and, of course, consulted the internet and watched endless minutes of fix-it shows and demonstrations of this and that wood repair wonder product, wherein I may have developed a soft spot for this man.

We got through steps 1 and 2 this weekend.  Mainly because we do not own many power tools, and had to lovingly hand-saw through the trim.
As a side note, after reading Karen’s post over at Destination Eichler (which you should check out!) about shou-sugi-ban, a Japanese technique for preserving wood, I was fascinated to find that the edges of the original trim had obviously been intentionally burned.

All of the 45 degree joint edges were charred black!  I wonder if this was a common practice in Eichler construction, or if it may have been particular to the builders who worked on our house.  Oh, I do love me some good house archaeology.  The intrigue!

Anyway.  Ew:

The house now has some serious ‘This Old House’ curb appeal.  I keep telling myself it gets worse before it gets better, but it’s certainly cringe-inducing to look at right now.  Stay tuned!
the best things

the best things this week

June 15, 2013

I thought I’d share a round up every now and again of things that have caught my eye lately.

This week:

  • Emily Henderson’s living room reveal has me wanting a jewel-toned sofa.  Perhaps in emerald green!
  • Dave and I have always joked about this, but the ladies at A Beautiful Mess have gone ahead and made it reality:  a piñata filled with tiny bottles of liquor.
  • I found this amazing Etsy shop of Moroccan Boucherouite and Beni Ourain rugs:  Bring Your Own Sunshine.  Isn’t that a great name for a shop?  I love it.  The rugs they source are like works of art. I almost wanted to keep this find to myself. Almost.
  • I want to go to a camp for grown-ups.
  • What a clever idea for a photographer’s business card.  I am a fan of slides.
  • Speaking of slides, in case you missed it:  a teeny tiny, adorable projector for your Instagram pics.
  • Because I have a fascination for the creepy and sometimes grotesque, I can’t stop looking at these paintings of 1950s suburban homes via 20thCenturyGoods, also on Etsy.  (Can you tell it’s been a rough week?  Etsy is my escape.  It’s like a getting lost in a great little shop crammed with interesting things.  Some of which may have turned up in the mail already this week and are pictured above.  Oops!)
  • I just started playing with Over.  (To create the title pic here.)  It’s very cute but find myself wanting even more fonts and will likely use it sparingly.  I love the convenience though.  I’m curious what you all use.  Any recommendations for those days when I don’t want to edit photos on my laptop?  Let me know!

Happy weekend everyone!

interiors projects

yahoo! labs

June 11, 2013

dear house,
sometimes i can get all crazy and design and paint and furnish whole floors of other buildings!
i know, i scare myself too.
xo
karolina

I’ve been meaning to share this side-project I did last year:  I designed a new space at my office!  Those of you who know me well, know that I work for a certain Internet giant, which has seen its share of rough times and a renaissance of sorts at about the time I did this project.  I just passed my 7-year mark there last week, so this seems like good timing to share!

First, some back story:  Mid-last year, the head of lab was relocating all of us (or, erhm, what was left of us) to a new floor on our main campus, and soliciting ideas for how to improve the space and make it our own.  I sent a few thoughts by email and somehow ended up volunteering to take on the whole project.  In my spare time.

This involved creating a new lounge space for people to hang out in and discuss ideas (whiteboards are critical in such places), a library area to house all three million of their old computer science tomes, and a general refresh of the hallways where our cubes were located.

Somehow I was lucky enough to be given a pretty free rein with what to do with the space, within reason and without major reconfiguration.  The most enjoyable part was completely gutting a conference room and turning it into a super-geeky, super-fun lounge space for my fellow scientists and engineers.

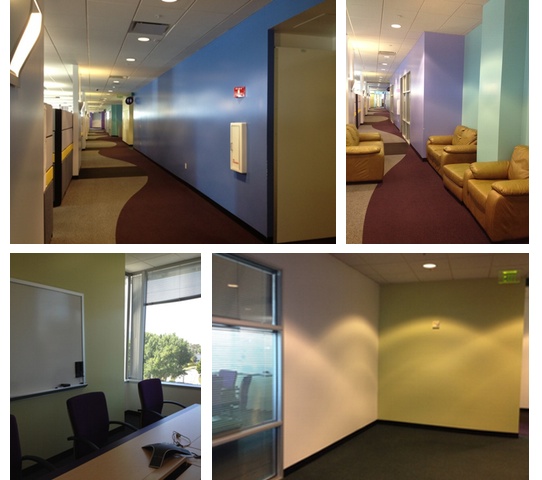
Here’s what we started with:

Yawn.  And dark.  And …. ew.  I secretly want to know where the inhabitants of this space found the baby-poop-yellow leather chairs.

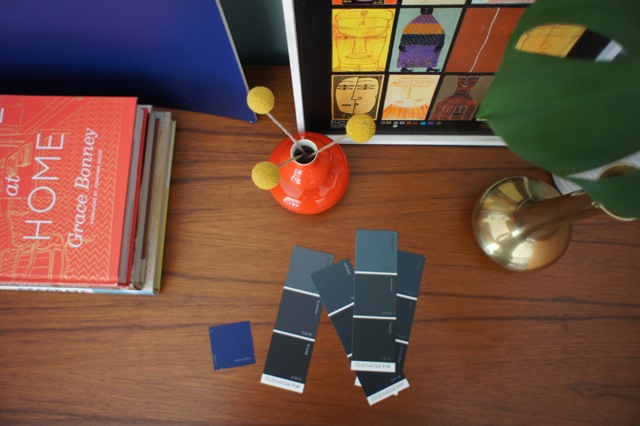
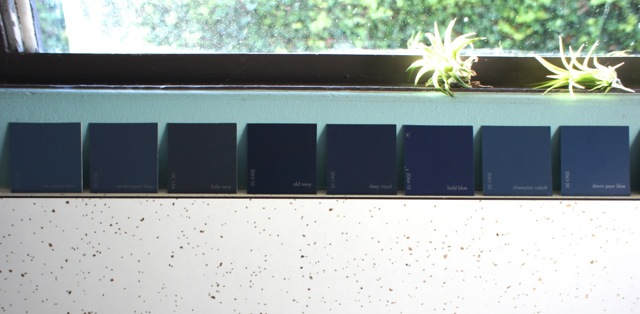
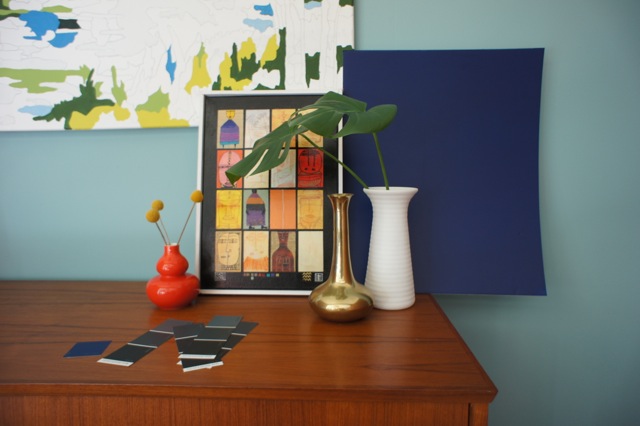
I went through some rounds of consulting with my ‘clients’, i.e., colleagues and managers, and pitched a look including full-on mood boards and pins, colour schemes, furniture options, and budgets.  I had a blast and I think they did too.  I don’t think research scientists tend to review interior design proposals very often and were quite amused to do so.  It was great to have something fun for us to rally around and to see the transformation take place.

Enough background.  Let’s have at it, shall we?
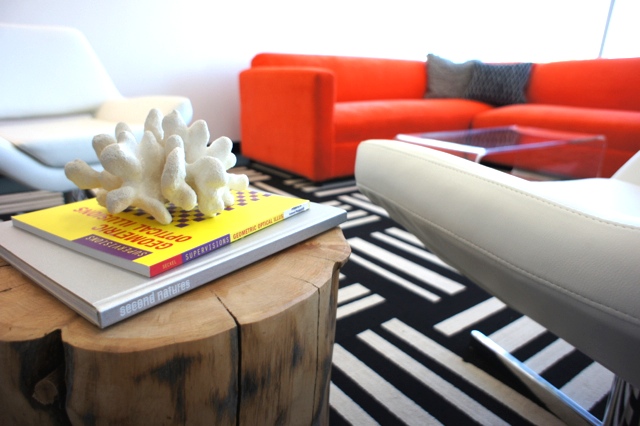
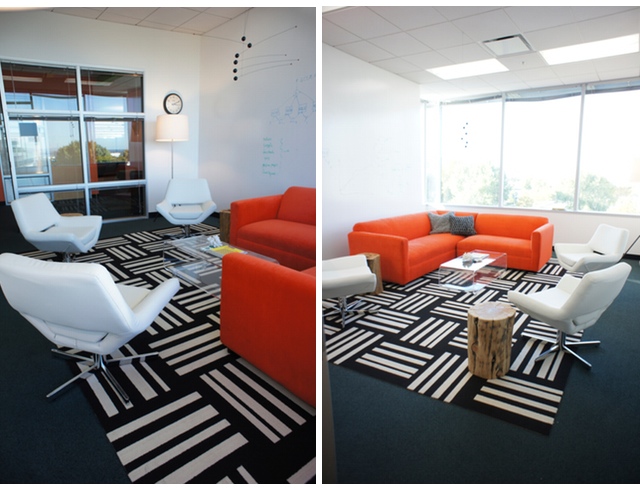
The lounge room:

Yeah, take that boring conference room tables!  For reference, this is the room pictured in the bottom left of the before shots.

So what’s in here?
 
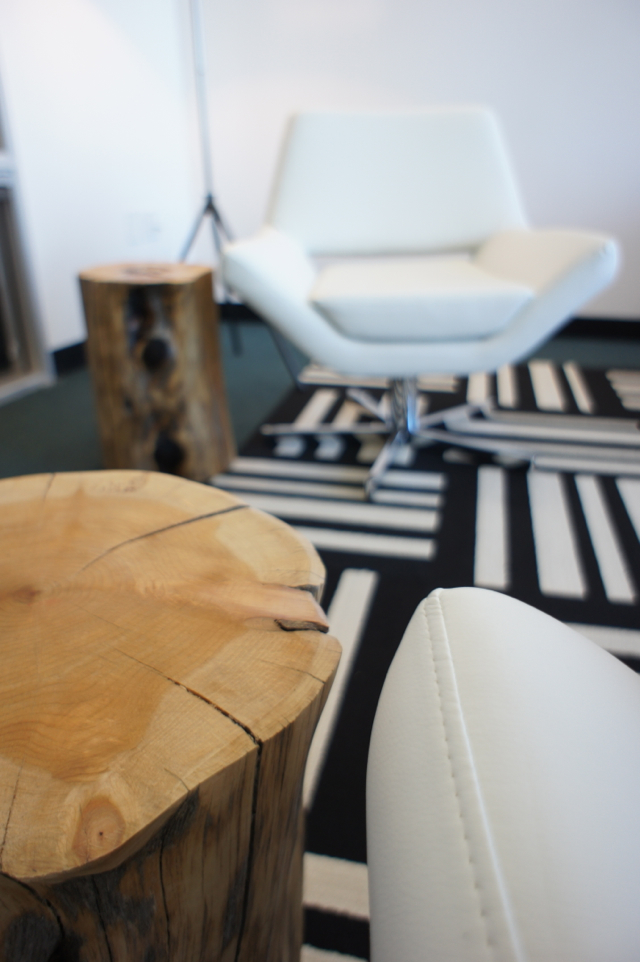
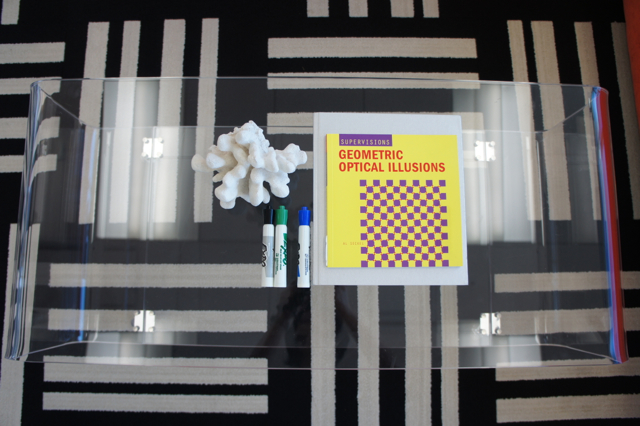
The orange sectional was from our office furniture inventory and the starting point for the room design.  The white chairs came from AllModern and I could spin and spin in them all day if given the chance.  Clear acrylic coffee table actually sold as a media console is from CB2.  The throw cushions and tripod floor lamps were also from CB2.  Wood stump side tables from West Elm.  FLOR tiles are the ‘Dashed Off’ style in black and white.  I looooove these and they really made the room.

We also got a big ol’ fiddle leaf fig tree installed behind the sofa, after months of waiting for it.  Sadly it is not pictured, as my patience ran out and paranoia about things becoming disheveled set in around the time these pictures were taken.  Please imagine it in all of its green, figgy beauty in the corner on the left.

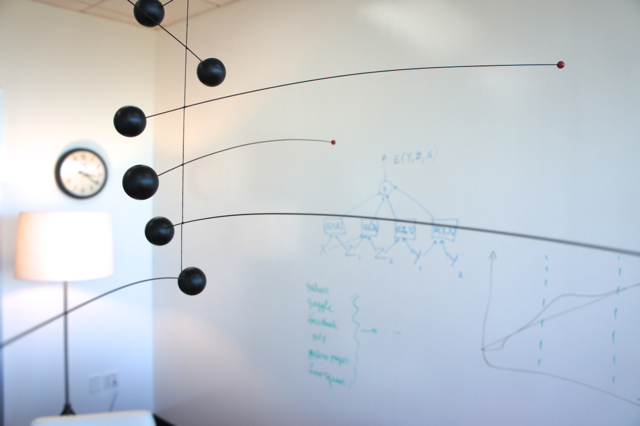
My design geek heart is happy that I got to incorporate the Flensted mobile.  It acts as a sort of chandelier to add a bit of dimension to this otherwise white box.

Speaking of white:  you’ll notice we ripped out the whiteboards.  To make sure plenty of brainstorming could happen in here, we painted the two main walls with IdeaPaint, which turns the whole wall into whiteboard.  It’s been holding up really well and gets used a LOT.

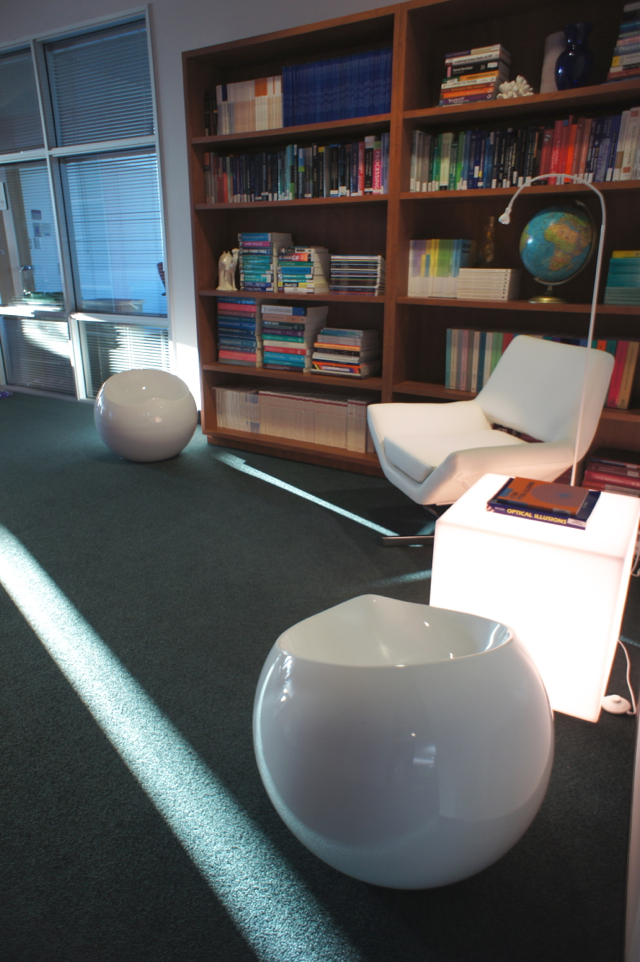
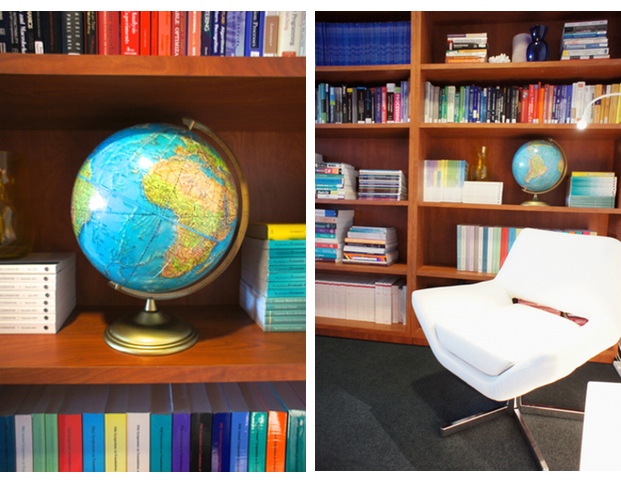
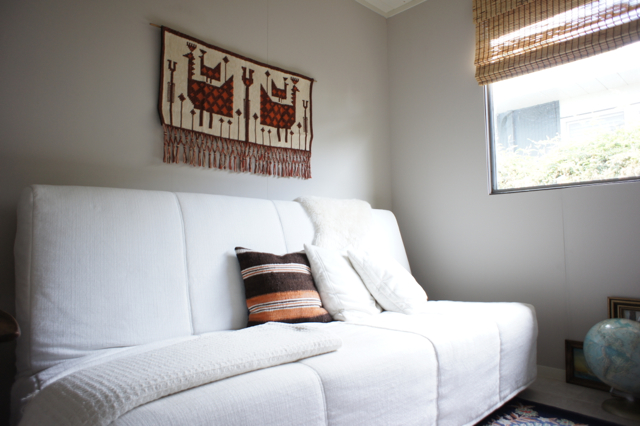
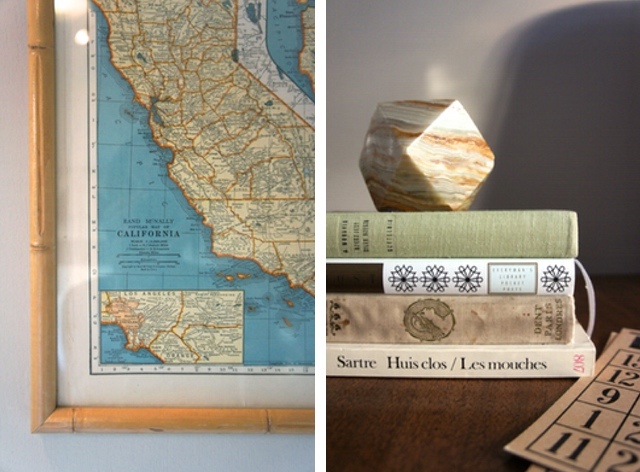
Another space was this little ‘library’ corner also nearby the lounge room (pictured before in the lower right).  This is in an area next to a bunch of conference rooms so it’s generally quiet.  A nice place to take a break away from one’s cube and read up on machine learning theory and computational linguistics, as you do.

Resources:  Lightbox table from Gus*Modern; white chair, AllModern; awesome spherical stools from Zuo Modern via Amazon; floor light from IKEA; globe and other accessories all thrifted; bookshelves from our office furniture inventory; scientific tomes all property of Yahoo! Labs

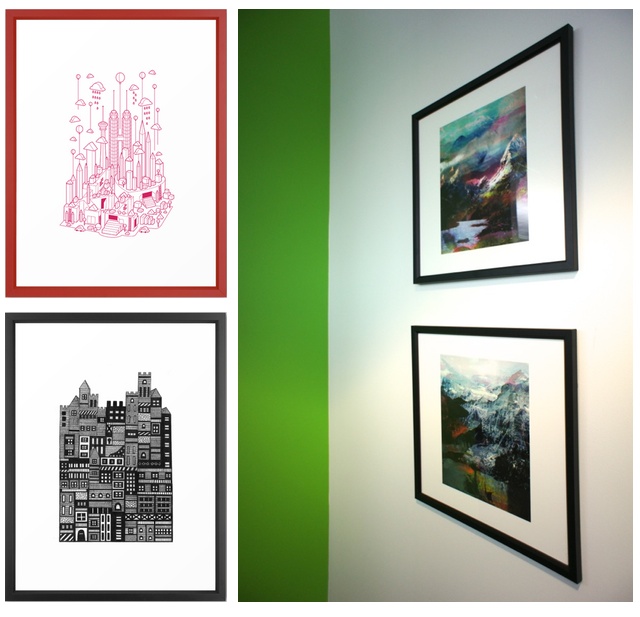
Throughout the halls, after taking painting most of the dark, dingy stuff out in white, we added some blocks of bright colour, chalkboard walls for more collaborative scribbling, and art.  I got a few prints from Society6 which I really enjoy to add interest without being overly rah-rah motivational or corporate, plus they came framed which made things very easy.

The red print is Kuala Lumpur by Steven Toang, the black Scandi-style print by Marcelo Romero, and the two technicolor landscapes by Tchmo.

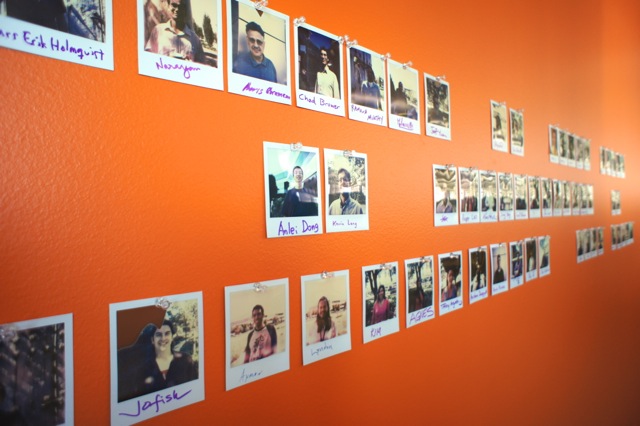
We also started a tradition of taking everyone’s picture and adding it to the big ‘wall of fame’, with a janky old Polaroid camera and film made by the Impossible Project.  Now when any new folks join, getting their pic taken is part of the welcome.

That paint colour, by the way, is Outrageous Orange by Benjamin Moore.

A huge THANK YOU for her advice and support goes to Alena Wallace, who is an actual designer and was super sweet about letting me try out my ideas.  The FLOR tiles were Alena’s suggestion and added a certain 2001: A Space Odyssey feel to the lounge that I love so much.  Alena, you rock!

I look back on this and think I was totally crazy to do it.  Almost all of it was done after-hours, except where contractors were involved and when colleagues were conscripted to help with furniture assembly.  I thrifted for props to style bookshelves and arranged them on a weekend.  On a weeknight, I got my husband to assist with installing things and hang up the prints.  I agonized over paint colours in my sleep.   I stalked our real estate and workplace team to get approvals for my plans (and was so lucky that they were cool with it).  And I had waaaaaaayyy too much fun.

And now when I see my colleagues having brainstorming sessions in that room, using the whiteboard walls, spinning around in the white chairs, I feel all warm and fuzzy inside.  I would totally do it again.

Uncategorized

beams

June 5, 2013

dear house,
you have some very nice beams.
xo
karolina

Oh, we do love our beams around here.  Except when they have dry rot.  The house is currently sporting a very glamorous black trash bag cover over one of the beams out front.  Wish us luck.

In the meantime, I’ve been pinning fantasizing about putting a hanging chair in our atrium, suspended from one of the beams of course.  I can dream, right?

http://dearhouseiloveyou.com/wp-content/uploads/2013/06/tumblr_mh0tkaMrOK1qcwiu0o1_500-204x300.jpg

photos:
top image by Karolina Buchner
hanging chair image source unknown

dining room

dining room update

June 3, 2013

So, yeah.  It’s been slow.  Sorry to have left you all with that Miyazaki monster for so long.

Progress:  we have a rug!

Anti-progress:  I am having cold feet about the wall colour.

This last weekend, I got a piece of foam-core board and painted a big piece with the Admiral Blue paint that I’ve been pining after.  It’s an awesome deep indigo blue.

Look how great a backdrop it makes:

But it looks almost black in low light.  I’m a bit concerned that with all the mahogany paneling, it might be too dark.

I have also turned our kitchen into a paint-chip laboratory.  I am constantly walking by squinting my eyes at all the chips, trying to get a feel for what they’d be like on a larger scale, in case I want to try a variation of dark blue.  And I’m still not sold.

I just might go white for the walls.  Or light grey.  My brain is going to explode, people.  Please send your decision-making energies my way.  Thanks.

While you do that, here’s a bonus shot of some peonies because it’s peony time!  I love these.  Most of all, because if I ever wonder which peonies to get, the answer is usually ‘just get ALL the peonies’.  I had two bunches in my house this past week (one white, one super dark pink), and I’m thinking I might pick up a few more.

You should too.  I’m pretty sure they’re proven to lift the even most decision-burdened of spirits.

Uncategorized

miyazaki in furniture form

May 29, 2013


WHICH ONE WILL WIN?!

If you’re fascinated by the crazy settee (as I am), head over to InMod where they have a bunch of these pieces.  I believe they are all named after Japanese foods or food-related terms.  Soba, sushi, tobiko, bento, miso…  This one is the Teppan sofa.  It looks like it could totally come to life and take on that monster, right?

And if you’re fascinated by the monster, you should check out Hayao Miyazaki’s brilliant films.  Spirited Away is my favourite.

I thought I’d share this peek into the weird part of my brain with you just for today, since it’s almost Wednesday, and this week going to be a full one.  I’m making progress on the dining room, if you’re following me on Instagram.  I’ll be posting an update later this week!

(Not a sponsored post.)

Image source:  Demon boar from Miyazaki’s Princess Mononoke