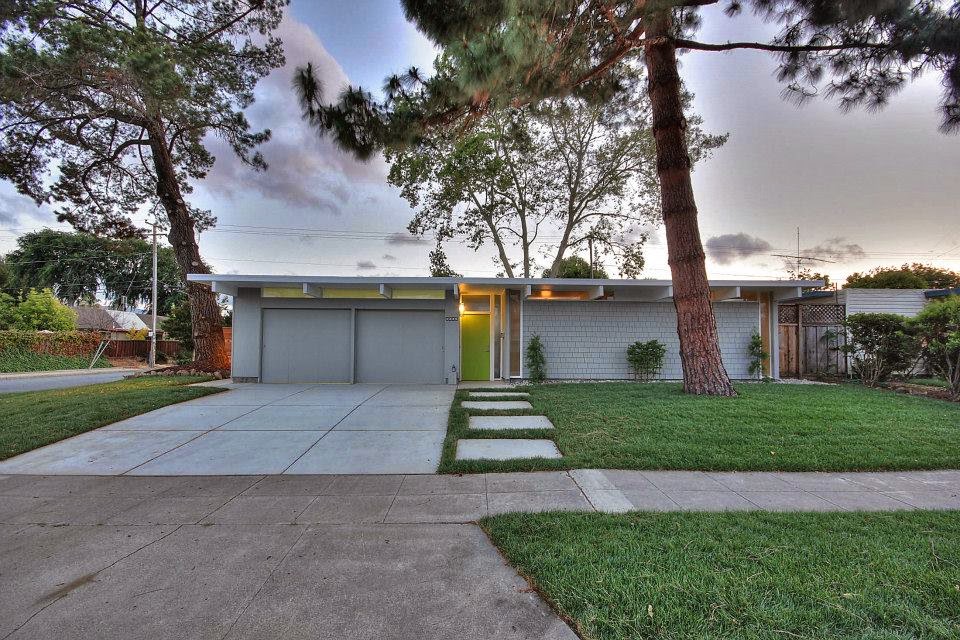
All Posts By

Karolina

diy eichler projects

diy reproduction eichler closet doors

June 18, 2014

dear house,
it’s been a while since we’ve done something for you, hasn’t it?
and so i have built you closet doors, out of purest love.
xo
karolina

There’s one room I haven’t featured here on the blog, mostly due to shame:  our office.  It was formerly a nursery and now serves as an office/ironing room/general catch-all/room of shame, albeit with some pretty great wallpaper to deceive the unsuspecting.  Part of its shame came from the sad closet door.  Well, when say ‘door’ I mean a sad, random piece of red material strung up on an IKEA curtain wire.  Which eventually failed, leaving the crammed closet innards for all to see.

 
After the IKEA curtain solution gave out (taking some drywall with it, UGH), we were left with a choice: install some ready-made closet doors, or try to match the doors to the original Eichler doors in the house. Due to certain compulsions of mine, I opted for the latter.  I thought of getting salvaged doors from a renovation, but that would have involved waiting around until the perfectly sized set of doors became available (probably never).

So: we decided to build some.  From scratch.  With our own non-expert hands.  #YOLO

This lead to the inevitable acquisition of more wood-working tools, but since the living wall project, I’ve decided to just jump into this sort of thing head first. I don’t particularly care how long it will take to complete a project.  After some high-level planning and convincing ourselves this is indeed feasible, we were a go.

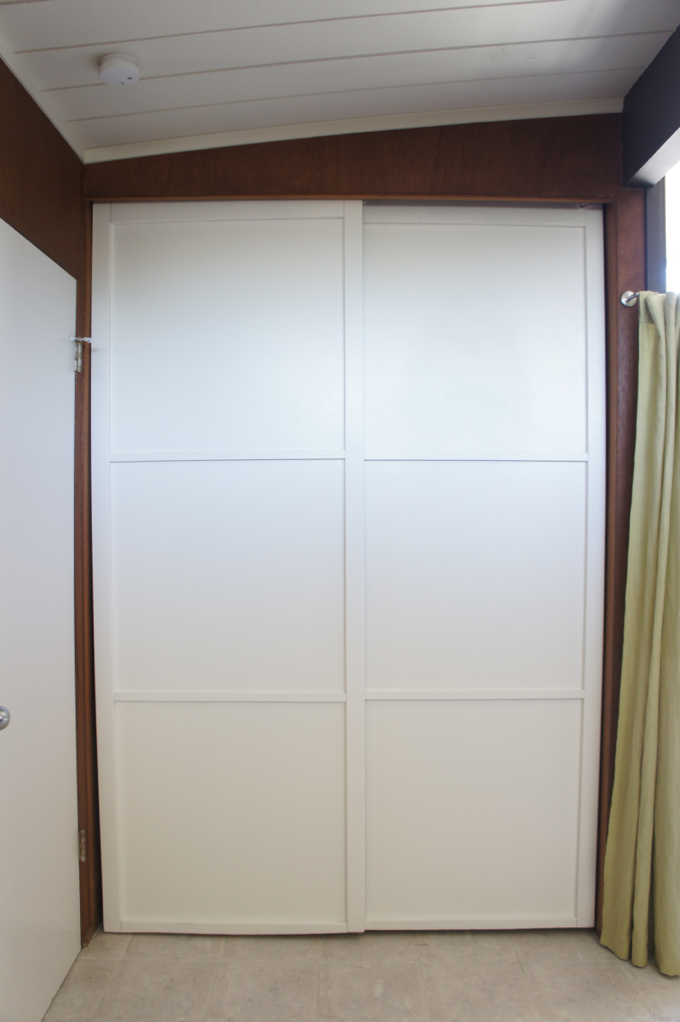
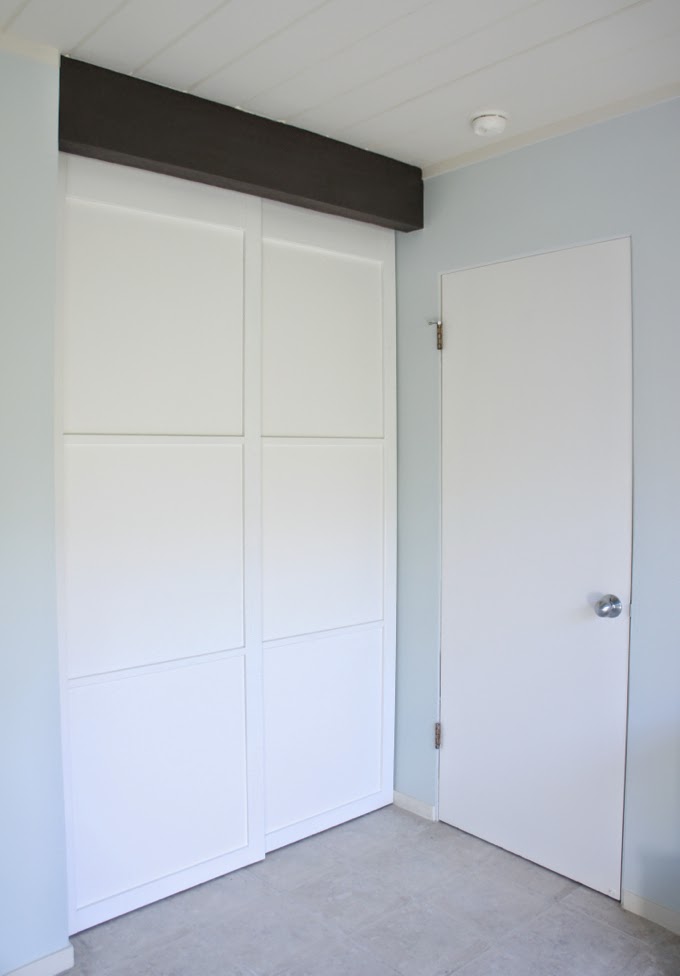
This is what the original Eichler closet doors look like in other parts of our house:

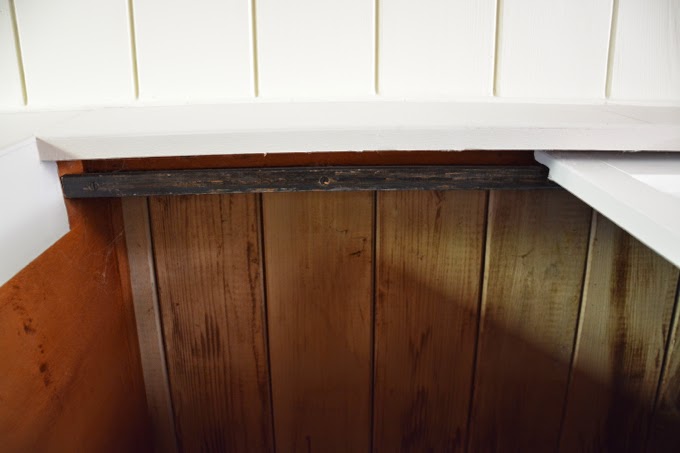
 The new doors are not a completely faithful reproduction. We didn’t use the same type of wood and we most definitely are not using the original hardware.  The original tracks of Eichler closet doors are made of wood, which at least in my house, are a total pain.

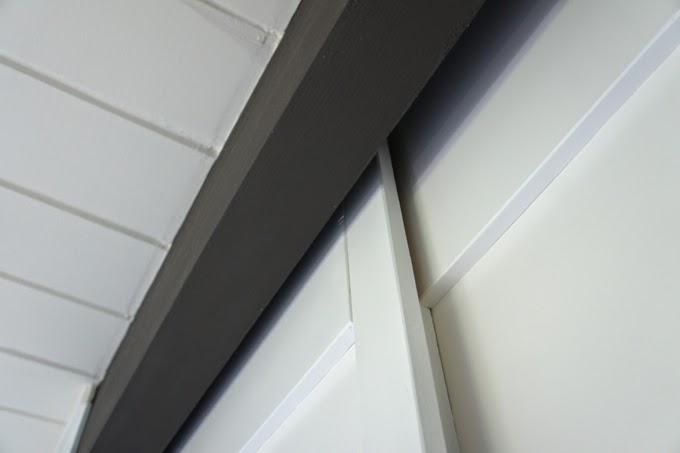
You can see the wooden track here (the black piece), looking up at the ceiling inside the closet:

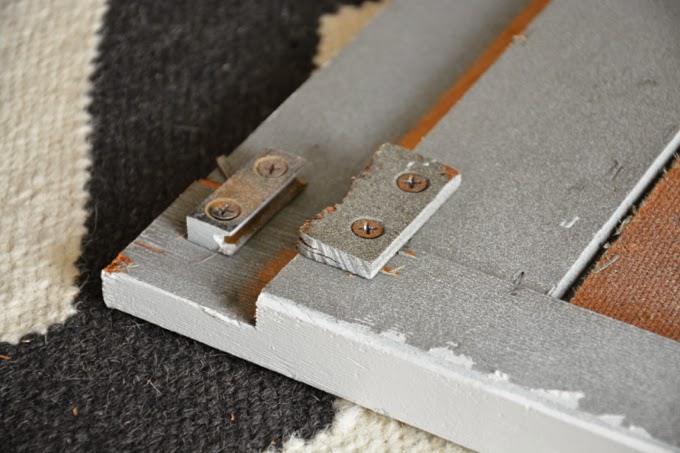
And that’s the “hardware” on one of the doors:  a metal slider at the top of the frame, and a cardboard bumper which looks terribly chewed up.  Our doors are often jumping off their tracks and getting stuck. For this project, we used standard roller and metal track hardware.

To start, I took down some of our existing doors to figure out the design. The original doors are built with 1 ¾” thick wood frames, and the panels are masonite boards.  We measured one of them carefully and determined what our dimensions should be.

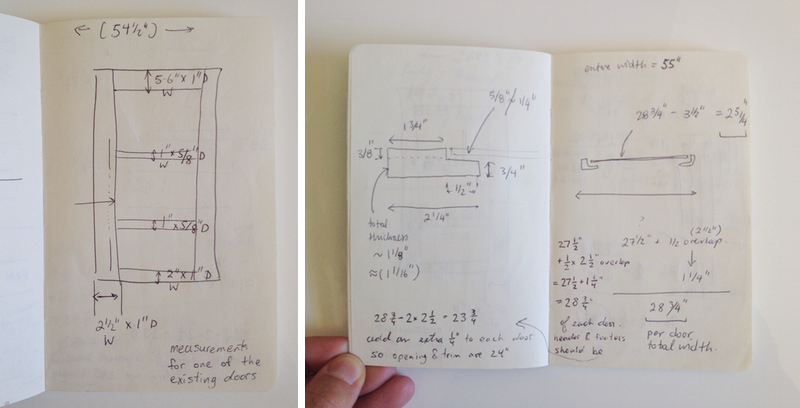
The main challenge was to use materials similar to the original doors, but also to keep the weight as low as possible, given our use of modern track hardware.  The original doors use a rabbet cut along the inner edges of the frame, to create an inset for the panels to sit. You can see that in the above pics and in my sketch on the right.  This also keeps things from being too thick and chunky, so the doors can more easily slide past each other.

To make the rabbet, we got a dado blade to use with our table saw. There are various ways to do it  (for example, using a router) but we wanted to minimize the amount of additional equipment in our garage.  The dado blade produced perfectly good results and was super fast to use.  (It is awesome, I tell you.  If you’ve never seen one, come over.  It’s a basically a huge stack of saw blades!  So…. evil.  I love it.)

In order to mimic the original door details, I also chamfered the edges of the frames and trim.  Yes, I totally had to look that up.  I did this using a block plane (and a jig) when cutting along the wood grain, and sanding across the grain at the ends.

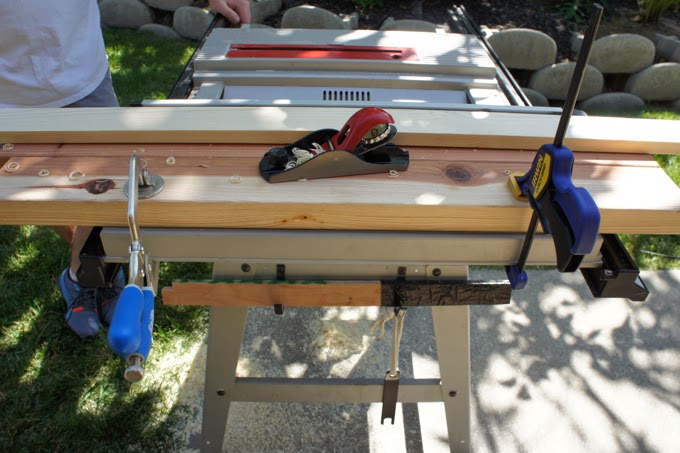
My chamfering jig!  Basically two 2x4s clamped to our table saw fence, which helped me run
the block plane along the door frame edges at the same angle each time.
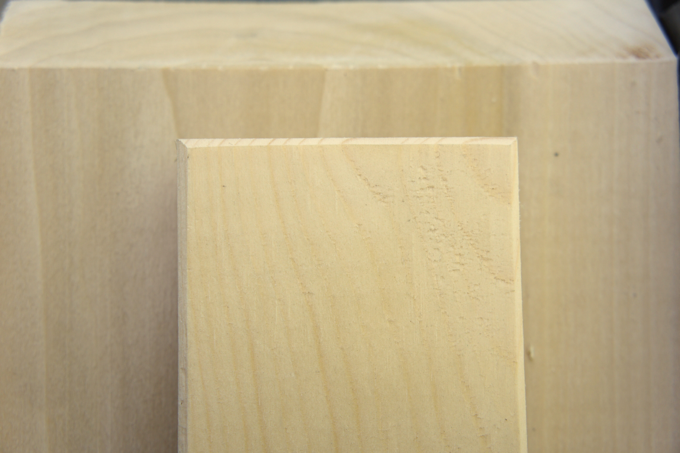
Profile of one of the door frame pieces:  chamfered edges, rabbet on the bottom right.
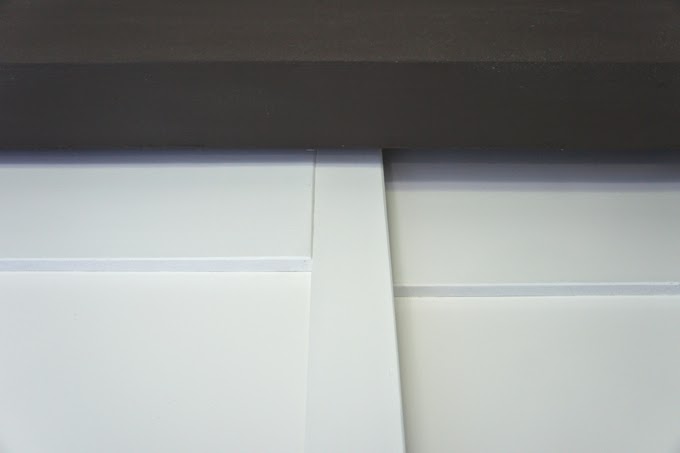
Chamfers lining up at the corners (almost).

 To build the frames, we used a pocket-hole join (created using a Kreg jig) to attach the top and bottom to the sides, like so:

Pocket joins at the top and bottom of the frame.

Here’s a long shot of the frames, so you can see how things work:

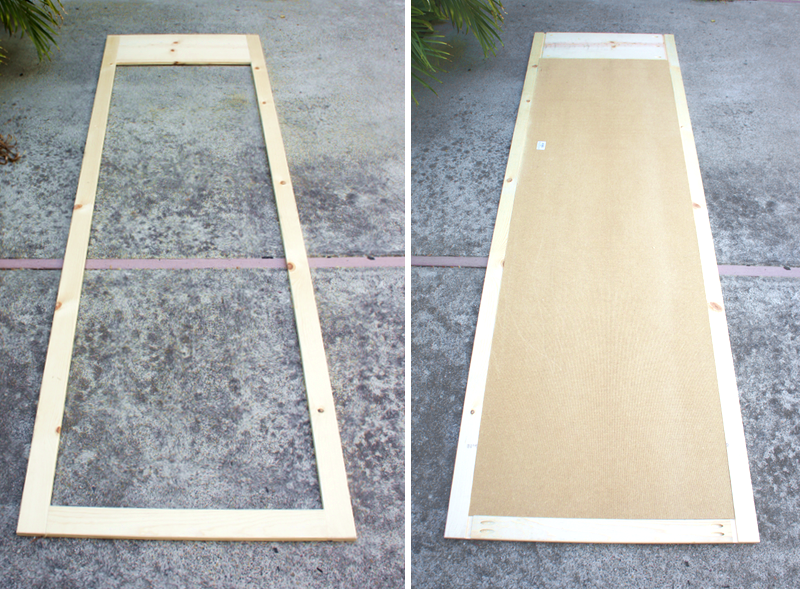
Left:  closet door frame (front side up), right: closet door frame back with masonite backing

After fitting everything together and making some adjustments, we painted the frames, masonite boards, and trim separately.  To assemble, we used heavy-duty staples to attach the masonite to the frame and the front trim to the masonite.

A few learnings along the way:

  • Lumber from big box retailers is only OK-ish for projects like this.  After getting some really crummy trim that my block plane chewed up, we discovered Southern Lumber, here in San Jose.  Their stock is fantastic both in quality and selection.  (And they will totally rip and dado and band-saw things for you!  For a small fee.  Heaven.)
  • If you can, get masonite cut to size when you buy it.  Oh my goodness.  Dealing with these giant, floppy boards was horrible.  We decided it should be fine to cut them at home.  Uh huh.  We managed to do shorter cuts with a hand saw (an experience akin to digging your way out of Alcatraz with a spoon) and longer cuts with our table saw (which was pretty much a scene taken from the “how to cut plywood with a table saw and wheelbarrow” video, except with patio chairs and an ironing board standing in for the wheelbarrow).
  • Woodworking means you will be building jigs.  Like this one, which we mimicked.  I was attempting to chamfer wood freehand (bad idea), until I discovered this.  If you want consistent results, you build a jig to eliminate as much variability in how you apply a tool to a piece of wood as possible.  This is a new concept to me:  building something to help me build something else.

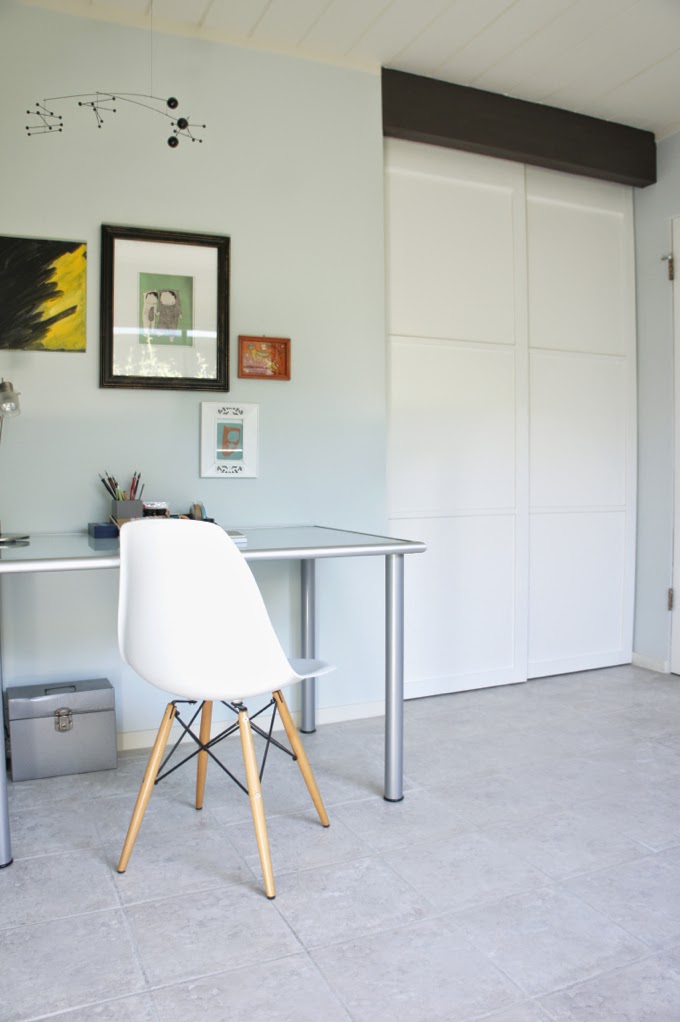
After painting the doors and putting everything together, we are really satisfied with the results.  The details I worked my butt off to replicate are almost identical to the original doors.  And the office looks a lot better now.  Hooray!

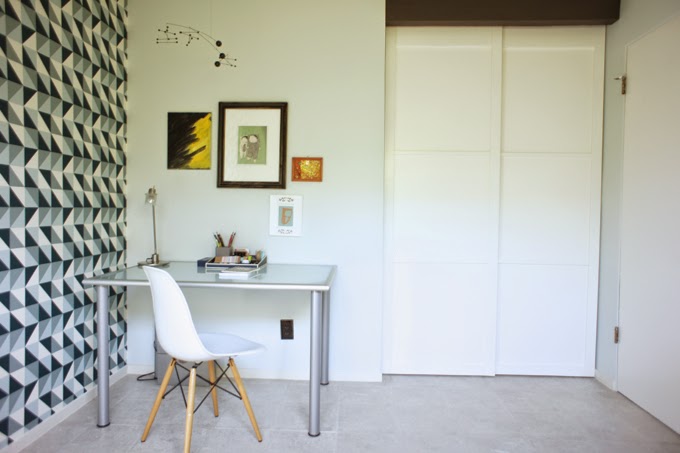
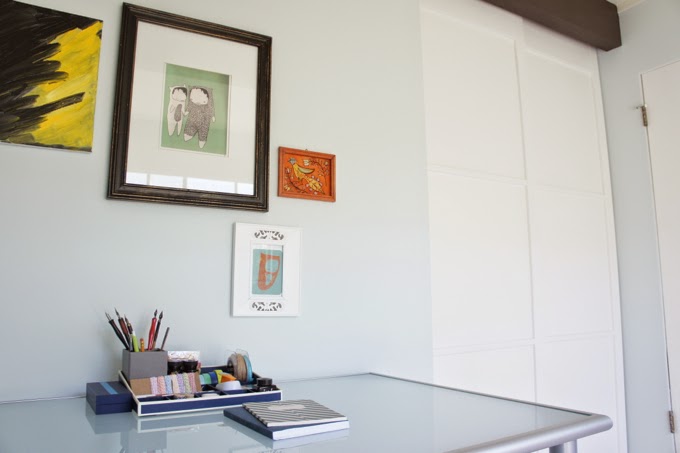
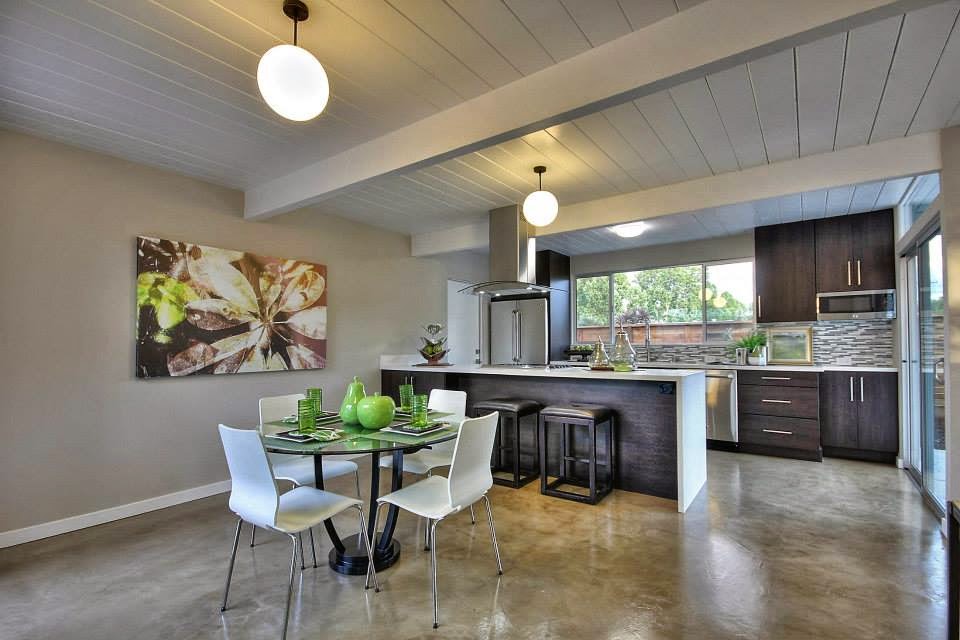
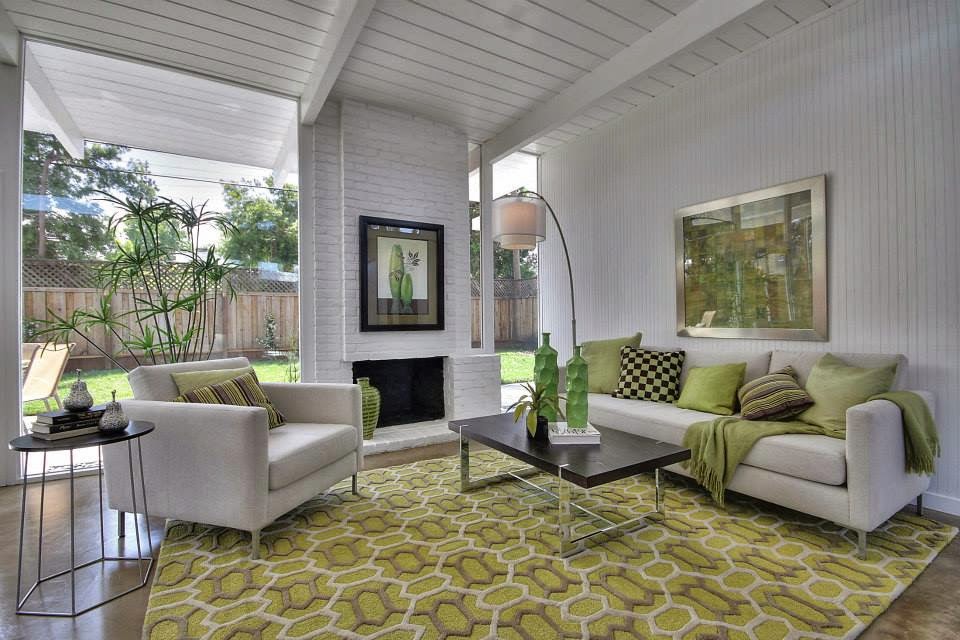
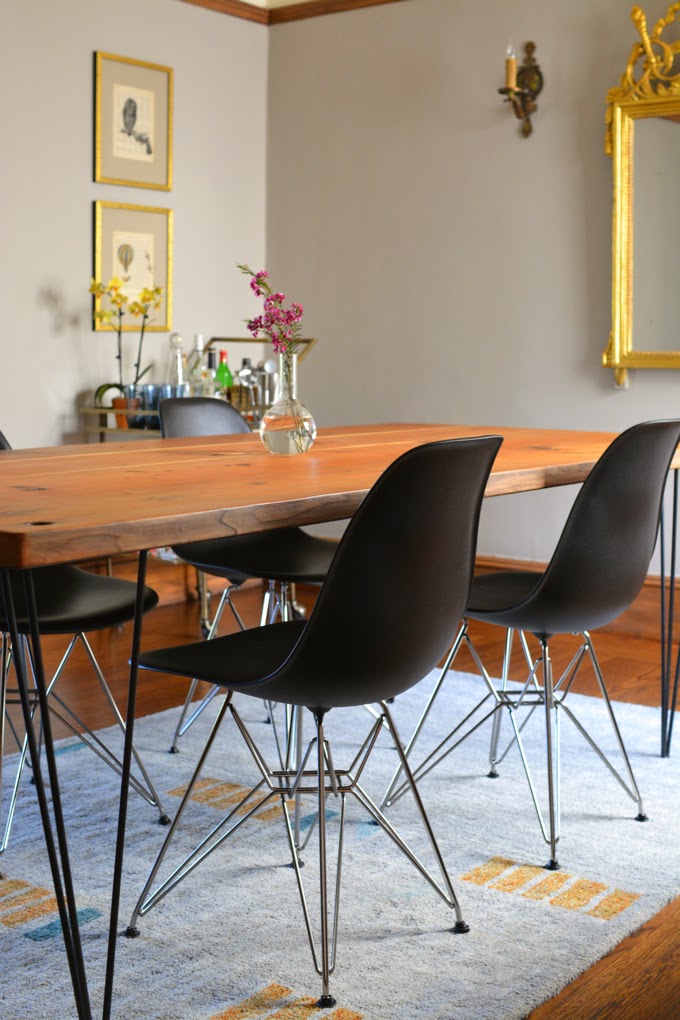
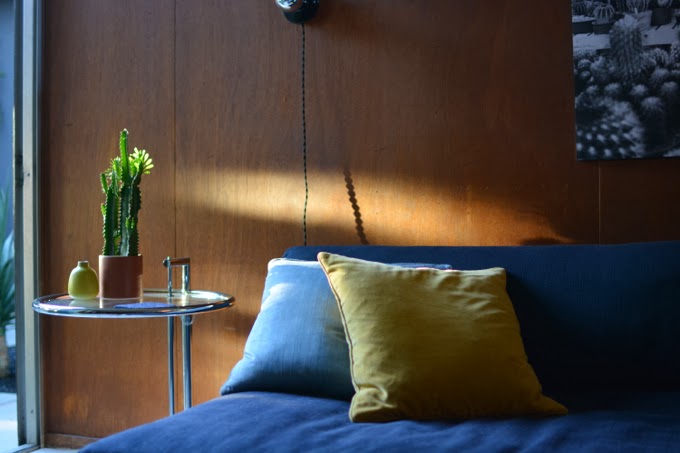
Ahhh.. a much nicer spot to work!

The closet doors are not perfect (I’m not a master with the block plane just yet, it turns out), but we love them.  And I’m happy knowing that I will leave a little bit of my own handiwork with this house for its next people.

Would we do it again?  Probably not, but it was a LOT of fun.  The whole project took us just over a week of work, due to the fact that we had to learn how to do just about everything as we went along.  The materials, to recap:

  • 2 sheets of masonite ($10 a piece)
  • 5 pieces of 6ft 3×1″ pine boards ($6 each maybe?)
  • 2 pieces of 2ft 12×1″ pine board ($14)
  • 4 pieces of 2ft 1×1/2″ clear pine trim ($8)
  • closet door hardware ($14)
  • Zinsser BIN shellac-based primer ($14, it covers knotty pine like a dream, but might kill you with its vapours — I actually wore a respirator mask when working with it)
  • semi-gloss latex paint ($30)

Total cost is about $150 (without the equipment I bought).  Not exactly pocket change, but I’m guessing a lot cheaper than having them custom-made by a carpenter.

Has anyone out there built something similar?  I’d love to hear about your experiences and any recommendations for improving the process – let me know in the comments or drop me a line!

(This is in no way a sponsored post.)

All photos by Karolina Buchner

eichler

the jungle house

June 6, 2014

Hi friends!  I’m not quite done sharing all of my travel finds, but there’s been an interesting Eichler-related development in our neighbourhood which I’ve been waiting to tell you about.  It just reached a big milestone.  Hope you enjoy!

Those of you who follow me on Instagram will remember some excitement a couple of months back: one of the homes near ours was apparently sold and getting fixed up in a HUGE way.  This was the house we dubbed the Jungle House.  Why, you ask?

(The house as seen from Google Streetview)

The original owner was no longer able to keep up the property and moved to a retirement home.  Clearly the vegetation was untended for some time.  A peaked roof (more visible below) was installed over the original flat top, apparently the best solution back in the 1980s when the original roof started to leak, and likely saved the structure from a lot of damage.  There was a lot of work to be done here when the house was bought by an LLC as a flip.

Watching the transformation has been really neat.  We’re happy to see this house brought back to its former glory and not replaced by a McMansion, which is definitely a trend here in San Jose.

A few pictures I snapped during the process and now:

Sadly, I just missed the open house by a week and couldn’t do my usual neighbourly snooping, due to my trip to Europe (boo hoo, I know).  Luckily the realtor Joey Portale has plenty of glamour shots so we can all get a peek inside.

It’s interesting to see the finishes they chose in here, like the stained concrete floors.  I’m partial to raw polished concrete myself, so I wish I had the chance to see this in person.

The full set of glamour shots is here and construction was done by Ranch Homes Construction.

With the flip complete, the property was sold again while we were away.  All we need now is for our new neighbours to arrive and this place will truly come back to life.  Neighbours who won’t need to resort to the use of machetes in order to reach the house.  Jungle, no more!

This is not a sponsored post.

All photos by Karolina Buchner
Except Google Streetview images and listing photos via Joey Portale Real Estate

shopping travel

london shopping: twentytwentyone

June 4, 2014

Hello!  Going through my photos and notes brings me to my next shopping stop in London:  Upper Street, which is the high street of the Islington neighbourhood.  We walked it all the way from the Highbury and Islington tube stop to Angel station.  It starts out in a slightly rough but quiet area, increasing in poshness as you go south, and ending in a busy retail shopping area.  Along the way, I popped into a number of truly fantastic shops (including Folklore and the shop of Abigail Ahern) but twentytwentyone felt like most like home.  Of course, my house is nowhere near as stylishly curated as this shop, but the simple modern designs within felt like they could very easily come back home with me.

I’m always excited to find a new source for a reproduction of a midcentury Poul Cadovius shelving unit.  Sure, the original pieces are out there if you have the patience to hunt, but sometimes, I want something pristine, configured to my specific needs, and guaranteed to be functional.  I was floored to realize that this is actually a reissue of the original design!  Pictured here in the background:

The tea set is totally cute too.  I can picture it in an Eichler kitchen.  And you know how much I love tea.

Speaking of cute, I loved these little guys:

Also for that Eichler kitchen, these funky terracotta pots and baking dishes.  Perfect for making a traditional midcentury casserole for dinner.  Or perhaps something tastier.

For our bedroom (from which the shag rug has sadly been retired), I am quite smitten with this kilim rug.  I love the colour palette.  It’s more Scandinavian and subdued than traditional Turkish kilims, which tend toward browns, reds, and oranges.

So bright for London, right?  I loved this place.

I was quite happy to find that you can shop twentytwentyone online plus they ship outside the UK.  Lucky us!  So, the above cross-legged table and chairs, Cadovius shelving unit, colourful tea service, adorable turned wooden birds, clay cookware, and nordic kilim rug are all within reach.

And if you’re in London, you can find them here:

twentytwentyone
274/275 Upper Street
London N1 2UA

Happy shopping!

This is not a sponsored post.

All photos by Karolina Buchner.

shopping travel

london shopping: liberty london

May 28, 2014

 
If you ask Dave, I’m a bad tourist.  I’m hard to get out in the mornings for any sight seeing and I’d most happily spend my vacations sitting in cafes, people watching, and generally avoiding the tourist trail.  For this reason, I have never been to Harrod’s in London.  Nonetheless, I was tempted into the old fashioned London department store experience by way of Liberty London.  Housed in an enormous Tudor style building, it’s pretty hard to resist.  I caved.

Liberty is known for their floral fabrics.  You’ve probably seen their shirts in collaborations with places like J Crew.  Florals: definitely not my area.  So after getting an eyeful of scarves and shirts (OK, they are quite pretty), I headed for the furniture and lighting section, which featured a rich mix of modern and antique pieces, perfect for filling up that hypothetical London flat.

Despite my affinity for the sleek midcentury look, I adore the idea of a cozy library, filled with bohemian textiles, old books, quirky lighting, antiques, and art.  One of the houses near where we rented a flat had a library which we could spy in the evenings as we returned home.  It had tall shelves filled with books, walls hung with paintings, and it cast a cozy glow as we passed it in the street below.  These little moments from Liberty remind me of that house and fill me with London-envy:

Their rug section was probably the best part:  stacks upon stacks of Turkish kilim rugs.  I find I’m liking the more subdued palettes more for these, and they had a nice selection of them.  Even if I didn’t have an extra suitcase to stuff one in, it was great to browse and get inspired.
I’ll be posting more of my London finds next week!  Stay tuned.
All photos by Karolina Buchner
travel

london: drink, shop & do

May 20, 2014

 
Hello friends! It’s been a while! Happily for you, I’m currently on a two month sabbatical from work and intend to use it to blog up a whole bunch of things around here, both Eichler-related and otherwise. I’m traveling for the first four weeks, so I’ll kick this off with a few finds from London where David and I got to spend a lovely week and a half. Things are about to get rather floral and pastel-y in here. Prepare!

Drink, Shop & Do is an adorable shop and crafting space near King’s Cross. We stopped in here for tea and cake one afternoon to take a break from the London crowds.

I think if I lived in this city I’d be guilty of secretly hanging out here all the time. In addition to crafty activities AND tea (my idea of heaven, right there), they host a variety of dance classes and social events. I saw posters for reggae night, a list-making night, and a ‘speed listening’ event for singles. Listening to peoples’ personal music players as a way to meet new friends sounds like great fun. And list-making as a social activity might be a bit scary but in a totally good way, right? You know who you are, fellow compulsive list-makers.

The main space houses a café and bar, with bright white walls and the most perfectly twee décor. A giant pink airplane, glittery fish, and colourful beach balls hang from the ceiling. The tables and chairs are midcentury atomic diner style.  I’m talking formica tops and vinyl upholstered seats.  Tea is served in mismatched vintage teacups.  I could have spent a very, very long time there.

You too can be this happy.  Matching your shirt to the decor is highly recommended, but not required.

Check it out if you’re in London:

Drink, Shop & Do
9 Caledonia Road
London N1 9DX

This is not a sponsored post.

interiors projects

design gig: dining room in the mission

April 23, 2014

 
I’m very excited to share another peek at my client project with you! We’ve just finished the dining room of their lovely 1920s home, located in the Mission district of San Francisco.

This dining room had some great pieces to start with, but needed some polish.  I’ve omitted the before shot this time, but the Eames chairs, the art, the rug, and the amazing raw wood table are all theirs. These folks have a great sense of style, which is one of the many reasons I love working with them. And getting to explore their gorgeous neighbourhood is definitely a bonus.

When we started this part of the project, they had some pretty specific requirements for me to go after, which included finding the perfect antique mirror for the space. I’m thrilled with the mirror: it’s authentic (circa 1900), totally them, and a real conversation piece to boot.

Glorious, isn’t it?  This mirror may be my favourite purchase for this project so far. I love how it works with the modern table and chairs.

Sources:  Mirror via Inessa Stewart’s Antiques, Alyson Fox rug (a past collaboration with West Elm), 
Eames chairs via DWR, Florence flask from the homeowner’s collection

On the same wall as the mirror, a hefty black bar cabinet was replaced by this very sweet bar cart. The mirrored shelves and delicate lines give this cart a refined look. We originally missed out on this same cart in a true gold finish, but I feel like the subdued brass keeps things from looking too over-the-top. (And stay tuned – I’ll be sharing all of my other bar cart picks in an upcoming post, for they are plentiful.  My secret pinboards are brimming with them.)

Sources:  bar cart from One King’s Lane, DwellStudio crosshatch decanter, blue Libbey tumblers thrifted, 
owl and balloon prints via The Curious Printery in West Elm gallery frames

A new buffet is now below the large abstract art piece, styled up with a mirrored tray which echoes the bar cart’s shelves. Repetition is a great tool for unifying your space.  As is restricting your colour palette (one of my great learnings from AB Chao).   I tried to be very intentional about these elements in this space, while incorporating my clients’ pieces, like the bright orange pitcher on the bar cart, and still having a bit of fun.

To style the buffet, I ended up using just one lamp instead of a pair.  I am pretty sure this is breaking some sort of sacred design rule.  But what fun are rules if you can’t bend them a bit?  The lamp is balanced by the owl sculpture, so it works quite well to my eye.  The mirrored tray keeps things corralled and organized. Trays are a great styling tool if you have a collection of objects to display.

And there are those blue midcentury tumblers again. Repetition, yo. It works.

Sources:  Jonathan Adler owl sculpture, Tom Dixon Etch candleholder
mirror tray from West Elm, blue tumblers via Etsy, Crate & Barrel Tino decanter
tiny gold bowl from Skultuna, Greek Key lamp by Jonathan Adler for JC Penney, 
Dumont buffet from West Elm

And that’s all for now.  We still have a few more rooms to tackle in this project, which I’m looking forward to.  I hope you’re enjoying this as much as I am, because there’s more to come!

All photos by Karolina Buchner

geeking out

geeking out: paper replicas of warsaw buildings

April 18, 2014

While catching up on one of my favourite design blogs, Freshome, I spotted these amazing little paper replicas of buildings from my birthplace of Warsaw, Poland.  They are created by graphic design firm Zupagrafika.  A bit of a departure from what I post here normally, but these feel very personal and their design is spot-on.

Check them out:

The details are perfect:  the tiny satellite dishes attached to the building exteriors and the graffiti on top of smog-darkened concrete.

For me, they evoke many not-so-distant memories of walking through these often not-so-pretty parts of Warsaw.  This city has seen a lot.  For those not familiar:  in World War II, Warsaw, including its very charming Old Town, was completely reduced to rubble.  The Old Town was rebuilt and new housing developments sprung up in the 1950s and 1960s.  One of those is ‘Za Żelazną Bramą’, which translates to ‘Behind the Iron Gate’.  Its style is influenced by Le Corbusier’s brand of brutalist modernism.  Which means LOTS of concrete.

Indeed many Varsovians consider these buildings to be a blight.  They may not be pretty, but they have their own stories to tell.  The PKO Rotunda building was the site of a natural gas explosion in the 1970s which is remembered by many in the city.  Kieślowski’s ‘Dekalog’ was set in and revolves around the lives of an array of characters residing in one of the housing complexes.  Now I’m feeling nostalgic.  Strange yet familiar times.  I love that Zupagraphika has decided to take these iconic buildings and honour them in some way.

You can purchase these paper cutouts through Zupagrafika.  And (bonus!) I’ll soon be in Poland hunting for these in Warsaw:  cutouts and buildings alike.

(This is in no way a sponsored post.)

Images via Freshome and Zupagrafika

eichler hobby room house tour

our hobby room: a few updates

April 14, 2014

‘huntington’ print by laure joliet / late afternoon light / 1960s chrome eyeball floor lamp

Our hobby room is the one room in our house which has all of its original paneling.  The mahogany makes it the perfect cozy lounging room.  I’ve been adding things here and there (like the sconces we made a while back), but have yet to sort out the musical instruments and random video game system components.

In the meantime, I am loving this chrome lamp we got back in February.  We drove it all the way up to San Jose from Palm Springs, in the back seat of my car.

The Laure Joliet print which reminds me of the fantastic cactarium in PS.  I recently incorporated one of her photographs in my client’s home.  There is a certain sense of quiet about her images even though they have quite a lot going on in terms of texture.  I enjoy them immensely.

And, my new favourite things:  more ceramics.  That look like space aliens.

The blue vase is 1970s Italian (half-price score from Monument in San Francisco); the tall green is Jonathan Adler (last season, but I’ll call it ‘vintage’); the little green bud vase is Heath.  They have a certain late sixties feel which I quite like for our laid-back lounge room.  Like a lava lamp, but a heck of a lot more classy.  Yes.

friends interiors

baby shower

March 27, 2014

 
Well, hello!  It’s been a while since I’ve updated here, and I thought I’d share a bit of what’s been going on at our house.  Lots of happy stuff actually:  I threw a baby shower for my dear friends who are expecting a baby boy in May.  I am so very excited for them.  I love dressing up our place for parties, and managed to snap some pictures before and after so you can have a peek at the fun too.

The decorations were largely inspired by Emily Henderson’s triangle-themed baby shower, though I didn’t go all out with the triangles.  I did make garlands to dress up the living room and atrium.  They are super easy:  just cut out shapes from card stock and feed them through your sewing machine.

To add more colour, our dining room wall got the giant confetti treatment (you can check out the tutorial here) and I scattered (normal-sized) confetti on every surface I encountered while setting up.  Even the dog got some festooning.  I picked jasmine from our yard, and added wax flowers, daffodils, and ranunculus in vintage jars on the table.

We had some gorgeous weather for the party, so I set up an outdoor seating area for our guests to enjoy our atrium and its very wild living wall.  (I love how crazy this thing has gotten.)

The best part of course was catching up with the awesome parents-to-be and everyone who came to celebrate.  We played games (some serious baby-knowledge-testing trivia), collectively crafted up a yarn pom-pom garland for the baby’s nursery, and ate lots of good food.  I got to reprise my Polish rice with plums and made these great ricotta crostini with an assortment of toppings.

The pom pom making was a hit even with the guys (it was a mixed shower).  Even all those little yarn bits were quite pretty and made me a bit sad to clean up.  I really enjoyed the combination of teal, cobalt, and yellow on my coffee table.


I hope this inspires you to embrace spring and colours that come with it.  Even if it’s still freezing where you are.  Or gloomy and wet like it was here today.  I have a feeling it will be summer before we know it.

All photos by Karolina Buchner

eichler landscaping

springtime in the atrium

February 24, 2014

We’ve been getting ready for spring to start by tidying here and there.  I picked up the camera this weekend just to capture a few of these moments.

Our atrium is the nicest place to hang out in for now.  The living wall is doing great, with a few small replacements needed:  the stonecrop, of all things, died.  The agaves, ferns, and even the bromeliads are doing just fine.

The rest of the garden is a bit of a mess.  Lots of frost-bitten dead plants still hanging around.  The angel trumpets have been freshly massacred by our gardener.  And our fence is looking less and less vertical with each passing day.

I’m holding out with the backyard because I’m currently in the process of finding a landscape architect to work with.  Landscaping:  definitely not my area.  I have been collecting plenty of ideas, but no clue how to put them together.  Any recommendations for people to work with, please send them my way!