
It’s been a bit quiet around here, since we’ve had a tough couple of weeks, sad and frustrating at the same time. I’ve been coping by working on the house, tuning things up here and there, aggressively painting at times, and purging junk. And after a nice weekend visiting with friends, my mind and heart are feeling much more settled now as compared to last week.
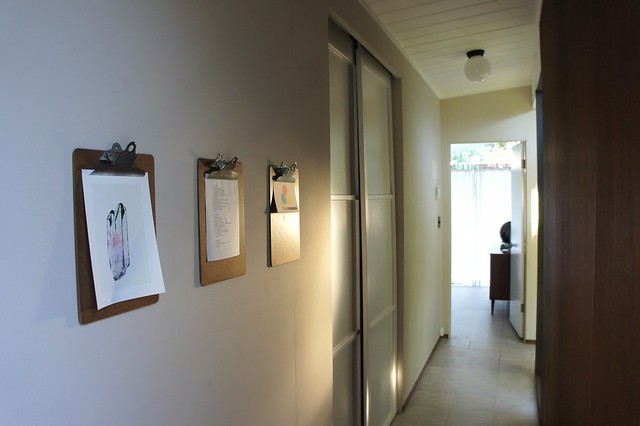
So: closet doors! (The unofficial, never-ending theme of this blog.)
As part of having our house painted, all of our original closet doors got a fresh coat of paint … along with their original slider hardware (oops). The painted sliders were sticking in their wooden tracks, making the doors nearly impossible to slide. The wooden track-and-slider combo is an original Eichler feature and, sadly, one that is not terribly durable. After a few weeks of frustration, we decided to make things right.
Here’s how it went down, in case you’d like to re-do your doors, while keeping them as intact and original as possible:
Step 1: Take down doors and rip out the old wooden tracks. It’s cathartic. Even if you only make it past this step, you will feel a lot better about your house and yourself. However, you will have no closet doors at this point, so you’ll have to soldier on.
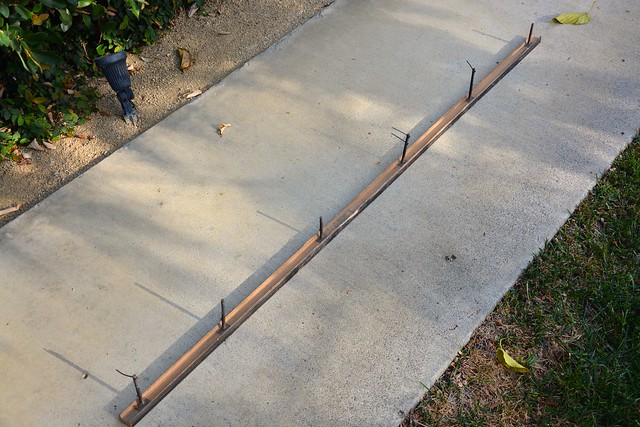
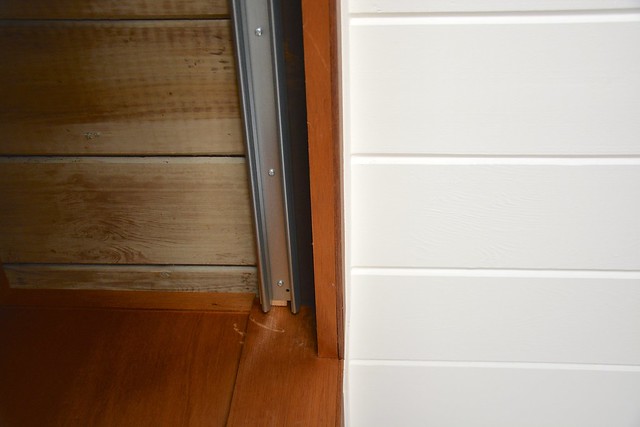
Let’s take a moment to appreciate the scary wooden tracks. Held in place with a combination of screws with nails driven through them (?!?), they wore out very unevenly over their 50+ years of service. We had the doors jumping out of their tracks on a regular basis. Not-so-fun times.
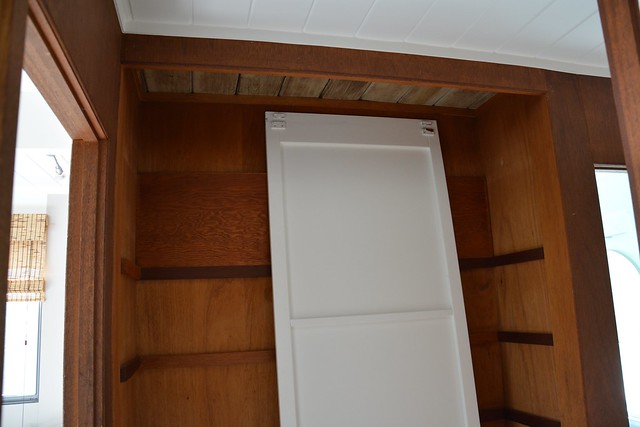
Step 2: Build out the area from which to hang the new track with extra lumber.
We put an additional 1 1/2″ x 1 3/4″ (or so) board up alongside the existing black frame from which the tracks were suspended. With the new lumber (the light stuff) we had about 3″ in depth, enough to install the metal track and have it set back from the fascia of the closet. Set-back from the fascia really helps when hanging the doors later on since you have to put them in on an angle.
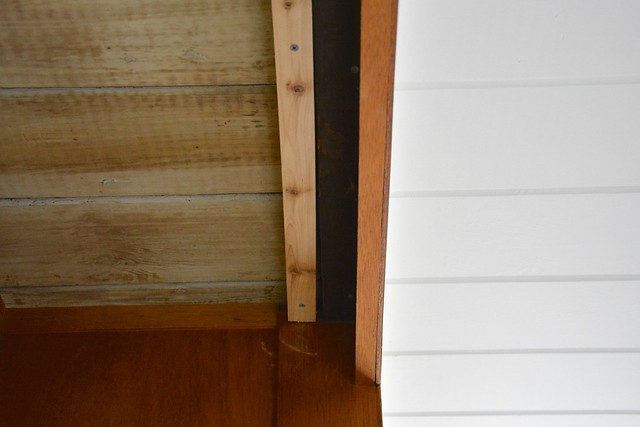
Step 3: Install the metal track. Pilot holes and screws.
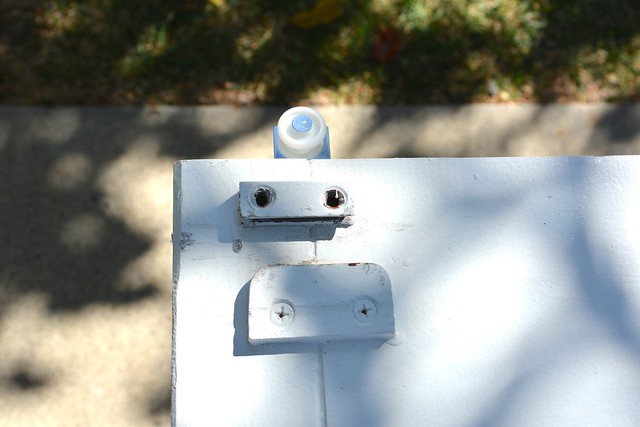
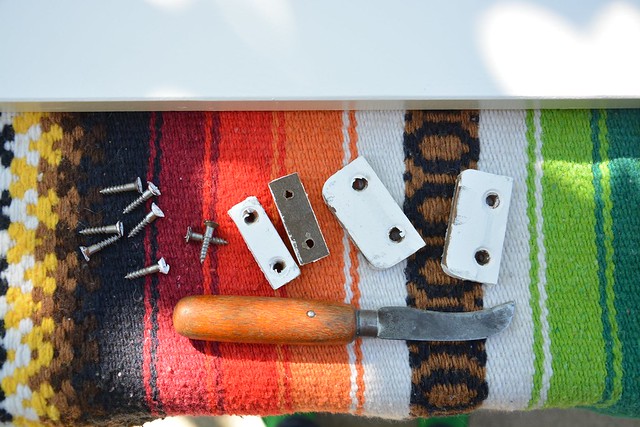
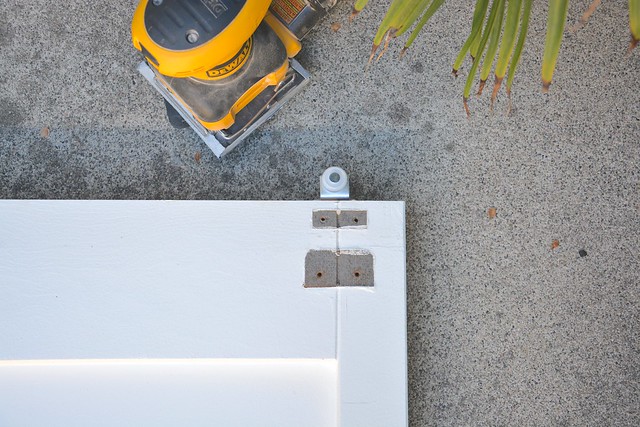
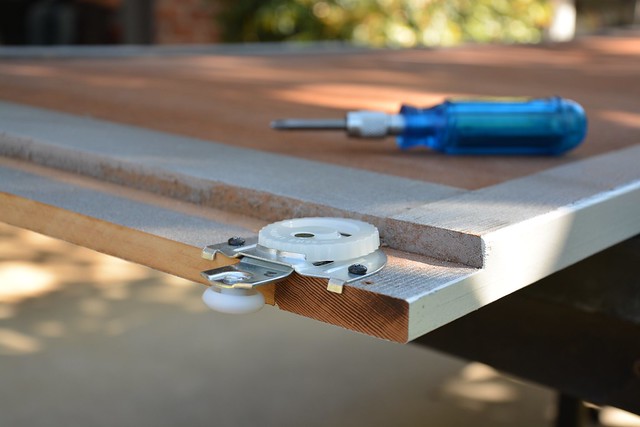
Step 4: Pop off the old sliding hardware and bumpers from the doors. Sand, patch, sand, paint. We did this both for aesthetic and functional reasons, to prevent the bumpers from scraping against the doors after hanging (as we discovered later).
Step 4: Measure the doors and opening AT LEAST 10 TIMES. We took about 3/4″ off each door: 3/16″ at the top, and 5/8″ at the bottom. I know that doesn’t add up, but when things get precise like this, I revert back to my native metric, so: we actually took 0.5 cm off the top, 1.5 cm off the bottom.
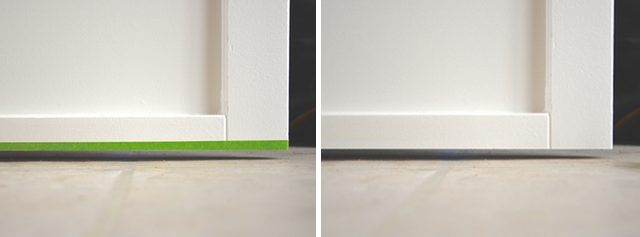
Step 5: Trim the doors. We used a circular saw. I recommend this video for tips on how to get nice precise cuts. We specifically made sure not to take off too much from the top, so our new roller hardware could fit into the original groove at the top of each door.
By the way, the best advice from that video: use painter’s tape when cutting surfaces that are already painted. We did this and it really kept the cuts smooth and clean:
Steps 6-7: Attach the rollers to the doors, and hang.
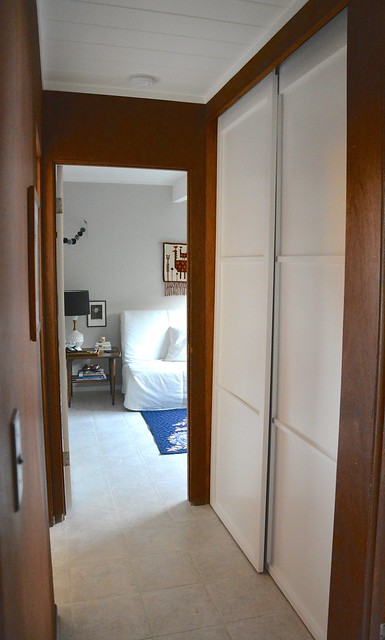
After all this time, having closet doors that actually move is a small miracle in our house. It’s so amazing to have them just glide with minimum effort.
Anyway, hope this was useful to some of you! I’ll be back with prettier things soon.


4 Comments
Just reading this…genius!! Love the step by step explanation, makes it seem very doable – I’m totally adding this to my (looong) list of projects.
I may have to invite myself over sometime to admire the doors and drool over that amazing living wall in your atrium;)
Karolina, Hero. I cannot wait to do this for our closet doors. It has been a jangly, creaky loud mess in our house. It would be a miracle if this would work on our doors! Thanks for the step by step instructions and beautiful visuals!
I’m sure you can do it, Aislin! This was definitely one of those invisible upgrades that has made our lives so, so much better. Not more wrestling with doors to get them open. We had one door where we had to build out the area for mounting the rail in a slightly hacky way, but it’s working just fine– I’d be happy to show you in person sometime.
[…] to fabricate and seemed to be used everywhere. (If this sounds familiar, you can read also about how we updated our closet doors to use modern metal […]