
dear house,
i love your beams.
i really, really do.
xo
karolina
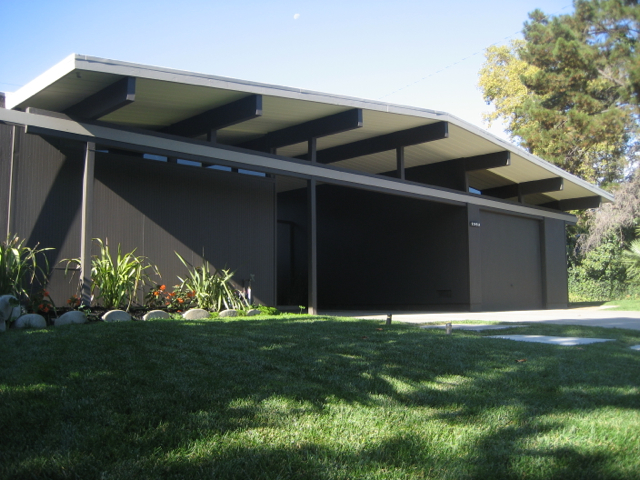
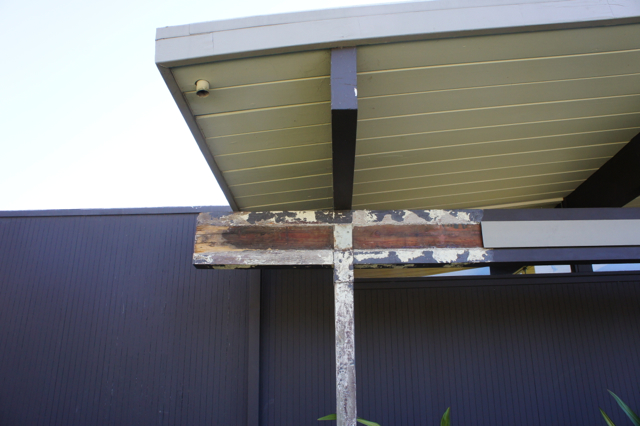
This weekend, Dave and I embarked on the first serious repair work we’ve ever attempted on the house: fixing a beam affected by dry rot.
Brace yourselves.
BUT since the beam rot doesn’t affect anything structural (it stops about a foot shy of that post, which, yes, is holding up our roof) we’ve decided to have a try at repairing this ourselves.
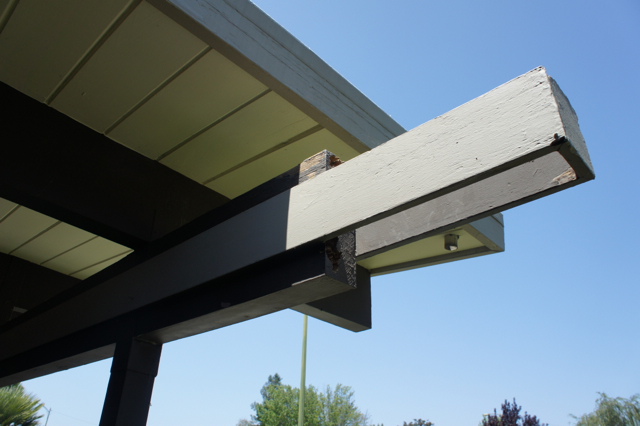
- Remove the decorative outer trim (the beige stripe) surrounding the beam.
- Strip the paint from the beam (and heck, why not strip the post supporting the beam while we’re at it!)
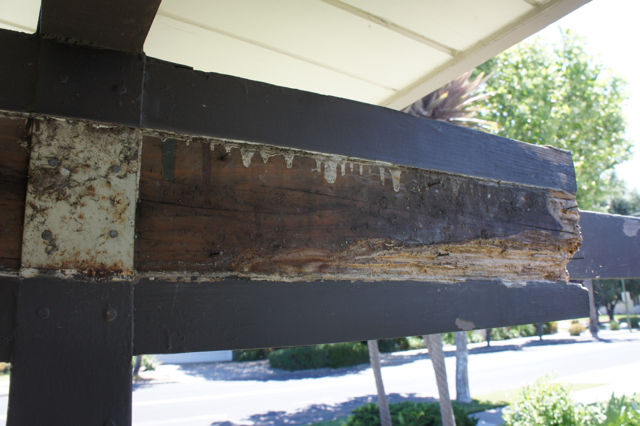
- Chip out as much of the dry rot as possible from the beam, until only stable wood remains.
- Treat the wood with wood hardener or ‘consolidant’ as the pros call it. (We’re using Minwax Wood Hardener.)
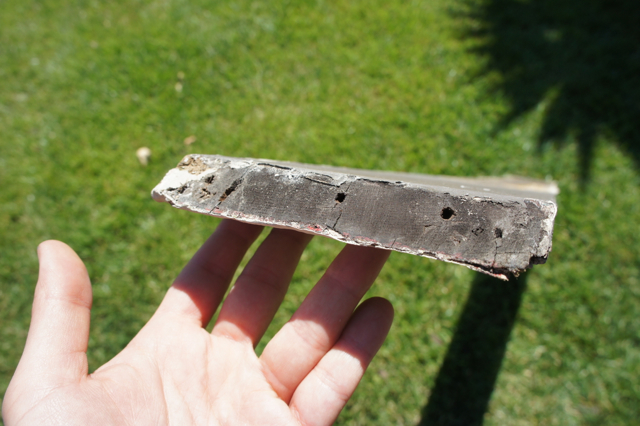
- Patch the beam with epoxy filler. (We’re using Bondo, which you can get at car repair shops and some hardware stores.)
- Sand the beam back to its usual profile.
- Re-apply the trim, caulk, prime, and paint!
Before starting the work, we had a chat with a local contractor to make sure our plan wasn’t completely crazy and, of course, consulted the internet and watched endless minutes of fix-it shows and demonstrations of this and that wood repair wonder product, wherein I may have developed a soft spot for this man.
All of the 45 degree joint edges were charred black! I wonder if this was a common practice in Eichler construction, or if it may have been particular to the builders who worked on our house. Oh, I do love me some good house archaeology. The intrigue!
2 Comments
nice post
This comment has been removed by a blog administrator.